Introduction
Making a candle at home can be a fun and rewarding craft activity. Not only is it satisfying to create something with your own hands, but you can make something useful while also having complete control over the colors, scents, and shapes of the finished product. Whether you’re looking for a stress-relieving hobby or a unique personalized gift for friends and family, homemade candles are perfect. In order to get started on making your own candle, here is an overview of what’s needed.
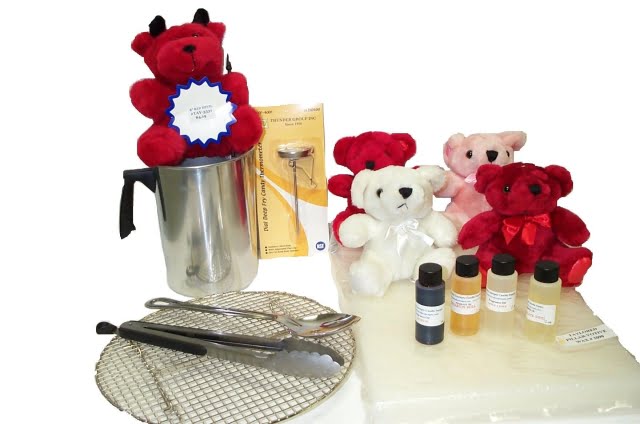
Materials: Candle-making requires a few different items that are relatively easy to find in any local craft store or online. You will need some wax (either beeswax or paraffin wax is best), wicks, fragrant oils for scent (optional), dye for color (again optional), double boiler/melting pot combination and molds for shapes or containers to hold the molten wax.
Instructions: After gathering all your supplies, start by melting your wax in the double boiler/melting pot combination. It’s important that you keep temperatures low so as not to risk combustion – once melted add dyes and fragrances as desired. Once the wax has cooled enough to pour into molds or containers attach wick first with wooden skewers if needed then top off with warm liquid wax – after about 15 minutes press down gently one last time on any bubbles formed on surface wait until completely cool before removing from mold or container.
Finally: When finished simply cut the wick to size (1/4 inch above top of candle)light up and enjoy!
Prepare the Work Area & Supplies You’ll Need
Before you get started, it’s important to make sure you have all of the supplies you need in one spot. Depending on the type of candle you’re making, typical ingredients include wax, wicks and dyes or scents. A few other tools that are often necessary include a double boiler (or saucepan and a heat-safe bowl), a thermometer, and some type of container for the candle (mason jars work well). A surface protector like an old towel can help keep your work area free from wax splashes. Lastly, have paper towels and safety accessories like heat-resistant gloves and eyewear nearby in case something unexpected happens or overheats.
Different Types of Wax to Choose From
When making a candle at home, there are a wide variety of waxes from which to choose. Paraffin wax is the most traditional and affordable option, but it is not the most environmentally friendly because it comes from petroleum based products. Soy wax is becoming increasingly popular because it’s made of renewable resources, is biodegradable, and holds colorants and fragrances better than paraffin. Beeswax candles are also an excellent choice since they burn longer, don’t contain chemicals or additives, and have a pleasant honey aroma that lingers in the air. Coconut wax candles are known for their superior scent throw, while palm wax has a pure white color when combined with dye and can produce intricate patterns when layered correctly. Rapeseed oil is another option that offers all-natural appeal, although it requires heating before being used as candle wax due to its oily consistency. Finally, there are newer wax types such as bio-based and vegan options available for those interested in more sustainable candles.
Melting, Pouring & Adding the Wick
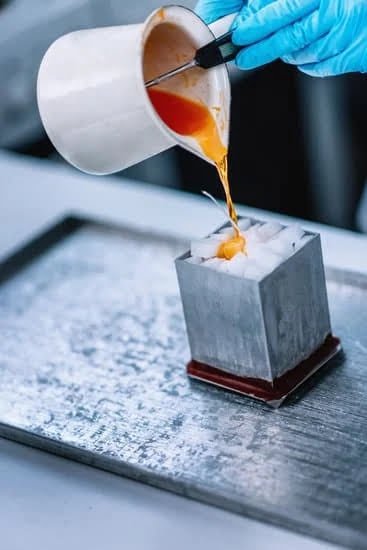
Making your own candles at home can be a fun and creative way to add a special touch to your home décor. The first step in the process is to melt the wax that you have chosen to use. Usually, wax flakes, found at most craft stores, are melted in a double-boiler setup on the stove. Once all of the wax has melted, it’s time to pour! You’ll need either a heatproof container or pour pot with a pouring spout and a funnel if necessary. Place your wick into the bottom of whatever vessel you’re using, making sure that there aren’t any air bubbles trapped underneath it before pouring. As you pour make sure that you pour slowly, ensuring no air bubbles form. Allow the wax to cool for about an hour before adding additional scents or colors if desired. Gently move the wick back and forth until it sticks straight up before allowing it to cure for 24 hours before lighting. Enjoy your new candle!
Adding Aroma, Color & Decoration to Personalize
Making a candle at home can be a fun DIY activity. To personalize it, you can add aroma, color, and decorations to the candle. Depending on what type of wax you choose to use – such as paraffin or beeswax – you may need to purchase special fragrances or essential oils specifically for candles. These scents come in various strengths and combinations so that you can create a unique aroma for your homemade candle. You can also buy liquid wax dyes and/or crayons to add color to your candle or create separate layers for a marbled look. To decorate, try adding ribbon, glitter, foliage or images that correspond with special occasions or seasons. Once all these elements are added, the wick needs to be securely attached before pouring in the hot wax. Allow enough time for the wax to harden fully before using the candle. Enjoy your beautifully crafted homemade candle!
Finishing Touches & Curing the Candle
Once the candle has been poured and cooled, it’s time to apply some finishing touches. To give the wick a sharp, even look, you can trim off the top of the wick with a pair of scissors or a wick trimmer. If there are any air bubbles on the surface of your candle that weren’t level out while pouring you can use a toothpick to pop them and create an even finish. If desired, you can also dress up your homemade candles with unique decorations such as ribbon, glitter, or fresh flowers.
It is important to cure your candle for two or three days before lighting them for optimal performance and burn quality. During curing, you should store the candles away from direct sunlight in cool temperature and low humidity environments. This will help ensure that all of the ingredients are binding properly for an even burn and longer lasting smell upon lighting. After curing your homemade candles will be ready for burning!
Displaying Your Creation & Enjoying the Results
Once you have finished making your candle at home, you can take time to display your beautiful creation. Showcase your art and all the hard work you put into it, on a coffee table or a shelf. Light the candle and appreciate its beauty in its glow – the flickering light will add a touch of ambience, while the delightful aroma of natural ingredients like beeswax and essential oils will comfort you with a warm and cozy feeling. Make sure that safety is taken into consideration when burning any kind of candle: keep it away from any potential fire hazards, away from drafts and other sources of ignition such as flames or heaters. For maximum enjoyment of your new homemade delight, make sure never to leave a burning candle unattended. This way, you can experience the pleasure derived from witnessing a product of your creative skill at work in all its glory!
Conclusion
Creating a candle at home can be an enjoyable and rewarding experience. Not only does it allow for an exploration of different scent combinations, but it also gives you the opportunity to make something truly unique with your own two hands. Once complete, you’ll have a beautiful and decorative item that serves as a reminder of the work you put into it. Additionally, when giving candles as gifts, being able to tell the recipient that the item was handmade increases its value exponentially. Finally, there is no better feeling than admiring your own creation and enjoying its pleasant aromas as it burns or just as a decoration in any room. Making a candle at home is not just a fun activity – it is also a great way to show creativity and ingenuity!

Welcome to my candle making blog! In this blog, I will be sharing my tips and tricks for making candles. I will also be sharing some of my favorite recipes.

