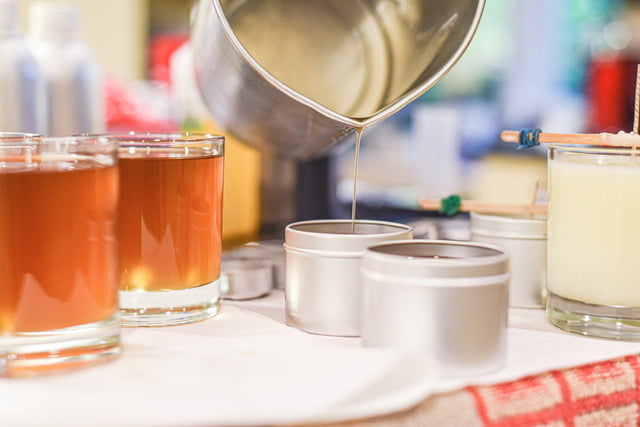
Are you looking for a creative and rewarding DIY project? Making a layered candle might just be what you’re looking for. This popular craft allows you to express your creativity while producing beautiful and unique candles. Whether you’re an experienced candle maker or a beginner, creating layered candles can be a fun and satisfying endeavor.
Layered candles are becoming increasingly popular due to their visually stunning appearance and the endless possibilities for customization. From choosing the right materials to adding decorative elements, making layered candles is a versatile art form that appeals to many DIY enthusiasts. In this article, we will explore the step-by-step process of making a layered candle, the best materials to use, and how to troubleshoot common issues that may arise during the process.
By following our guide, you’ll be able to create eye-catching candles with distinct layers, beautiful colors, and delightful scents. Whether you plan on gifting them to loved ones or keeping them for yourself, making layered candles is a fulfilling and enjoyable hobby that allows you to add a personal touch to your living space.
So let’s dive into the world of candle making and discover how you can create stunning layered candles right in the comfort of your own home.
Choosing the Right Materials for Making a Layered Candle
When it comes to making a layered candle, choosing the right materials is crucial for achieving the desired results. The type of wax used will determine the quality and appearance of the layers, while the wick, fragrance oils, and dyes will contribute to the overall aesthetic and scent of the finished candle. Here’s a closer look at each of these essential materials and how to make informed choices for your layered candle project.
Types of Wax
One of the first decisions to make when making a layered candle is choosing the appropriate type of wax. Some common options include paraffin wax, soy wax, and beeswax. Each type of wax has its own unique characteristics that can affect how the layers form and hold together.
Paraffin wax is known for its ability to hold vibrant colors and scents, while soy wax offers a natural and environmentally friendly option. Beeswax is popular for its natural honey-like aroma and clean-burning properties.
Wicks, Fragrance Oils, and Dyes
In addition to selecting the right type of wax, choosing the appropriate wicks, fragrance oils, and dyes is essential for creating a successful layered candle. The size and material of the wick will impact how evenly the layers burn and produce a consistent flame.
When it comes to fragrance oils and dyes, it’s important to choose high-quality products that are specifically designed for use in candles. This will ensure that the scents are long-lasting and that the colors remain vibrant throughout each layer.
Making Informed Choices
To make informed choices when selecting materials for making a layered candle, consider factors such as your desired candle size, burn time, scent throw, color palette, and budget. Researching different brands and experimenting with small batches can also help you determine which materials work best for your specific preferences and creative vision when making a layered candle. By carefully considering these factors, you can set yourself up for success in creating beautifully layered candles that meet your expectations.
Step-by-Step Guide to Preparing the Wax for Layering
Making a layered candle requires careful preparation of the wax, including proper melting, coloring, and scenting. Each step is essential in creating a beautifully crafted layered candle that not only looks stunning but also provides a delightful sensory experience when lit. In this section, we will walk you through the step-by-step process of preparing the wax for layering, ensuring that each layer is perfectly colored and scented.
Melting the Wax
The first step in preparing the wax for a layered candle is melting it to the appropriate temperature. Different types of wax have different melting points, so it’s important to follow the manufacturer’s instructions for safe and effective melting. Whether you’re using paraffin wax, soy wax, or beeswax, using a double boiler or a wax melting pot can help prevent scorching and ensure an even melt.
Coloring and Scenting the Wax
Once the wax is melted, it’s time to add color and fragrance. Using dye chips or liquid dye specifically made for candles, carefully add the desired amount of color to each layer of wax. It’s important to stir thoroughly to evenly distribute the color throughout the wax. Similarly, choosing high-quality fragrance oils and adding them at the recommended concentration will ensure that each layer of your candle is beautifully scented.
Layering Technique
After coloring and scenting each batch of wax, it’s time to carefully pour one layer on top of another. To create distinct layers in your candle, it’s crucial to pour each layer at just the right temperature – too hot might mix with the previous layer while too cool may not adhere properly. This step requires patience and precision to achieve crisp and well-defined layers in your final product.
By following these steps for preparing your wax for making a layered candle with care and attention to detail, you’ll be well on your way to crafting a beautiful candle that not only looks stunning but also fills any space with delightful fragrance when burned.
Layering the Wax
Techniques for Creating Distinct Layers
- Pouring Method: One popular technique for creating distinct layers in a layered candle is the pouring method. This involves pouring each layer of different colored and scented wax carefully into the container, allowing it to cool before adding the next layer.
- Freezing Method: Another technique is the freezing method, where each layer is poured and then briefly frozen before adding the next layer. This helps to create crisp, clean lines between each layer.
The Importance of Patience and Precision
Patience and precision are key when it comes to creating distinct layers in a layered candle. Rushing through this process can result in uneven layers, mixing of colors, or air bubbles within the wax. Taking your time to carefully pour and set each layer will ensure that your finished candle has sharp, defined layers that enhance its visual appeal.
It’s also important to have precise measurements when preparing each layer of wax, ensuring that they are equal in thickness and density. This level of attention to detail will result in a beautifully layered candle that is both visually striking and high quality.
By mastering these techniques and embracing patience and precision, you can create layered candles that are not only visually stunning but also showcase your skills as a talented candle maker. Experiment with different colors, scents, and textures to craft unique designs that will captivate anyone who sees or uses your candles. Keep practicing these techniques to further hone your skills and creativity in making a layered candle.
Adding Decorative Elements
- Embeds: Embeds are small, decorative items that can be added to the layers of your candle. These can include dried flowers, seashells, or even small toys for themed candles. When adding embeds, it’s important to place them strategically within the layers so they are evenly distributed and visible from all angles.
- Glitter: Adding glitter to the layers of your candle can create a beautiful, shimmering effect when the candle is lit. You can choose a fine or chunky glitter depending on the look you want to achieve. Simply sprinkle the glitter onto each layer as it starts to set, ensuring that it adheres to the wax before it completely hardens.
- Creative touches: Consider using unique containers for your layered candles, such as mason jars or vintage teacups, to add an extra element of visual appeal. You can also use decorative ribbon or twine around the outside of the container to further enhance its appearance.
By adding these decorative elements, you can take your layered candle from simple and classic to visually stunning and unique. Experiment with different combinations of embeds, glitter, and creative touches to create one-of-a-kind candles that make perfect gifts or beautiful additions to any room in your home.
Tips for Troubleshooting Common Issues
When making a layered candle, there are certain common issues that can arise during the process. One of the most common problems is the formation of air bubbles within the layers of wax.
These air bubbles can create an uneven surface and affect the overall appearance of the candle. To prevent air bubbles from forming, it is important to pour each layer of wax at the proper temperature and to let each layer cool and harden before adding the next one.
Another potential issue when making a layered candle is achieving even layers. Uneven layers can result from pouring the wax too quickly or at an incorrect temperature. To avoid this problem, it is essential to pour each layer slowly and carefully, allowing it to settle evenly before adding the next one. Using a flat surface and leveling tools can also help in creating consistently even layers.
In addition to air bubbles and uneven layers, other potential problems that may arise when making a layered candle include difficulty in adhering embeds or decorative elements, as well as issues with wick placement. Properly securing embeds and ensuring correct wick placement are crucial for both the visual appeal and functionality of the finished candle. Paying attention to these details and taking your time during each step can help prevent these common issues from occurring.
| Common Issue | Preventive Measures |
|---|---|
| Air Bubbles | Pour wax at proper temperature; allow each layer to cool before adding next |
| Uneven Layers | Pour each layer slowly and carefully; use flat surface and leveling tools |
| Adhering Embeds/Decorative Elements | Secure embeds while wax is still soft; pay attention to proper wick placement |
How to Safely and Effectively Finish the Candle
After successfully making a layered candle, it’s important to ensure that the finishing touches are done safely and effectively before presenting it for gifting or personal use. One crucial step in completing a candle is trimming the wick to the right length. The proper wick length will ensure that the candle burns evenly and cleanly. An ideal length for a wick is about 1/4 inch, which can be achieved by using wick trimmers or scissors.
Labeling the finished candle is another important aspect, especially if it’s intended as a gift or for sale. The label should include information such as the name of the candle, its scent, and any safety instructions. This not only adds a professional touch but also provides necessary information for safe use.
Packaging is also an essential part of finishing a layered candle. Whether it’s for personal use or gifting, aesthetically pleasing packaging can enhance the overall experience of receiving and using a homemade candle. This can include using decorative boxes, jars, ribbons, and other embellishments that complement the design of the candle.
| Aspect | Details |
|---|---|
| Wick Length | An ideal wick length is about 1/4 inch for even burning. |
| Labeling | The label should include name, scent, safety instructions. |
| Packaging | Aesthetically pleasing packaging enhances overall appeal. |
Inspiration for Creating Unique Layered Candle Designs
In conclusion, making a layered candle is not just a simple DIY project; it is an art form that allows for endless creative possibilities. By carefully selecting the right materials such as wax, wicks, fragrance oils, and dyes, individuals can customize their candles to fit any aesthetic or mood they desire. The step-by-step process of preparing and layering the wax requires patience and precision, but the end result is well worth the effort.
Adding decorative elements like embeds, glitter, or other creative touches can take a layered candle from beautiful to extraordinary. These small details can elevate the visual appeal of the candle and make it truly unique. Additionally, troubleshooting tips ensure that common issues like air bubbles or uneven layers are easily avoided or addressed.
Finally, finishing the candle with proper trimming of the wick and thoughtful packaging allows for safe use and makes for a perfect gift. Inspiration for creating one-of-a-kind designs lies in experimenting with different colors, scents, and textures.
This not only adds a personal touch but also provides endless opportunities to explore new combinations and styles. Ultimately, making a layered candle is a rewarding and fulfilling experience that results in beautiful home décor or thoughtful gifts for loved ones.
Frequently Asked Questions
How Do You Make Layered Candles at Home?
Making layered candles at home involves pouring layers of different colored and scented melted wax into a container, allowing each layer to cool and harden before adding the next one. This process requires patience and precision to achieve clean, distinct layers.
Can You Pour Candles in Layers?
Yes, it is possible to pour candles in layers. To create a layered candle, you need to carefully pour each melted wax layer into the container without disturbing the previous layer. It’s important to allow each layer to cool and harden before adding the next one to avoid blending the colors and scents together.
How Do You Layer Fragrance Candles?
Layering fragrance candles involves adding different scents to each layer of wax as you pour them into the container. The key is to choose complementary fragrances that won’t clash when burned simultaneously. It’s essential to pour each layer at the right temperature so that the fragrances mix evenly without overpowering each other.

Welcome to my candle making blog! In this blog, I will be sharing my tips and tricks for making candles. I will also be sharing some of my favorite recipes.

