Introduction
Making beeswax candles in jars is an easy and rewarding craft project. Not only are the finished product timeless and beautiful, but you get the added bonus of knowing that your efforts are helping to promote a healthier planet. Unlike paraffin candles which release toxic chemicals into the air when burned, beeswax candles clean up the air as they burn ” acting as natural air purifiers. Studies have also shown that beeswax candles provide a more calming atmosphere by releasing negative ions into the air which work on positively charged particles in our atmosphere. In addition to this, beeswax candles are longer lasting, require less money for materials and are easily transportable ” making them great for decorating or gifting. Finally, their distinct aroma which changes depending on the source of wax makes them a special treat for any candle enthusiast! Learning how to make beeswax candles in jars isn’t difficult either; with some basic supplies you can be ready to start crafting your own creations right away.
Gathering The Supplies Needed To Get Started
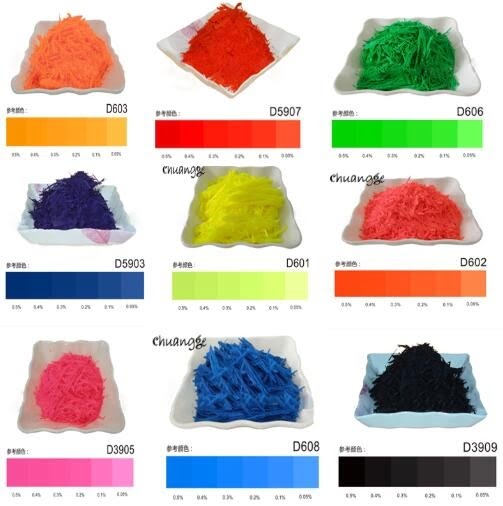
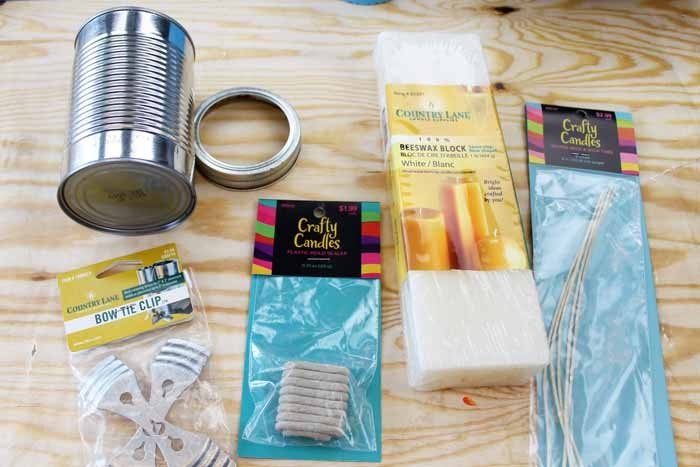
Creating beeswax candles in jars is a popular and rewarding activity. To make these beautiful candles, there are certain supplies that are necessary. First, you’ll need to gather the required materials. This includes: Beeswax, glass jars (with lids or covers), wick with tabs, candle-making thermometer and double boiler or melting pot. If you’d like to add color or scents to your candles, you will also need dye chips or liquid fragrances designed for candles.
Once all the supplies have been acquired, the next step is to prepare your workspace. Before beginning the project ensure that you have wax-covered sheets of paper available ” this will serve as a drop cloth for any debris that may fall during the process of pouring out molten wax. You should also make sure to place your empty jars on their own surface before melting any wax; this will help prevent any spillage from getting onto unexpected areas and causing damage. Additionally, depending on the type of wick likely being used for the project (i.e. wood-core), it can be recommended to attach an additional metal tab above each wick end and wrap it around a pen set across from each other into individual jars; doing so can help keep them centered when you pour in your melted wax later on.
Understanding How To Measure and Prep The Wax
Before you can begin making beeswax candles in jars, you must understand how to measure and prepare the wax for use. This is important to ensure your final product looks great and will burn properly. To start, you must decide what type of wax you prefer for your candle ” 100% pure beeswax or a beeswax blend. If you are working with bulk wax and need to measure amounts for your project, be sure to use a kitchen scale to determine the correct weight that is needed.
Once the wax is measured, it should then be melted slowly in a double boiler over medium-low heat. A double boiler is preferred as it provides even and gentle heating so that the wax does not burn on the bottom of the pan. As the wax starts melting, give it a stir occasionally to help break up any larger pieces. When all of the wax is melted and smooth, remove it from heat source and now it’s ready to pour into your jar containers!
Melting and Pouring Your Wax Into The Jars
When it comes to making your own beeswax candles in jars, the first step is melting and pouring the wax. Beeswax is naturally solid at room temperature, so in order to get it into your jars you’ll need to melt it first. The best way to do this is with a double boiler. Heat up your double boiler and place the amount of beeswax you would like for your jar candle into the top pan. Don’t fill up more than 2/3 of the top pan as the melted wax will expand slightly when heated and might overflow when you add more wax. Once all the wax has melted, carefully take the top pan out of the boiler, leaving any remaining unmelted pieces in the bottom pan. Slowly pour your melted beeswax into each jar until it reaches desired level. Let cool before adding wicks or decorations as needed. Finally, trim away any excess wick once completely cooled and your beeswax candles are ready to be enjoyed!
Creating Beautiful Decorative Artwork On Your Beeswax Candles In Jars
To create beautiful decorative artwork on your beeswax candles in jars, there are several techniques to choose from. One of the easiest ways is to use a hot glue gun and various colors of paint chips. Simply lay out the paint chips in the desired design and then glue them onto the jar with a hot glue gun. For extra flair, you could also add other embellishments like ribbons or die cut paper shapes.
Another way to decorate your beeswax candles is with wick decorations. You can buy ready made wick decorations or if you’re feeling creative you can make some yourself using beads and wire. When placing the bead onto the wax cord, make sure not to drag along any beeswax residue as this may affect the flame when lit. It’s important to keep in mind that certain flame-resistant materials should be avoided as well such as metal, plastic or glass beads; instead opt for cotton or wooden ones.
Finally, if you’re looking for a unique finish on your candles, consider adding decals stickers onto them. Decals come in every shape and size and make for great decorative art pieces for your jars or glass vessels. Be sure to apply each sticker carefully so it stays securely stuck on your candle jars until you’re finished making them!
Maintaining and Caring For Your Beeswax Candles In Jars
Caring for your beeswax candles in jars is an important part of being a candle-maker. It can help your candles last longer and burn better, while also protecting the walls of your jars from heat damage. Here are some tips on how to care for your beeswax candles:
1. Keep the wick trimmed to ½ inch before lighting the candle each time. This will help keep the flame at an appropriate size and prevent flares that could potentially melt the glass jar.
2. Burn the candle for no more than four hours at a time and never leave it unattended – beeswax burns quickly and you don’t want it to burn down too much before extinguishing it.
3. Allow the wax pool around your wick to reach at least 1/4 inch deep each time you burn it, but do not let it go over halfway up the walls of your jar – this will prevent any damage from happening due to overly hot wax coming into contact with the material of your jar.
4. If possible, keep a clear glass lid on top of your jar when not burning so you can keep out dust or insects which can reduce a candle’s shelf life and affect its performance when lit.
5. Make sure that if you need to move or transport them, they are secure in a way that prevents them from tipping over and spilling out their contents – melted beeswax is difficult to clean up!
6. Lastly, store them somewhere away from direct sunlight or humidity (such as in a closet or cupboard) – both extreme temperatures and humidity can greatly reduce the benefits of beeswax candles!
Conclusion
Now that you have the skills and knowledge to make beeswax candles in jars, you can take your candle-making skills to the next level. To continue learning and exploring, here are some recommendations:
Try using different wicks or waxes ” there’s no need to limit yourself strictly to beeswax. Consider trying out soy, coconut or paraffin wax, which will give you a range of different options depending on what aroma or texture you’re going for. You can also experiment with different scents, dyes and other embellishments like glitter and herbs.
Practice mixing waxes together – use different amounts of each wax to get creative and come up with more interesting candles.
Make bigger batches – play around with larger batches if you feel comfortable doing so. Sourcing larger containers and molds might be necessary if you want to make several items at once.
Create detailed shapes – if you really want to get into the details of making amazing candles, look into how to create intricate shapes and designs by molding or incorporating intricate carvings into your products.
Take on DIY requests – get requests from friends and family for custom-made candles and expand your skills even further!

Welcome to my candle making blog! In this blog, I will be sharing my tips and tricks for making candles. I will also be sharing some of my favorite recipes.


