Introduction
When it comes to making natural, eco-friendly candles, container candles made with beeswax is the way to go. Beeswax container candles are a great environmentally friendly option because they are made of sustainably-sourced beeswax. Additionally, they are non-toxic and burn cleaner than paraffin wax or soy wax candles. The beeswax burns more slowly due to their higher melting point, giving these candles a longer life span than other types of candle waxes. Beeswax also produces a lovely honey scent when burnt, reminiscent of relaxation and nature. These pollution-free, air purifying and aromatherapeutic benefits make them ideal for creating a peaceful home environment. Beyond being all around better for the environment and healthier for you, container candles also make beautiful decorations; their natural hues range from ivory to darker yellow shades and can be paired with decorative items to help spruce up any room.
Making the Wax
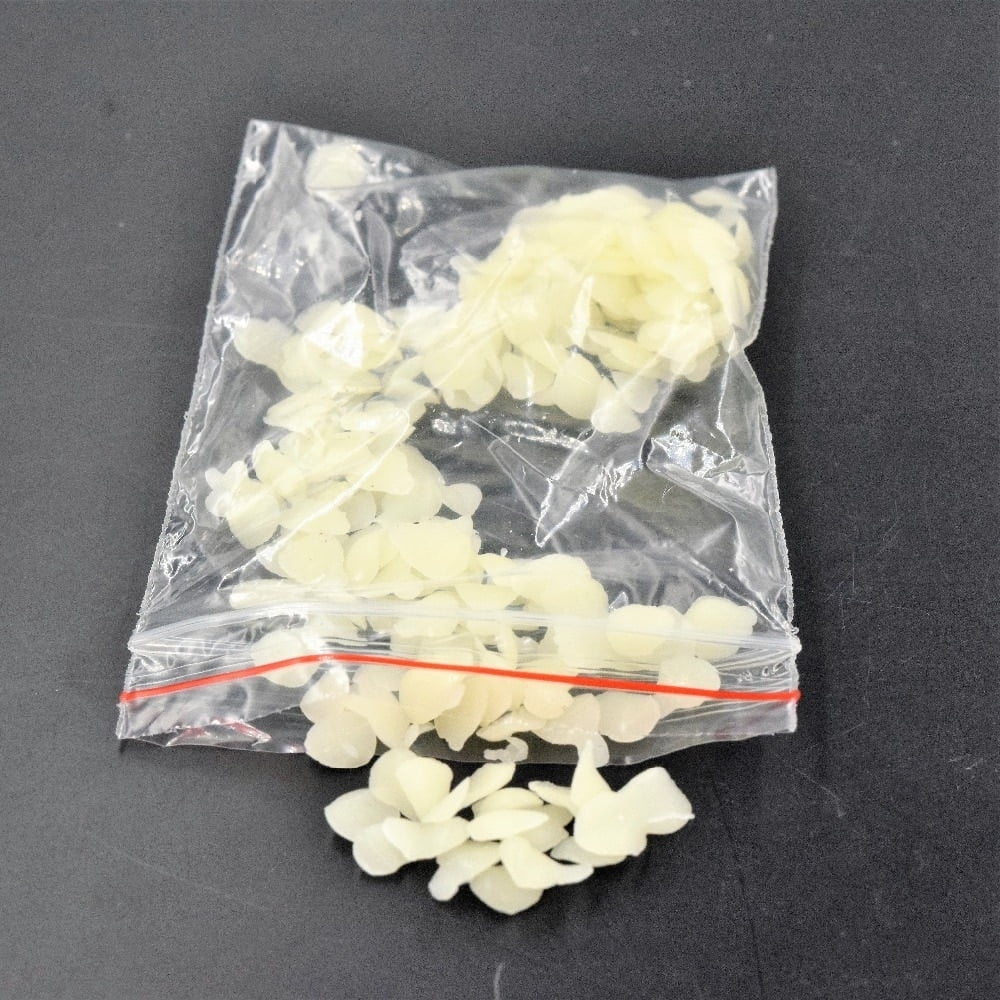
The most popular wax used for container candles is beeswax. Beeswax is a natural and renewable resource that comes from honeybees. If you are buying beeswax, you can find it in either blocks or granules. If you use the block form of wax, it will need to be melted down before you pour it into your containers. To do this, cut the wax into cubes and place them in a double boiler over low heat until it is completely melted and liquid. For the granular form of wax, place the wax into a container with a lid and melt it in your microwave on short intervals of 15-20 seconds while stirring in between each interval, until fully melted and liquid.
Once the beeswax has been melted, it is time to fill the candle containers with your chosen wick type. You should add enough molten beeswax to fill up the container until two-thirds full – this helps to ensure that your candlestick burns evenly when lit later on. Make sure that each wick is placed straight in order to avoid leaning after pouring and cooling which could lead to uneven burning when lit later on.
Finally, hold a lighter over each wick and let the flame pass across until all sections have been lightly charred. The charring encourages an even burn throughout the life span of your candle as well as forming a cap at the end of each wick which grows deep into the wax pool as your candle burns down so that no “runaway” flame caused by an excess of unburnt oil occurs during use (or storage).
Preparing the Containers
Types of containers: When making beeswax container candles, it’s important to choose the right container. Glass jar candles were popular before the introduction of plastic. Nowadays, materials like stainless steel and ceramic can be used to create beautiful and innovative candle holders. If you are going with a mason jar or other glass containers, make sure they are heatproof and that they won’t shatter upon heating up your wax.
Safety practices: When preparing your containers for your beeswax project, safety should be top priority. Always use gloves when handling any kind of hot wax to protect yourself from burns. Be extra careful when handling melted wax as it can cause severe burns. In addition to wearing protective gear, also be aware of potential fire hazards while melting down wax by keeping combustible items such as rags away from the immediate area.
Preparing the Containers: Before adding in the wax, it’s important to prepare the containers for better hold-ability and design appeal. Prep likewise includes washing and drying the containers prior to filling them with melted wax ounces completely followed by filling each jar gradually with hot liquid beeswax making sure not to overfill them otherwise some would escape out of it eventually interfering in designing process after cooling off .Once done with selection pour in wicks using a wick tab at the bottom for best results or glued into place using wire glue or even wrapping around lid in case of smaller jars depending on type of design you planning making preparations complete effectively covering its base finally ready for pouring in molten wax..
Fragrance and Color
Making beeswax container candles is a unique and satisfying process. It requires some patience, but the end result can be beautiful and rewarding. To add extra special touches to your candles, you can add different natural fragrances and colors. Essential oils can be added for scent, with scents like lavender, vanilla, citrus, cinnamon and bergamot being excellent options. Small amounts of essential oils should be used in order to prevent overpowering the beeswax fragrance. Plant-based colorants like Madagascar madder root powder and annatto seed can also be used to turn your candles beautiful shades of reds, yellows and oranges. For colored candles, pre-melted wax pellets can also be used in various colors to create eye catching designs. With some experimenting you can come up with any number of exciting combinations that will make your container candles stand out from the crowd!
Wicks and Wielders
Beeswax container candles require different types of wicks and holders to ensure that they burn properly. To start, all-cotton wicks work best for container candles because they carry the wax up more effectively than other kinds of wick material. Wicks can come pre-tabbed, already attached to a metal disc that sits at the base of the candle and helps stabilize the wick as it burns. Some also feature a wire core which extends past that metal disc and prevents wax build-up on the bottom of the candle.
When selecting a wicker holder, it is important to choose one that will match the size of your containers. If you are using smaller tins or jars, tealight holders work best since they can fit easily without taking up extra space. Larger jars or mugs may need something like a tabbed disc, which can be adhered directly to the bottom of your container making them ideal for wide-mouth jars or taller mugs and glasses. You can also find various sized bridges that support multiple wicks at once and clip onto the sides of tin containers allowing each wick to get equal heat from the flame. Finally, for thick waxes such as beeswax, you should opt for thicker braided or square flat braid cores instead of thin single strands so your candle will get enough oxygen to burn cleanly and evenly.
Melting the Wax
When making beeswax container candles, the first step is to melt the wax. Melting containers can vary, but a double-boiler or special candle melting pot are popular options. In terms of wax types, beeswax is usually the main ingredient in bee container candles, but you may want to add in other waxes such as paraffin or soy as well. Once you have chosen your melting container and wax types, simply heat the wax over low heat until it’s completely melted and free from any lumps or chunks. Once it has melted down fully, it should be between 180°F and 200°F for pouring. For larger projects with large amounts of wax, use a thermometer thermometer to ensure that the right temperature is maintained during melting.
Pouring the Wax
Safety Practices: When making bee wax container candles, it’s important to take safety precautions to avoid injury or harm. This includes wearing protective eyewear in case of splattering wax and long sleeves to protect against the heat of the wax. Be sure to also use oven mits or thick fabric mitts when transferring hot wax and metal containers. Before beginning, make sure your work station and containers are placed on a non-flammable surface for added protection.
Temperature: The temperature when pouring your beeswax is incredibly important; hot wax can ignite flammable objects around you and burn your skin. The optimal temperature setting for beeswax container candle making is between 120-160 degrees Fahrenheit (49-71 Celsius). To ensure an even heat distribution, keep stirring the melted wax with a metal spoon as it cools down during the cooling process.
Pouring Techniques: Beeswax has different thicknesses depending on where you buy it from. This means that depending on how thick the beeswax is, you’ll need to be mindful of how quickly or slowly you pour it into the containers. Place your wick over the opening of the container before pouring in to ensure that it stays put. Start by holding steady in one spot and pouring slowly until the desired amount has been reached. Once finished, allow time for proper cooling before handling again or lid closing if applicable.
Curing and Cooling
After pouring the wax into the desired container, the candle must be left to cure in order to safely handle the hot material. The curing process involves evenly distributing heat within the wax and allowing it to set. During this process, the wax is still malleable and can be easily molded or damaged if handled improperly during this time.
To avoid any problems, it is important to allow the candles to cool completely before handling them. Depending on the size of each candle, this might take several hours at least. Further, while cooling you should place each candle in a dry location that has low humidity levels and consistent temperatures to help with an even cooling process. After doing so, adjust your space by providing adequate ventilation around the candles which will cool off your workspace faster than normal. Finally, after a few hours of having been cured and cooled down patiently, check to ensure that each candle has reached its final desired temperature for ideal use and handling”typically about 150°F (65°C).
Announcing Your Creation
Promotion Ideas
When it comes to promoting the candles you have created, there are many strategies and tactics that can be utilized. Some of these include:
-Developing an email list of potential customers: Allow people to sign up for updates about your beeswax container candles and offer special deals or discounts from time to time to keep them engaged.
-Making flyers and handing them out in high-traffic areas: Create flyers that share information about how your beeswax candles are eco-friendly, long-lasting, and affordable. Make sure to include a picture of the product or an eye-catching design.
-Including samples in gift bags: Give away small samples of your candle at local events or as gifts to friends and family along with promotional cards or pamphlets.
Social Media Strategies
Social media provides another great avenue for advertising and marketing your creations. Consider joining relevant communities on platforms such as Facebook, Twitter, Instagram, LinkedIn, Snapchat, etc.. Additionally create YouTube videos demonstrating how to make beeswax container candles from home so people can learn from the comfort of their own homes. You could also use other channels such as blogging, Pinterest boards, etc..to promote the product further reach more potential customers.
Selling Your Candles
To successfully sell your candles you may choose start by utilizing various online marketplaces like Etsy or Amazon as well as personal websites which allow more control over branding and visual display options for listing products. In addition to traditional retail spaces (i.e stores), attending craft fairs is a great way to introduce yourself and meet potential clients face-to face ” bring along a few samples if possible! Last but not least take advantage of good old word of mouth; satisfied customers love telling others about their purchases when they’ve had a great experience!
Conclusion
Once you have created your beeswax container candles, there are a few final tips and tricks for making them as beautiful and unique as possible. Consider painting or drawing on the outside of the container to create an interesting texture and look. If your candle is small, adding dried herbs or flowers to the melted wax can create a unique scent. Finally, don’t discount the impact of tying ribbon, lace, string, or other embellishments around the container to lend the candles personality. Creative touches like these that transform ordinary candles into special gifts your friends and family with love. With these tips in mind, go forth and make fantastic beeswax container candles!

Welcome to my candle making blog! In this blog, I will be sharing my tips and tricks for making candles. I will also be sharing some of my favorite recipes.


