Making Candles From Your Beeswax
Beeswax candles are not only beautiful, they are also environmentally friendly. By making your own candles from beeswax, you not only help the environment, you also save money.
Beeswax is a natural product that is made by bees. The bees use the wax to build their hives. When you make a candle from beeswax, you are using a natural, renewable resource.
Beeswax candles also burn cleaner than other types of candles. They do not produce soot, and they are not toxic.
Making beeswax candles is a simple process. You will need some beeswax, a stove, a pot, a spoon, a thermometer, and some wicks.
The first step is to heat the beeswax. You can do this by putting the beeswax in a pot and heating it on the stove. Make sure that the beeswax is heated to between 170 and 190 degrees Fahrenheit.
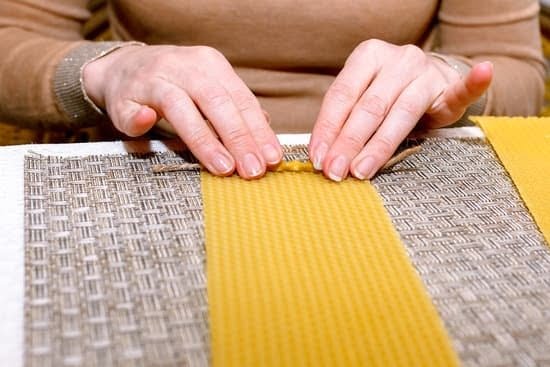
Once the beeswax is heated, you can add the wick. Make sure that the wick is centered in the beeswax.
Then, use a spoon to pour the beeswax into a candle mold. Make sure that the mold is at least 1/2 inch deep.
Once the beeswax has cooled, you can remove the candle from the mold.
Beeswax candles make a beautiful addition to any home. They are also a great way to help the environment.
Candle-Making
Candles have been around for centuries, and for good reason – they are a simple and elegant way to add light and decoration to any space. While the basics of candle-making are simple, there are a few things to keep in mind to make sure your candles come out just right.
The most important factor in making candles is choosing the right wax. There are a few different types of waxes available, but the most popular for candles is beeswax. It has a natural scent, is non-toxic, and burns cleanly. Paraffin wax is another popular option, and is available in a variety of colors.
Once you’ve chosen your wax, the next step is to melt it. You can do this in a microwave or on the stovetop. If you’re using a microwave, be sure to use a microwave-safe container and stir the wax occasionally to make sure it doesn’t burn. If you’re using a pot on the stove, be sure to use a pot that is deep enough to avoid burning the wax.
Once the wax is melted, it’s time to add the fragrance. This can be done in a variety of ways, but the most popular is to add essential oils. Essential oils are natural extracts from plants that have a strong scent. You can add as much or as little as you like, depending on how strong you want the fragrance to be.
Once the wax is melted and the fragrance is added, it’s time to pour the wax into the mold. Be sure to pour slowly and carefully, so the wax doesn’t spill over the edge.
Once the wax has hardened, it’s time to remove the candle from the mold. If the candle is difficult to remove, you can place it in the refrigerator for a few minutes to help it cool down and make it easier to remove.
Finally, it’s time to light your candle and enjoy!
Making Paraffin Container Candles
Candles are a popular way to add light and decoration to a room. They come in a variety of styles, sizes and colors. There are several different types of candles, but the most popular type is the paraffin container candle.
Paraffin container candles are made from paraffin wax, which is a type of wax that is made from petroleum. Paraffin is a white, odorless wax that is relatively easy to work with. It is also relatively inexpensive, which makes it a popular choice for candles.
To make a paraffin container candle, you will need:
-Paraffin wax
-Container for the candle
-Wick for the candle
-Scissors
-Heat source
The first step is to melt the paraffin wax. You can do this using a heat source such as a stove or a microwave. Be sure to use a pot or bowl that is large enough to accommodate the size of your container.
Once the wax is melted, cut the wick to the desired length. The wick should be about twice the length of the container.
Next, dip the wick into the wax and quickly remove it. Hold the wick straight up and down and allow the wax to drip down the wick. You may need to do this a few times to get a thick enough coating of wax.
Once the wax is thick enough, insert the wick into the container. Be sure to center the wick in the container.
Finally, place the container in a safe place and allow the wax to cool. Once the wax has cooled, you can light the candle and enjoy.
Candle Making Wax Dye
ing
Candle making is a centuries old tradition that is still popular today. There are many different ways to make candles, but one of the most popular methods is to use wax dye.
Wax dyeing is a process in which you add dye to melted wax in order to change the color of the candles. This is a great way to customize your candles and make them unique.
There are many different types of wax dye available, so you can find the perfect color for your candles. You can also mix different colors together to create custom shades.
The process of dyeing wax is very simple. All you need to do is melt the wax and add the dye. You can use a dye tablet, liquid dye, or powder dye.
The amount of dye you need will depend on the type of wax you are using and the color you want to achieve. For most dyes, you will need between 1 and 3 teaspoons per pound of wax.
Once you have added the dye, stir it in to the wax until it is fully dissolved. Then, pour the wax in to your candle molds and let it cool.
The dye will not affect the burning of the candles, so you can use them as usual. However, the color may not be as bright as it is when the wax is uncolored.
If you are looking for a way to add a little bit of color to your candles, wax dyeing is a great option. It is a simple process that is quick and easy to do. You can use any type of wax dye to create any color you desire.
Making White Scented Candles
Making white scented candles is a process that can be completed at home with a few simple supplies. The first step is to gather all of the necessary materials, which include wax, fragrance oil, and a mold or container in which to pour the wax.
The next step is to heat the wax. This can be done in a double boiler or in the microwave. If using the microwave, be sure to heat the wax in short increments and stir it between each interval to prevent it from burning. Once the wax is melted, add the fragrance oil and stir to combine.
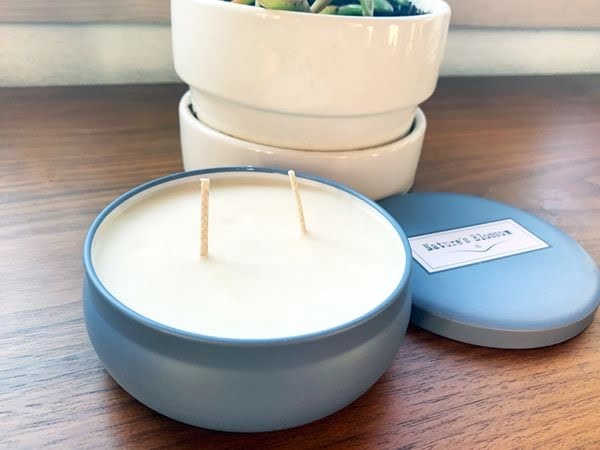
Pour the wax into the mold or container and allow it to cool completely. Once it has cooled, remove the candle from the mold or container and enjoy!

Welcome to my candle making blog! In this blog, I will be sharing my tips and tricks for making candles. I will also be sharing some of my favorite recipes.


