Introduction
Making candles on a gas stove offers many benefits. With the proper safety measures taken, it is an easy way to make beautiful and fragrant homemade candles. Not only does candle making at home save you money, it also allows you to customize the colors, scents, and shapes according to your preference. Additionally, you can tailor the ingredients used in your candles to be one-hundred percent natural and eco-friendly. Lastly, you will be able to create unique gifts or simply give yourself or others a cozy ambiance like nothing else.
Gathering the Necessary Materials and Supplies
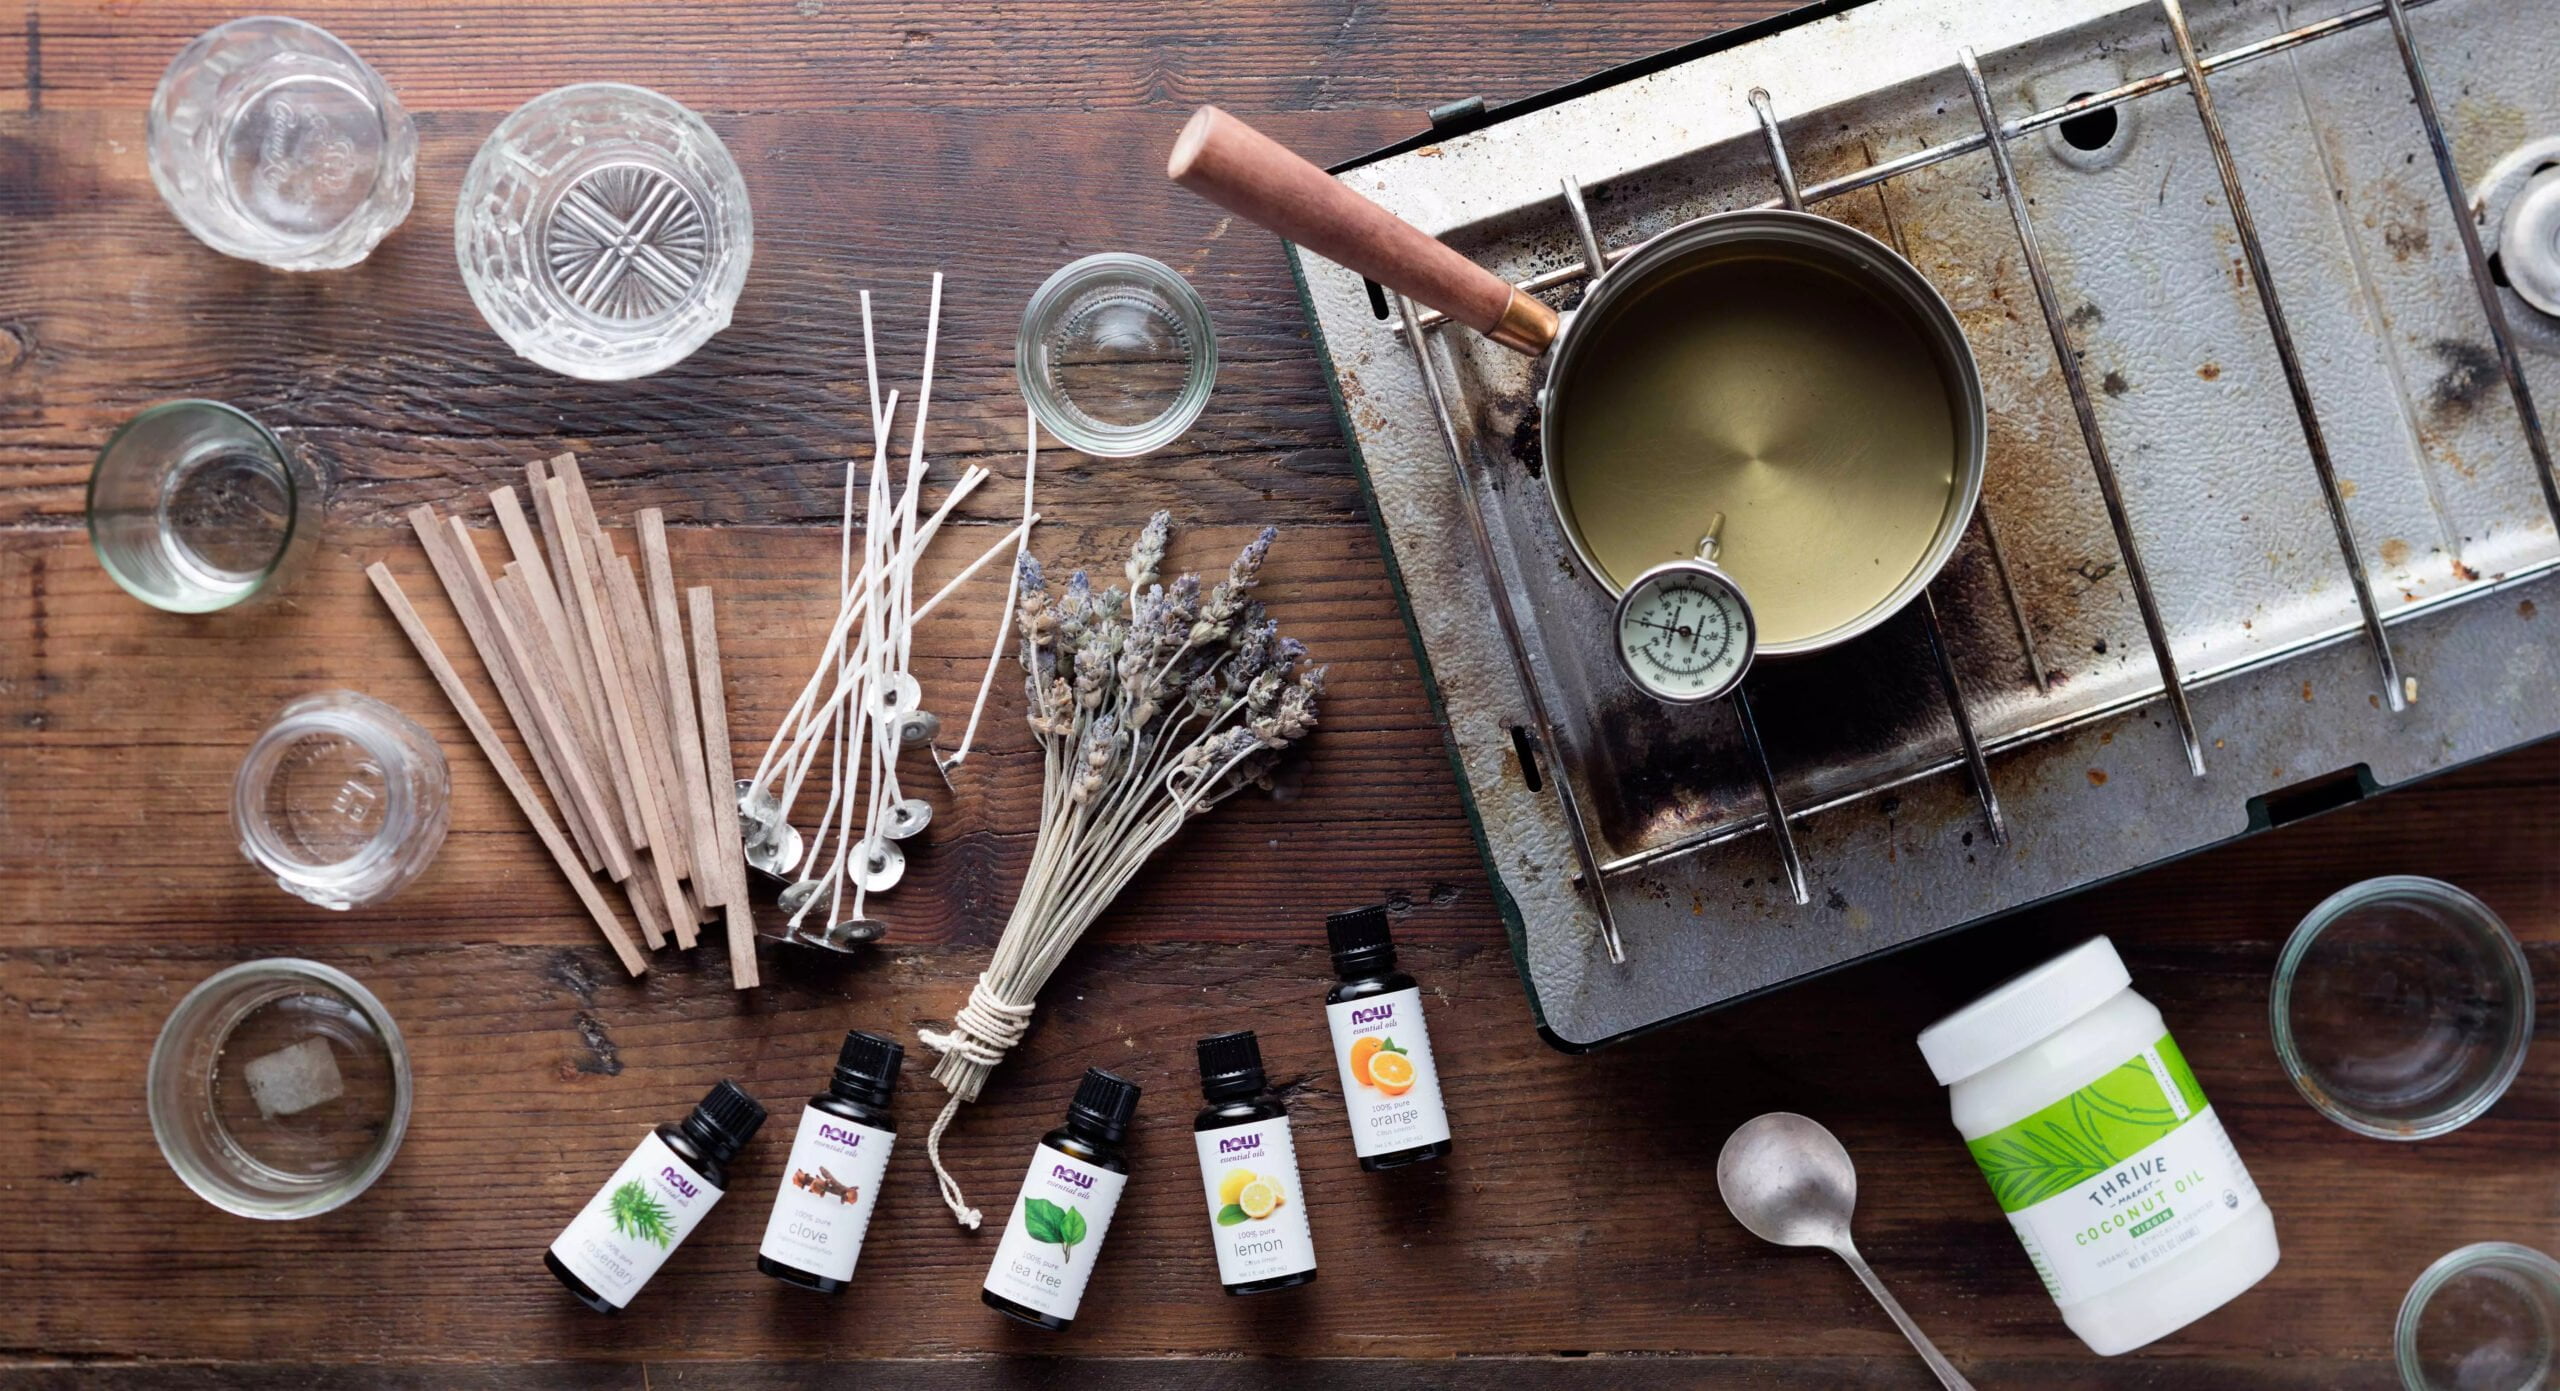
When making candles on a gas stove, it is essential to gather the necessary supplies and materials. Many candle makers believe that high-quality products will make for a longer burning candle, so it’s important to buy materials from trusted retailers who specialize in candle making supplies. Quality wax can be much more expensive than cheaper wax varieties, but it usually results in better quality candles. The most common type of wax used for candle making is paraffin wax, although some craft stores also offer beeswax and soybean varieties. Quality dyes and fragrances are also important components, as these will give your finished product its desired look and smell. Additionally, wicks with metal coils should be purchased to help achieve desired burn times and prevent the wick from drowning out in melted wax. Properly prepared jars or molds should also be purchased to ensure structural stability once the candles have cooled down completely. Finally, other accessories such as thermometers and pouring pitchers can also help with temperature control when making your own candles at home. With the right quality materials and supplies, you can create candles that are beautiful and long lasting.
Preparing the Gas Stove
Before attempting to make candles on a gas stove, it is important to follow proper safety protocols. First and foremost, ensure that the area in which you are working is well-ventilated. Besides ventilation, be sure to remove anything flammable from your work area, including appliances, fabrics, paper products, aerosol cans, etc. Turn off sources of ignition like lighters or matches until the project is complete. Place a fire extinguisher nearby and make sure everyone in the home knows where it is located and how to use it if necessary. Additionally, use heavy pots and pans”not plastic or wooden bowls”when melting wax as they tend to be more heat-resistant than other materials. Also be sure not to leave melted wax or flames unattended. Make sure there is always an adult with children when using a gas stove for any activity.
Calculating the Proper Wicks and Wax Amounts
When making candles on a gas stove, calculating the proper wicks and wax amounts can be tricky but is important for determining the optimal burning time. Generally speaking, a candle should have one half inch of wick for each inch of wax diameter. It is also beneficial to use either an anchoring material or sealer in order to properly secure the wick before pouring your melted wax into the mold. Additionally, make sure that you are using a suitable heat source such as an electric hotplate or double boiler with adjustable temperature control when working with candle-making wax. This will ensure that you get the best melting results while preventing any chance of overheating and scorching your wax. Once you get comfortable with measurements and temperatures, vary them according to personal preferences in order to create unique looks, scents, and burning times. Finally, carefully monitor your candles after they are lit in order to ensure safety by avoiding flare ups or soot build-up caused by improper flame sizes or broken wicks.
Melting and Mixing the Wax
Making candles on a gas stove can be a fun and rewarding experience when done correctly. To begin, gather all your necessary wax-making supplies including the wax, fragrances and colors, wicks, dye chips, thermometer, molten wax container, candle molds and pouring pot. You will also need safety equipment such as gloves and glasses to protect you while handling hot wax. Once everything is in place, it’s time to start melting and mixing your wax.
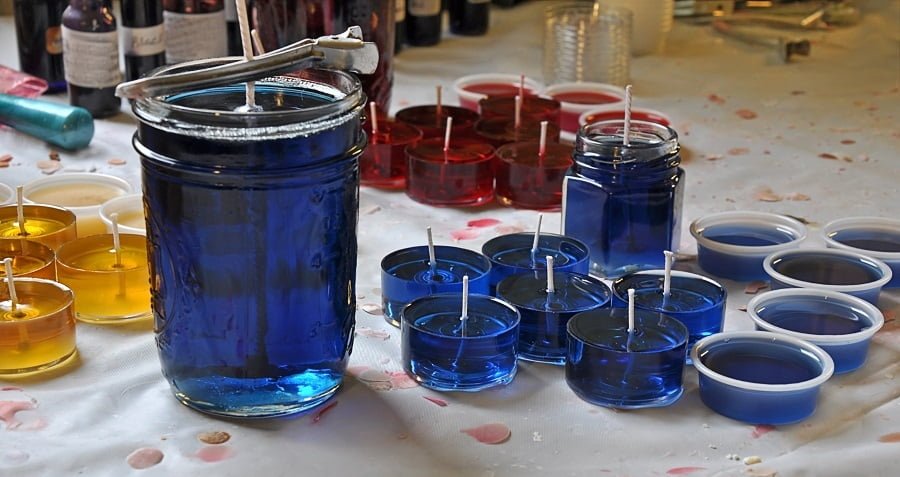
Begin by heating the wax in the pouring pot on medium heat until it is completely liquefied. If you are making a scented candle add fragrance oil to the molten wax at a rate of 1 tsp per pound of wax. For colored candles you will need to add dye chips”a few drops at a time until desired color is reached”when melted they may appear darker than their true color until solidified again. The next step is to pour the molten wax into an appropriate mold for cooling; for container or pillar type candles use wicks previously centered as appropriate for each shape/size of candle being made. As the wicked candles cools re-adjusting the wick may be necessary so it remains centered in the hardened candle once cooled. After allowing sufficient cooling time (12-24 hours) remove from mold and enjoy your custom made candle!
Pouring the Wax Into the Molds
When making candles on a gas stove, it is important to choose the right type of container for your wax. Depending on what kind of candles you are making, different types of containers may be necessary. For instance, if you are making pillars or jars, these will have wider mouths and should require a contoured pouring container that can help direct the hot wax into them. Containers with spouts can be useful for tapers and tea lights to ensure the wax is poured in an even stream. Another option could be to use a separate accessory specifically designed for pouring wax ” such as a pitcher with a long handle.
Glass measuring cups or metal cans work great for melting wax directly over a flame, but once heated it will need to be transferred out in order to pour it into molds. Different sized pots are available that have been designed specifically for candle-making ” just make sure they all have non-flammable handles so you won’t burn yourself when transferring the wax! You can also invest in double boiling systems that help regulate temperature, allowing you to transfer warm liquid wax via durable plastic or rubber tubes instead of trying to continually reheat it. These systems often add convenience and precision during the pouring process, resulting in cleaner and smoother candles overall!
Allowing the Wax to Cool
When making candles on a gas stove, it is important to track the cooling time of the wax once it has been melted. You want to allow the wax to cool sufficiently enough that it will retain its shape when poured into the molds. However, you don’t want it to become too hard, as this can cause difficulty in candle-making later on. It is advised to stir the molten wax frequently so that there is an even cooling rate. The amount of time for cooling down will depend on the type and size of mold used as well as any additives that have been used in combination with the wax. A simple way to test if the wax cools down satisfactorily is through touch; simply insert a small temperature detection instrument like a thermometer or your finger into the cooled wax. Once cooled, your candles are ready for scenting and wicking!
Adding Your Custom Scents and Colours
When making candles on a gas stove, adding custom scents and colors can create unique and beautiful pieces. However, to avoid overpowering scents and color bleeding, it is important to follow a few techniques when selecting fragrance oils and dyes. When selecting scents, make sure they are formulated by candle making suppliers specifically for candle-making rather than those used in diffusers. This type of oil will evaporate faster when heated and therefore results in less scent overload. When choosing your wax dye, use high-quality dyes made from non-oil based pigments that are often labeled pigment dye or laminated dye. These provide better mixing of the wax without any residue due to their small particle size and reduced chance for clumping. Once you have narrowed your fragrance oil selection down to an appropriate scent range, start with a small amount until you get the desired intensity before adding additional drops as too much may cause colors to bleed into each other or overpower the senses depending on the temperature of the wax at the time of pouring. With these simple tips in hand, create amazing candles with unique scents and colors!
Finishing and Presenting the Candles
Once the candles have been made, there are a few options for decorating and presenting them. Adding colorful ribbons, strings of beads, or dried flowers can give your candles a unique flare. Wrapping the candles with brightly colored tissue paper gives them a rustic look or using decorative glass jars such as mason jars will provide an antique charm. Personalized labels can be used to identify scents. It is also possible to create intricate designs around the wick by various methods such as wax dipping and rolling with herbs. Scattered glitter, sequins and gold flakes make beautiful decorations while oil-based fragrances can give the finished product a special touch of variety. Finally, knowing how to package homemade candles enables you to share them with friends and family in creative ways such as gift baskets or baskets filled with many different types of candles in festive colours.
Tips and Tricks for Making Candles On A Gas Stove
Troubleshooting is an important part of making candles on a gas stove. While the process is quite simple, there are times when things don’t go right. Here are some tips and tricks to help you get the best results with your candles:
1. Make sure that you have enough wax in the pot to fully submerge the wick. If your wax is too shallow, it won’t be able to saturate the wick and will result in a poor-burning candle.
2. Ensure that there is adequate ventilation in your workspace while melting the wax on the gas stove. Having vents or windows open will prevent buildup of fumes which could be dangerous.
3. For best results, melt wax slowly over low to medium heat for at least 45 minutes until completely melted ” this will reduce the risk of burning or scorching your wax.
4. Keep a watchful eye on your melting wax and stir often with a wooden or silicone spoon as needed to keep from burning or discoloring your wax mix-in ingredients such as dye blocks or essential oils.
5. Lastly, ensure that you pour molten wax into containers within 5 minutes after taking off heat for optimal temperature and appearance of your finished product(s).
Conclusion
Overall, making candles on a gas stove can be a great way to engage in creativity and make a beautiful end product that you can enjoy for years. However, it is important to remember the safety precautions of working with heated wax, which include keeping any flammable items away from the flames and ensuring that you are using non-toxic materials and appropriate containers for the wax when melting it. Additionally, due to the fragility of some container materials, it is wise to use a double boiler method rather than placing the container directly into the flame. If possible, completing candle making on an outdoor gas stove is ideal as well. Whatever your preference and resources may allow, by following these core safety steps one can create beautiful and memorable homemade candles while staying safe!

Welcome to my candle making blog! In this blog, I will be sharing my tips and tricks for making candles. I will also be sharing some of my favorite recipes.


