A Making Candles Starter Kit is the perfect introduction to the captivating world of candle-making. These kits provide all the essential tools and materials needed to create your own beautiful and fragrant candles at home. With their increasing popularity, more and more people are turning to Making Candles Starter Kits as a way to explore their creativity, relax, and indulge in a satisfying hobby.
What makes Making Candles Starter Kits so popular? Firstly, they offer convenience and accessibility for beginners. These kits typically include everything you need to get started, saving you the time and effort of hunting down individual supplies. Additionally, they often come with step-by-step instructions or tutorials, making it easy for even those with no prior experience to dive into candle-making.
Using a Making Candles Starter Kit also comes with several benefits. For one, it allows you to personalize your candles according to your own preferences.
You can choose from various types of wax, fragrance oils, colors, and decorative elements to create candles that perfectly suit your style or mood. Furthermore, making your own candles can be a rewarding and therapeutic activity-a chance to switch off from technology, unwind, and enjoy the process of creating something tangible with your own hands.
In this article, we will dive deeper into the world of Making Candles Starter Kits. We will discuss the essential tools and materials needed to get started in candle-making, explore different candle-making techniques ranging from basic to advanced methods for creative results.
I will also provide a step-by-step guide on how to make your first candle using a starter kit. Join me as we journey through this delightful craft that offers endless possibilities for self-expression and relaxation.
Getting Started
Getting started with making candles requires having the essential tools and materials at hand. The process of candle-making involves selecting the right type of wax, fragrance oils, wicks, and equipment. Each element plays a crucial role in creating beautiful and fragrant candles.
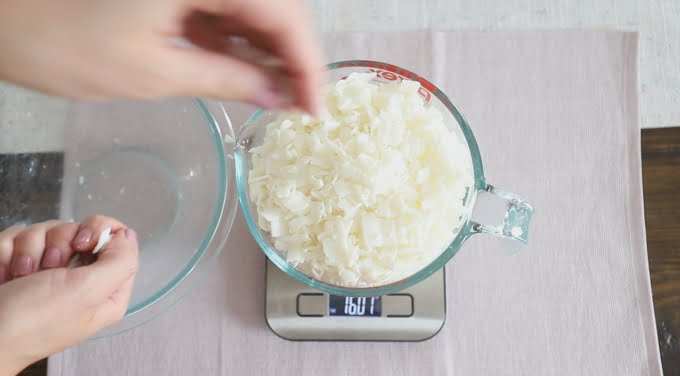
Firstly, it is important to choose the right type of wax for your candles. There are various options available such as soy wax, beeswax, paraffin wax, and gel wax. Each type of wax has its own unique characteristics and benefits. Soy wax is popular among beginners due to its ease of use and natural properties.
Beeswax is known for its clean burn and natural fragrance. Paraffin wax is commonly used in commercial candles due to its affordability and versatility. Gel wax allows for creative possibilities when it comes to embedding objects or creating decorative designs within the candle.
In addition to choosing the right wax, selecting the perfect fragrance oils is essential to create beautifully scented candles. Fragrance oils come in a wide variety of scents, allowing you to customize your candle’s aroma according to your preferences. It is important to consider the strength of the fragrance oil and how well it performs in different types of waxes.
Next, understanding different types of wicks is crucial for successful candle-making. Wicks come in various sizes and materials such as cotton or wood. The size of the wick determines how much melt pool it creates when lit, so choosing the appropriate size for your chosen container or mold is important.
Lastly, having essential equipment and tools will make the candle-making process smoother. This includes a heat-resistant container or mold for pouring the melted wax into, a double boiler or melting pot for melting the wax properly, a thermometer to monitor temperature, a stirring tool like a wooden dowel or spatula, and scissors for trimming wicks.
By having these essential tools and materials on hand, you are ready to embark on your candle-making journey and create beautiful, personalized candles.
Exploring Different Candle-Making Techniques
When it comes to candle-making, there are endless possibilities for creativity and experimentation. In this section, we will explore different candle-making techniques that you can use to elevate your creations beyond the basics. Whether you are a beginner or have some experience with candle-making, these techniques will inspire you to take your candles to the next level.
First and foremost, it’s important to understand the basic candle-making techniques. This includes learning how to melt wax properly, adding fragrance oils, and pouring the melted wax into molds. Once you have mastered these foundational techniques, you can start exploring more advanced methods for creating unique and personalized candles.
Advanced techniques can involve using different types of wax, such as soy wax or beeswax, which offer different qualities and benefits compared to traditional paraffin wax. These alternative waxes can give your candles a more natural and eco-friendly touch. Additionally, experimenting with different types of wicks can result in various burn times and flame characteristics.
For those looking for more creative results, there are plenty of options available. You can try your hand at creating layered or marbled candles by adding different colored layers of melted wax or swirling different shades together before they set. You can also incorporate dried flowers, herbs, or glitters into your candles for a unique touch. The possibilities are truly endless when it comes to designing beautiful and one-of-a-kind candles.
It’s worth mentioning that achieving desired candle shapes and designs may require some tips and tricks along the way. For instance, if you want to create intricate shapes or patterns in your candles, using molds specifically designed for those shapes can be helpful. Additionally, understanding how cooling rates affect the final appearance of your candles can make a significant difference in achieving desired outcomes.
Step-by-Step Guide
Making your own candles can be a fun and rewarding hobby. With a Making Candles Starter Kit, you have everything you need to create beautiful candles right at home. In this step-by-step guide, we will walk you through the process of making your first candle using a starter kit.
Before you begin, it is important to prepare your work area. Lay down newspaper or use a wax-proof mat to avoid any messes. Ensure that you have all the necessary materials from your starter kit within reach. This includes the wax, fragrance oils, wicks, molds, and any additional tools provided.
To start, you will need to melt the wax. Follow the instructions provided in your starter kit on how to safely melt the wax without causing any accidents or injuries. Once the wax has melted completely, you can add fragrance oils to give your candle a pleasant scent. Remember to stir gently but thoroughly to distribute the fragrance evenly throughout the wax.
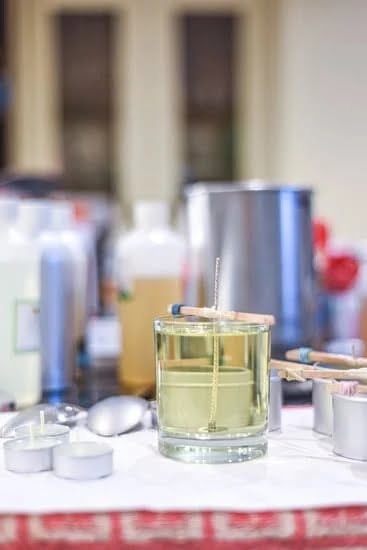
Next, carefully pour the melted wax into your chosen mold. Choose a mold that suits your desired candle shape and size. To ensure that the wick stays centered in the candle as it sets, insert it into the mold before pouring in the wax. Use a pencil or dowel rod placed across the top of the mold to keep the wick straight and secure.
Now it’s time for patience as you allow your candle to cool and set completely. This can take several hours depending on the type of wax used and environmental conditions such as temperature and humidity. Avoid moving or disturbing the candle during this time to prevent any imperfections from forming in its surface.
Once your candle has fully hardened and cooled, trim the wick to around half an inch above the surface of the candle using scissors or wick trimmers. This will help optimize its burning performance when lit later on. Congratulations. You have successfully made your first candle with a starter kit.
The process may seem intimidating at first, but with practice and experience, you can become skilled at creating your own handmade candles. The step-by-step guide provided here serves as a foundation for future candle-making projects. Experiment with different fragrances, colors, and techniques to create unique and personalized candles that reflect your style and personality.
Enhancing Your Candles
Adding color and decorative elements to your candles can take them from simple and ordinary to stunning works of art. With just a few extra steps, you can create unique and eye-catching candles that will impress everyone who sees them. In this section, we will explore various techniques for adding colors and decorative elements to your candles.
One way to add color to your candles is by incorporating color pigments into the wax. These pigments come in a variety of shades and can be mixed together to create custom colors. Simply melt the wax, add the desired amount of pigment, and stir until fully blended. Be sure to experiment with different amounts of pigment to achieve your desired shade.
Another technique for adding color to your candles is creating layered or marbled designs. To achieve a layered effect, pour a thin layer of melted colored wax into the mold, allow it to cool and set slightly, then pour another layer of a different color on top.
Repeat this process until you have achieved the desired number of layers. For a marbled effect, pour multiple colors of melted wax into the mold at the same time and swirl them together using a toothpick or skewer.
In addition to adding color, you can also enhance your candles with decorative elements such as dried flowers, herbs, or glitters. To incorporate these elements, simply place them in the mold before pouring in the melted wax. Make sure they are evenly distributed throughout the candle for a balanced look. You can also sprinkle glitters on top of the poured wax before it completely sets for an added sparkle.
| Technique | Description |
|---|---|
| Color Pigments | Adds custom colors by mixing pigments into melted wax. |
| Layered Designs | Create multiple layers of different colored wax for a visually appealing effect. |
| Marbled Designs | Mix multiple colors of melted wax together to create a swirling, marbled pattern. |
| Decorative Elements | Incorporate dried flowers, herbs, or glitters for added visual interest in your candles. |
Troubleshooting
Dealing with uneven or cratered surfaces
One common issue that beginners may face when making candles is the formation of uneven or cratered surfaces on their finished candles. This can be frustrating, especially after spending time and effort in creating the perfect candle. However, there are a few common causes for these issues and some simple troubleshooting steps to help resolve them.
Uneven surfaces can occur when the wax cools too quickly or if there are temperature variations during the cooling process. To prevent this, it is important to ensure that your candle mold is at room temperature before pouring the melted wax into it. Additionally, you can try pouring your wax at a slightly higher temperature or using a heat gun to even out any imperfections after the candle has cooled.
Cratered surfaces are often caused by air bubbles getting trapped in the wax as it cools. To minimize this issue, make sure to thoroughly stir your melted wax before pouring it into the mold to release any air pockets. You can also try using a heat gun or gently tapping your mold on a sturdy surface to remove any bubbles that may have formed.
Preventing wick tunneling and mushrooming
Another common issue faced by beginners is wick tunneling and mushrooming. Wick tunneling refers to when the flame does not melt the entire surface of the candle evenly, resulting in a tunnel-like hole down the center of the candle. Mushrooming occurs when excess carbon builds up at the top of the wick and creates a mushroom-like shape.
To prevent wick tunneling, it is important to choose an appropriate-sized wick for your specific candle size and type of wax. A wick that is too small may produce insufficient heat while one that is too large may generate excess heat, leading to tunneling. It is also crucial to trim your wick to about ¼ inch before each use to ensure a consistent and even burn.
To prevent mushrooming, selecting the right type of wick is essential. Cotton cored wicks are often recommended as they tend to produce less soot and carbon buildup. Additionally, regular trimming of the wick can help prevent mushrooming. Trim the wick after each use when the candle has cooled down to remove any excess carbon buildup.
Solving problems with fragrance throw or scent retention
One common issue that beginners may encounter is a lack of fragrance throw or poor scent retention in their candles. Fragrance throw refers to the ability of a candle to release its scent into the surrounding area when it is burned.
Poor fragrance throw can often be attributed to using low-quality or incompatible fragrance oils. It is important to choose high-quality fragrance oils specifically formulated for candle-making. Additionally, certain scents may require a higher percentage of fragrance oil compared to others, so it is important to follow the recommended guidelines provided by the manufacturer.
Another factor that can affect scent retention is the type of wax used. Some waxes have better scent retention properties than others. Soy wax, for example, tends to hold fragrances well and provides a strong scent throw. Experimenting with different wax types can help you achieve better results in terms of scent retention.
By troubleshooting these common issues and following these simple tips, beginners can overcome challenges and create beautiful candles with satisfying results. With practice and experience, one’s candle-making skills will continue to improve, allowing for more enjoyment and creativity in this craft.
Safety Tips and Precautions for Candle-Making
Candle-making can be a fun and rewarding hobby, but it is important to prioritize safety while working with hot wax and an open flame. Here are some essential safety tips and precautions to keep in mind when making candles with a starter kit:
Managing heat and fire hazards
– Always work in a well-ventilated area that is free from flammable materials.
– Use a double boiler or a dedicated candle-making pot to melt the wax, and never leave it unattended while heating.
– Keep a fire extinguisher, baking soda, or sand nearby in case of emergencies such as a small fire caused by spilled wax.
– Avoid overheating the wax, as this can lead to combustion or release toxic fumes.
Proper handling and storage of candle-making materials
– Wear gloves and long sleeves to protect your skin from burns when working with hot wax.
– Use heat-resistant containers and tools specifically designed for candle-making to prevent accidents.
– Store your fragrance oils, dyes, wicks, and other supplies in tightly sealed containers away from direct sunlight and heat sources.
– Keep children and pets away from your workspace to avoid accidents or ingestion of harmful materials.
Important safety measures to protect yourself and your workspace
– Place your workspace on a stable surface away from flammable objects like curtains or paper.
– Keep a clean work area to prevent clutter that could increase the risk of accidents or spills.
– Have a first aid kit handy in case of minor injuries such as cuts or burns.
– Educate yourself about the potential hazards associated with specific candle-making techniques or materials before trying them.
By following these safety tips and precautions, you can create candles safely at home while enjoying the process. Remember that while candle-making is an enjoyable craft, it requires attention to detail and caution to ensure both your personal safety and the safety of your surroundings.
Exploring Advanced Candle-Making Techniques Beyond the Starter Kit
Diving into soy wax or beeswax candles
While a Making Candles Starter Kit is a great way to begin your candle-making journey, it is also important to explore advanced techniques beyond the kit. One exciting avenue to explore is making candles using soy wax or beeswax. These alternative types of wax offer unique benefits and can elevate the quality of your homemade candles.
Soy wax is derived from soybean oil and is known for its clean burn, long-lasting scent throw, and environmentally-friendly properties. It is a renewable resource and produces minimal soot, making it a popular choice among candle enthusiasts. Beeswax, on the other hand, is produced by honey bees and has a natural golden color and sweet aroma. Beeswax candles have a longer burn time and emit negative ions that purify the air.
When working with soy wax or beeswax, it is important to note that they have different melting points compared to traditional paraffin wax. Soy wax typically melts at lower temperatures, while beeswax requires higher heat. It is recommended to research specific melting instructions for each type of wax before attempting new projects.
Creating specialty candles like votives, pillars, or container candles
Once you have gained some experience with basic candle-making techniques, you may want to explore creating specialty candles such as votives, pillars, or container candles. These types of candles can add variety and uniqueness to your collection.
Votives are small cylindrical candles that fit snugly into holders designed specifically for them. They are popular for their versatility and can be used in different settings such as table centerpieces or mood lighting on special occasions. Pillar candles are wider in diameter than regular tapered candles and are often crafted without the need for containers or molds. They make stunning decorative pieces on their own or arranged in groups.
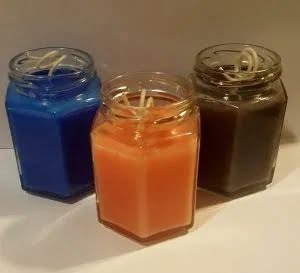
Container candles are made by pouring melted wax into containers such as jars or tins. They are versatile and can be made in various sizes, shapes, and colors. These candles are a great way to upcycle used containers or create personalized gifts.
Venturing into decorative techniques like embedding objects or using wax seals
As you become more confident in your candle-making skills, you can begin to explore decorative techniques that add flair and uniqueness to your creations. Embedding objects is one technique that allows you to incorporate small items such as seashells, dried flowers, or crystals directly into the candle. This adds visual interest and personalization to your candles.
Another exciting technique is using wax seals. Wax seals provide an elegant touch and allow you to create personalized designs on the surface of your candles. You can use special sealing wax sticks with a wick or even repurpose old crayons for added creativity.
When venturing into these advanced candle-making techniques, it is essential to conduct thorough research and practice proper safety precautions. Additionally, always ensure that any decorative elements used are heat-resistant and will not pose a fire hazard when lit.
By exploring these advanced techniques beyond the starter kit, you can continue to grow your candle-making skills and create unique candles that truly reflect your personal style and creativity.
Conclusion
Making candles with a starter kit is not only a popular hobby but also a creative and fulfilling experience. Throughout this article, we have explored the various aspects of candle-making – from selecting the right materials and tools to exploring different techniques and troubleshooting common issues. Now, in conclusion, let us delve into the joy and creativity that comes with making candles using starter kits.
Crafting personalized candles is an incredibly satisfying experience. With a starter kit, you have the freedom to choose your preferred wax type, fragrance oils, colors, and decorative elements. This allows you to create unique candles that reflect your personal style or match any occasion or season. The process of melting the wax, adding fragrance oils, pouring into molds, and watching your creation come to life can bring a great sense of accomplishment.
Handmade candles also make wonderful gifts for friends and loved ones. By customizing each candle with specific scents or designs, you can create a meaningful gift that shows your thoughtfulness and creativity. Whether it’s for birthdays, holidays, or special occasions, these homemade candles are sure to bring joy and warmth to anyone who receives them.
Finally, making candles with starter kits is an opportunity to encourage others to explore their own candle-making journey. By sharing your knowledge and experiences, you can inspire others to discover the joy of creating their own personalized candles. It’s a chance to bond over a shared passion and fuel their creativity as well.
In conclusion, creating beautiful candles with starter kits not only brings joy and satisfaction but also allows you to express your creativity in unique ways. Whether you’re making candles for yourself or as gifts for loved ones, this hobby offers endless possibilities for exploration and self-expression. So grab a starter kit today and embark on your own journey of candle-making creativity.

Welcome to my candle making blog! In this blog, I will be sharing my tips and tricks for making candles. I will also be sharing some of my favorite recipes.

