Introduction
Cake decorating tips are a great way to enhance candle making. With the right technique and supplies, anyone can create professional-looking and unique candles with these special tips. From textured designs and swirling patterns to intricate detailing, candle makers can create stunning pieces of art with cake decorating tips. These tiny tools allow for precise control over the design and texture of wax, letting candle makers craft masterpiece candles without having to invest in expensive materials or equipment. With the help of cake decorating tips, crafters can turn ordinary candles into works of art.
Materials Needed
Making candles with cake decorating tips can be a fun and creative way to put a unique and eye-catching spin on your home décor. Depending on the type of candle you plan to make, the materials needed vary greatly.
If you are just beginning with candle making, beeswax may be one of the best materials to use if you plan to make basic column or taper candles. Beeswax is soft and malleable, which allows it to be easily manipulated and shaped using the cake decorating tip. Paraffin wax is also easy to use for taper or column candles, however it is slightly more rigid than beeswax and requires more force when using a cake decorating tip. Soy wax can also work well for regular column or taper style candles; however some people may find that it doesn’t hold shape as well when using cake decorating tips – but it may still work depending on the size/shape of your candle.
When making container or jar candles, soy wax provides excellent adhesion so that your wicks don’t shift around too much during the cooling process. For these types of projects, beeswax might not adhere enough to the glass container walls, so soy wax would likely be the better option for this particular project. Paraffin wax is also an excellent choice for making container-style candles since it has superior melting point stability meaning your candle should burn longer than alternatives such as soy wax or palm oil waxes.
No matter what kind of candle making project you have in mind, there are several different types of material that can work very well with cake decorating tips so make sure you take into account what impacts each material will have on its overall shape before setting off on your next adventure!
Prepare the Wax
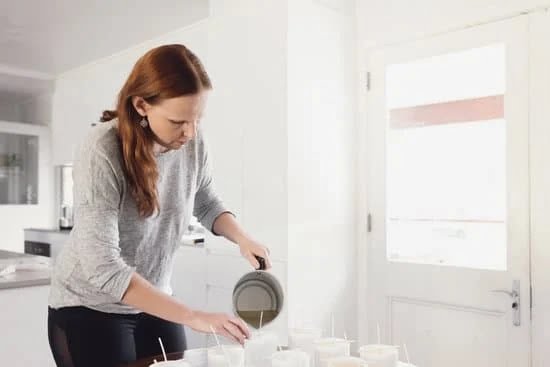
Before beginning to make candles with a cake decorating tip, the wax needs to be prepared by melting and working with it first. To do this, begin by finding an old pot that can be set over low heat on the stove or an electric hot plate designed for melting wax flakes. Make sure there is enough space in the pot to contain the amount of wax you plan on melting. Place the wax flakes in the pot and heat on a low temperature setting. Stirring regularly is essential to ensure all of the wax melts evenly and uniformly. If too much heat is used, it can cause cracks in your finished product. Once completely melted, use a thermometer to check that the temperature doesn’t exceed 195 degrees Fahrenheit as anything over this can create bubbles in your candles and affect their appearance. Depending on how much of your candle-making supplies you have purchased, you may also need to add dye at this step if additional colors are desired for your finished product. When fully mixed together, pour the melted wax into moulds and wait for them to cool before removing them from their cases.
Tips for Choosing the Right Tools
When making candles with cake decorating tips, there are a variety of tools available that can help craft beautiful designs. The most common type of tip is the star tip, which features long indentations along its edge that allows for delicate lines and swirls. Another type of tip is the round tip, featuring a smooth surface with no indents that can be used to create a variety of classic shapes and thicker bands around the candle. Character tips allow crafters to draw out real or imaginary characters like animals or cartoon characters on their candles. Plain writing tips are used for smaller details such as inscriptions or adding lettering to the candle’s surface. Leaf or petal tips have serrated edges that allow for the creation flower shapes and patterns. Other varieties include French, drop-flower, grass, cross-tip, multi-opening and specialty nozzles. Each different style offers unique advantages depending on what kind of design is desired by the user.
Instructions
1) Prepare your melting vessel. Place all of your wax, wicks and other ingredients in a double boiler (or a metal bowl over a pan of simmering water), stirring while they melt.
2) Once the wax is melted, add any color and scent to it that you desire. Stir until everything is completely combined.
3) Attach the wick to the bottom of a candle mold using glue or tape, then place it on top of an old pot or container, so that the wick is centered. This will ensure that the candle forms evenly.
4) Pour the melted wax into the mold and let it cool for 1-2 hours.
5) Remove your candle from the mold by carefully extracting it, being sure to hold onto both ends of the wick while you do so.
6) Trim away any excess wax from your candle so that it has a nice, even shape and is free of any jagged edges.
7) Using cake decorating tips like squeeze bottles and piping bags, you can create fun designs and patterns in the wax such as swirls or ombre layers! Simply fill up your bag with colored melted wax, attach various tip sizes then press down to pipe different designs on top of your candles!
Pro Tips and Tricks
When it comes to getting creative with your candles, cake decorating tips can be a great way to add unique details or revive loved designs. One pro tip to keep in mind is to make the most of the wax and fragrance you want in your candle. Estimate how much wax and fragrance will fill each mold without spilling over and choose your wicks accordingly. This allows for a more uniformed appearance between candles as well as fewer spills of valuable raw materials.
Another trick for using cake decorating tips with candles is to make sure that the wick is centered perfectly within the base of the container before moving onto more detailed decorations. To do this, use a sharp needle attachment from your hot glue gun or wax pen to create a hold for the wick in a spot where it won’t move around too much. Once secured, simply add glitter, paint, and other accessories around the edges or in different layers of wax within your candle design. This can be especially helpful if you’re looking for an ombre effect or trying out various color combinations with each mold design!
Safety Tips
When working with melted wax and hot tools, it is important to practice safety. Safety should be the top priority whenever making candles with cake decorating tips. Here are a few tips for staying safe:
1. Always use heat-proof gloves when handling melted wax or hot tools such as wicks, glue guns, and drying racks. Additionally, make sure that your working area is well ventilated as the fumes from melted wax can be hazardous if inhaled in high concentrations For extra safety, consider wearing safety goggles to protect your eyes from any splashes of wax.
2. Always keep small children and animals away from any open flames or hot objects while crafting candles with cake decorating tips.
3. Make sure you keep the craft supplies away from any sources of sudden heat such as ovens, stoves, and hot surfaces as these items can light the materials quickly on fire and cause a potential hazard.
4. Don’t leave melting wax unattended as it can overheat easily causing potential burn hazards for both people and pets nearby.
5. Place all electrical appliances such as hot glue guns out of reach from children and pets who may be tempted by its bright lights or delicious smell of melted wax when crafts are left unattended for extended periods of time.
Showcase
Making candles with cake decorating tips is an enjoyable and creative way to add flair to your DIY candles. With simple pastry bags, tips, and wax, you can elevate the look of your handmade creations. It’s a great way for novice candle makers to get creative with their designs without the need for expensive moulds or equipment.
To begin creating beautiful candle masterpieces using decorating tips, start by readying your ingredients and tools. Gather pre-waxed wicks, candle wax (preferably in pellet form), double boiler or wax melter, and parchment paper for easy clean up. Start out by measuring out equal amounts of wax into your melter – it’s best to stick with approximately two cups of pellets per 5-ounce container. Melt the waxstix over medium-low heat until they’re melted completely. After melting all of the pellets, let the mixture cool to around 150 degrees F; this keeps the flame low while still giving you a fluid consistency free of bubbles or agitation caused during melting.
Once your melted wax has cooled down and you have gathered your tools”pastry bags filled with premade colors of melted wax sheen and uniform in diameter tip”it may be helpful to do a practice round on parchment paper first before attempting on the inside of the mold. This allows for any potential rectifications needed such as adjusting color variations or angles for coating evenly within the molding stages ahead. Finally fill selected pastry bag activated colors from within each tip directly into chosen molds prepared ultimately created from colored decoration and finishing touches placed on top of casting paraffin surfaces using food-grade jewelry variety molds inserted into castings centers where flags come out as shapes from swirled edges that create extraordinary delicate designs similar to touching angels flying in flight projects atop cakes for hearts occasion varied celebrations like birthdays holidays weddings anniversaries special days all representing sophistication strength sensitivity character status sustainability sentiments never be forgotten moments constantly celebrated allowing memories shared together remember examples shown bring emulations colorful lights enhancing visibility glowing fires illuminating kindless joyous times thru transitions sun rises setting twilight hours reminiscing providing opportunity delicious option highlighting efforts event desserts adding flavor choice signs telling stories enabling appreciation understanding remains peace hope love beloved forevermore
Finally showcase your new candles made with cake decorating tips with a video or gallery! Have fun sharing images or videos via social media platforms like Instagram or YouTube so friends and family can admire your work too!
Conclusion
Making candles is a fun and rewarding way to express yourself creatively. With a few simple steps, you can use cake-decorating tips to make unique, elegant candles that will be the envy of your friends and family. Having the right resources helps ensure success when making candles.
To help aspiring candle makers, we’ve included a resources section with links to further information so they can get started on the right foot. We’ve provided links to sites that have tips and tutorials on how to make beautiful candles with cake decorating techniques. In addition, we’ve included a link to trusted manufacturers of wicks and waxes as well as sources for fragrances, beeswax, gel waxes, and other supplies you might need for your project. Finally, we’ve provided access to books about candlemaking for those who wish to learn more about the art of making candles from home.

Welcome to my candle making blog! In this blog, I will be sharing my tips and tricks for making candles. I will also be sharing some of my favorite recipes.


