Introduction
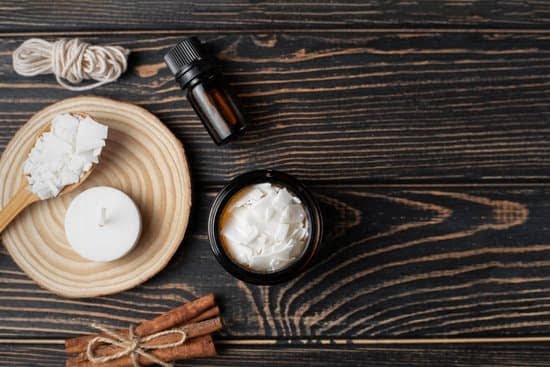
Making candles with cookie cutters is an inventive and fun way to create unique and personalized candles for all kinds of occasions. All you need for this project are some wax flakes, a double boiler, cookie cutters, wicks, and decorative items such as ribbon or paint. Then you can start making shapes and designs of any kind!
The process begins by melting the wax flakes in the double boiler. Next you pour the melted wax into your cookie cutters placed over wax paper on a non-stick surface. Then place a pre-cut wick in the middle of each candle shape. You can then decorate your candles as desired using ribbon or paint or leave them plain for simple elegance. After letting your candles cool completely overnight, simply Remove them from their molds, snip off excess wick , and enjoy the candles you have created!
Making candles with cookie cutters is an easy and economical way to customize any space with special designs that express your style or commemorate special occasions. The options are endless, from birthday cakes to snowflakes and hearts! Use different sizes to make tea lights or layer several shapes together for even more creative solutions. With imagination and care, you can turn ordinary cookie cutters into lovely handmade candles that add warmth and beauty to any room!
Choosing Your Cookie Cutters
When making candles with cookie cutters, you have a wide variety of shapes and sizes to choose from. Some popular designs include animals, characters, flowers, geometric shapes, stars, and even custom creations! Animal cookie cutters come in long and short shapes like cats, dogs, horses and birds. Character shapes vary from superheroes to Disney characters. Flower cookie cutters are great for creating scented or springtime candles”both round and multi-petal designs available. Geometric cookie cutters come in diamond, square and triangle shapes as well as other abstract configurations for an especially unique candle design project. Star cookie cutters also range from classical five-pointed stars to more complex or even 3D stars for an extra personalized touch. You can even create custom cookie cutter designs that fit perfectly with your desired candle theme such as Thanksgiving turkeys or wedding bells! Ultimately the choice is yours when it comes to selecting the perfect shape of your candle; just make sure it’s heat resistant so it doesn’t melt while you work!
Melt the Wax
Making candles with cookie cutters is a great project for those looking to create unique, personalized candles for any occasion. Before getting started, it is important to properly prepare the wax. The best way to melt the wax is to use a double boiler. Place it on medium heat and fill the pot with water and place the wax blocks into the top pot. Make sure not to get any water in the melted wax. The melting point of most types of paraffin wax will be between 120-140 degrees fahrenheit (49-60 degree celsius). If you need more control of your temperature, invest in an electric double boiler or oil-filled combo melter which provides flexibility and precision in moderating temperatures. Once your wax has reached optimal temperatures stir regularly until fully melted and then pour into the molds accordingly.
Adding Aroma and Color
Making candles with cookie cutters can be an enjoyable and creative endeavor. By adding aroma and color, you can make even more interesting and attractive candles. Blending fragrances and dyes is usually the most important components to creating unique candles. Experimenting with essential oils and natural waxes, such as soy or beeswax, can help you find the perfect scent for your candle. You can also find various dyes available in retail shops or online to add a vibrant accent to your masterpiece. If you are looking for something simpler, you may opt-in for scented wax tablets to easily incorporate desired fragrances. When it comes time to pour the melted wax into the desired ceramic molds or cookie cutters, adding a few small pieces of colorful film paper which will produce visually appealing patterns upon hardening. Utilizing special candle molds also aids in giving your project that finished, professional look everyone will appreciate.
Pouring the Wax
Making candles with cookie cutters is a easy and fun activity for all ages. To start the process, you will need some wax, cookie cutters, wicks, and a pot.
First, melt the wax in the pot using low-medium heat until it reaches 200F (93C). Once it has melted completely, carefully pour the wax into each of the cookie cutters so that they are evenly filled up to the top. Don’t pour too fast or too slow; maintain an even pace as each cookie cutter needs an even layer of wax. Using tongs or gloves, gently shake each candle mold to remove any air bubbles that may have formed while pouring.
Then dip the prepared wick into the center of each candle mold until it reaches the bottom corner and tie it with a knot at the top of the mold. Wait about 15 minutes for the wax to cool down and then carefully remove each candle from its mold. Garnish them with decorations such as glitter or confetti before lighting them up!
Cooling and Removing
It is extremely important to allow your candles to cool completely before attempting to remove them from the cookie cutters. If you attempt to remove them while they are still warm, they may stick and potentially warp or tear. Additionally, warping can also occur if your wax is too hot in relation to the size of the cookie cutter. It is important to gauge a proper pouring temperature for the cookie cutter being used in order to ensure that no warping occurs when cooling down.
Once cooled, you will want to give the sides of the cookie cutter a firm tap and wiggle it gently around until it shifts enough so you can grab hold and carefully lift the candle off its mold. Be sure to rub a little vegetable oil on the inside walls of your cookie cutters prior engaging each use as this will help with easy removal during future projects.
Finishing Touches
There are a variety of ways to decorate candles made with cookie cutters. You can make simple and elegant candles with no additional decorations or give them intricate carvings for 3-D effects. You can also use multiple colors of wax and layer them to create beautiful depth and designs, such as stripes or floral shapes. Cookie cutters are shaped like stars, hearts, animals, cars, numbers, letters, flowers, etc., so you have plenty of options for creative design ideas! You can paint your candles with acrylic or enamel paints or add gems, glitter and ribbons on the outside as well. Embedding items such as dried herbs into the candle’s wax also gives it an interesting look. Alternatively, you can mix melted wax with essential oils to give your creations pleasant aromas while they burn. Finally, you may use sealing wax to provide extra protection against moisture and the elements once your decoration is complete.
Conclusion
Creating candles with cookie cutters is a rewarding and enjoyable craft. With just a few supplies like wax, wicks and molds, you can make something truly special. Not only do you get a sense of accomplishment in creating an object out of essentially nothing but these simple items, but you’ve also got beautiful candles that can be used as decorative pieces or even lit to fill the room with a pleasant aroma. Making candles with cookie cutters is a great way to make holiday gifts or treats for your friends and family, as well as adding a personal touch to your own home dècor. So why not break out the molds and try making your own special candles today?

Welcome to my candle making blog! In this blog, I will be sharing my tips and tricks for making candles. I will also be sharing some of my favorite recipes.


