Introduction
Candle making is a fun and creative activity that anyone can do at home. It requires very few materials, but it will result in a beautiful handmade piece of art with each candle. Glazed ceramic, in particular, offers an opportunity to craft candles that are visually stunning and unique. The process of making a candle begins with melting wax in a double boiler, adding dyes and scent (if desired), pouring the mixture into the ceramic mould, preparing a wick for the candle insert and finally assembling it all together. Once set, the result will be an eye-catching glazed ceramic candle fit to display proudly in any room.
Materials Needed
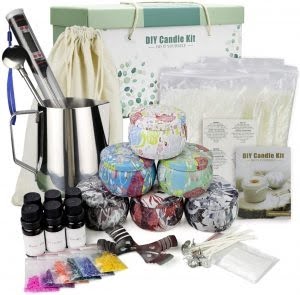
To make candles with glazed ceramic, you will need to pick up some supplies. For wax, you can choose from natural beeswax, paraffin wax, soy wax, or carnauba wax. Natural beeswax is a naturally occurring material and produces a light yellow hue when used in candle making. It is great for producing a soft scent and tends to be more expensive than other types of wax. Paraffin wax is a petroleum-based material that is quite heat-resistant and has good color retention. Its low cost makes it the most popular choice when it comes to making candles. Soy wax is derived from vegetable oils. It’s more environmentally friendly than paraffin and burns cooler and slower with minimal sooting. Carnauba wax, also known as Brazilian palm wax, is primarily used in combination with other types of mixtures due to its harder texture and higher melting point.
The shopping list of supplies for making candles with glazed ceramic includes: Natural Beeswax, Paraffin Wax, Soy Wax, Carnauba Wax, Ceramic Glaze (for pottery-like finish), Candle Wicks or Coreless Wick (to burn the candle), Fragrance Oils (to give your candles an added fragrance). You will also need some tools such as a double boiler for melting the waxes together or separately depending on your chosen recipe; containers for pouring the melted liquid; a thermometer to gauge the temperature; wick holders; moulds or jars if desired; fragrance oil feeder if you are using scent oils in your recipe; labels if you are planning on selling these as gifts/products. Finally, you will need safety equipment such as protective eye wear and gloves while working with hot liquid material throughout the process.
Preparing the Materials
1. Gather the necessary supplies: glazed ceramic (such as terracotta clay), wax, a wick, and a pot for melting the wax.
2. Prepare the terracotta clay by cleaning it with dish soap and warm water. Let it dry completely and then lightly sand any rough spots with fine-grit sandpaper.
3. Once you have prepared the clay pottery, you can set up your candle making space to prepare the wax and wick for assembling the candle. Make sure that you have enough space for all of your components before you begin melting the wax.
4. Depending on your desired size and shape of candle, cut your wax into small chunks that fit within the opening of your ceramic mould (or use pre-measured “pillows” specifically designed for candle making). Place these chunks in a pot on low heat to melt them.
5. While the wax is melting, measure out an amount of wick equal to twice the height of your finished candle plus an inch or two extra length wise just to be safe ” some people like their candles with more wick than not! Cut this amount of wick into separate pieces that are long enough to thread through the cavity in your ceramic moulds when they are laid flat against its interior surface during assembly – make sure it is tight going through!
6. When all components are ready, carefully pour melted wax into each ceramic mould until it is filled to top level (allow cooling time if needed). Then place a piece of cut wick in each one so that it forms an X through its center with ends hanging out from either side for easy removal once cooled again later on.
Making the Wick
Creating a DIY wick for your homemade candle is a complex process that requires patience and attention to detail. To begin, you must purchase a sustainer cap and wick tab, both of which can be found at craft stores. The sustainer cap should fit snugly around the edge of the ceramic making sure the bottom portion is just slightly larger than the opening of the vessel otherwise it will not stay firmly in place.
Next, cut a length of cotton string or twine depending on your desired size, typically 16 inches long, and thread it through the hole in the centre of the wick tab which will set your base. Then fold up each end as evenly as possible before tightly securing them inside both slots on either side of the sustainer cap. This specific folding method allows for enough tension to fully attach the wick when applied to its surface.
To attach your DIY wick to experience, dab some molten wax onto both sides and press into position with moderate pressure while holding in place for several seconds until completely secure ensuring there no air pockets from forming between it and ceramic surface. Lastly, use scissors or a lighter to cut off any excess material before setting aside for further use in candle projects.
Creating the Candle
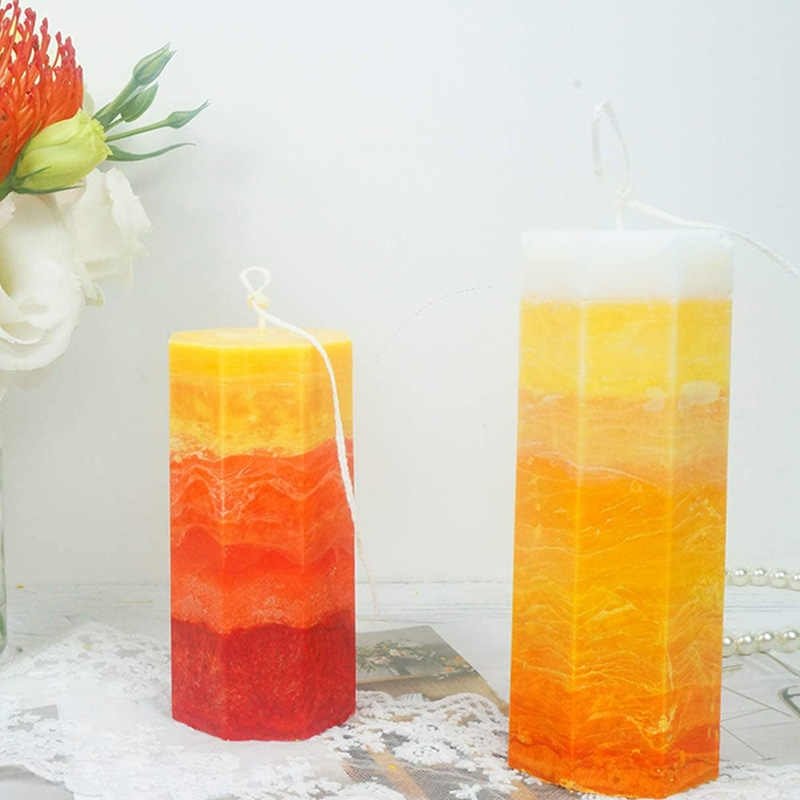
Creating the perfect candle involves many different techniques. When layering different waxes, you need to start with the color of wax near the hottest part of your flame and slowly add colors to create beautiful textures. You can also create lines or dots by pressing objects such as a chopstick, pencil or rod into each layer of colored wax.
Once you’re happy with your layers, it’s time to pour the wax into the glazed ceramic. Before pouring, preheat both the mould and the heated wax so they become equa-ly warm. Position your candle wick in the center of preheated mould and secure it with a wick holder or clay. Gently and slowly, pour your melted wax into the mould until it is filled. Allow your candle to cool at room temperature for 24 hours before burning or removing from the mould. If needed you can use a knife to carefully remove any excess wax around your edge before lighting up.
Finishing Touches
One idea for providing unique and decorative elements to the candle is to finish it off with a piece of ribbon at the top, or even around the entire candle. You could choose a color that matches or coordinates with the design you’ve chosen for your glazed ceramic. Another option would be to use twine instead of ribbon, and then either wrap it around the entire candle or tie a bow at the top.
You could also use rhinestones, glitter, or other embellishments to further personalize the candle. For example, if you’re using glazed ceramics with flowers on them, you could glue some small rhinestones onto each flower petal to create a sparkly effect. If you’re making a more abstract design, you could use glitter to give it an iridescent glow. Whatever type of decorations you decide upon should be done before you seal up your wooden wick holder and insert into your finished candles.
In addition to adding embellishments like these to make your candles special and unique, there are additional finishing touches that can improve them even more. You can add scented oil drops or drips over wax layers after they cool down enough that they won’t affect the burning quality of your candle. Sprinkling dried herbs or spices around and into your melted wax is also another way to add texture and fragrance – rosemary works especially well for this purpose! Finally, another nice finishing touch is applying wax sealing stickers onto your container once it’s been filled with melted wax. These can come in lots of different colors and designs, giving your final product an extra bit of flair!
Conclusion
Making candles with glazed ceramic can be a fun and enjoyable way to bring some unique flair to any home décor. Not only are they aesthetically pleasing, but they also bring a sense of elegance and tranquil ambiance to any room. Plus, the natural heat-retaining properties of glazed ceramic make it an excellent choice for keeping candles burning longer without messy drips or droppings. Craft stores and online retailers often carry all the materials one needs for candle making at reasonable prices.
To conclude, making candles with glazed ceramic is an attainable project that even the novice crafter can take on with a few simple supplies. The charming and inviting display these creations create are sure to be a conversation starter in any space. For further information on this craft, readers can try checking out books from their local library like “The Candle Maker’s Bible” by Judy Howard or additional resources such as Craftsy’s “Elegant Glazing Techniques for Porcelain & Ceramics” workshop.

Welcome to my candle making blog! In this blog, I will be sharing my tips and tricks for making candles. I will also be sharing some of my favorite recipes.


