Are you looking for a natural alternative to traditional candle-making materials? Making candles with vegetable shortening is a cost-effective and eco-friendly option that can provide numerous benefits. Not only is vegetable shortening readily available in most kitchens, but it also produces clean-burning candles that are safe for both indoor and outdoor use. This article will guide you through the process of creating your own candles using vegetable shortening.
One of the key advantages of making candles with vegetable shortening is the affordability and accessibility of this ingredient. Vegetable shortening, typically made from hydrogenated vegetable oils, such as soybean or palm oil, can easily be found in grocery stores and supermarkets. By opting for vegetable shortening over paraffin wax or other synthetic materials, you can create candles that are free from harmful chemicals and additives.
In addition to being a healthier choice, candles made with vegetable shortening have a longer burning time and produce less soot than their counterparts. The versatility of vegetable shortening allows you to customize your candles with different fragrances and colors, giving you the freedom to create unique scents and designs. Follow along as we explore the step-by-step process of making candles with vegetable shortening and discover how you can elevate your candle-making experience with this natural ingredient.
Choosing the Right Type of Vegetable Shortening for Candle Making
When it comes to making candles with vegetable shortening, choosing the right type of shortening is crucial for a successful and effective outcome. There are various options available in the market, each with its own unique characteristics that can affect the quality of your candles. Here are some key factors to consider when selecting vegetable shortening for candle making:
- Check the ingredients: Opt for vegetable shortening that is made from natural plant-based oils like soybean, palm, or coconut. Avoid shortening with added artificial ingredients or hydrogenated oils.
- Consistency: Look for a vegetable shortening that has a firm consistency at room temperature. This will ensure that your candles solidify properly and burn evenly.
- Scent neutrality: Choose a vegetable shortening that is odorless or has a mild scent. This will allow you to add your preferred fragrance oils without any interference from the shortening’s natural smell.
By paying attention to these factors, you can select the best type of vegetable shortening for your candle making project. Remember that high-quality shortening will contribute to the overall appearance, burn time, and fragrance of your homemade candles.
Tools and Materials Needed for Candle Making With Vegetable Shortening
When it comes to making candles with vegetable shortening, having the right tools and materials is essential to ensure a successful and enjoyable candle-making experience. Here are some of the items you will need to get started:
1. Vegetable Shortening: Of course, the main ingredient in making candles with vegetable shortening is the shortening itself. Make sure to choose a high-quality vegetable shortening that is specifically designed for candle making. This will ensure that your candles burn evenly and emit a beautiful scent.
2. Candle Wicks: Wicks are crucial for any candle-making project. When using vegetable shortening, it’s important to select wicks that are suitable for this type of wax. Cotton wicks work well with vegetable shortening candles and come in various sizes depending on the diameter of your candle molds.
3. Fragrance Oils: If you want to add fragrance to your vegetable shortening candles, you will need quality fragrance oils. These oils come in a wide variety of scents, allowing you to customize your candles according to your preferences.
In addition to these key ingredients, you will also need basic tools such as a double boiler or microwave-safe container for melting the vegetable shortening, a stirring utensil, thermometer, and candle molds. Having these tools and materials on hand will make the process of making candles with vegetable shortening smooth and efficient.
| Tools and Materials | Description |
|---|---|
| Vegetable Shortening | High-quality shortening specifically designed for candle making. |
| Candle Wicks | Cotton wicks suitable for use with vegetable shortening. |
| Fragrance Oils | Quality oils available in various scents for customization. |
Step-by-Step Guide on How to Melt and Prepare the Vegetable Shortening
When it comes to making candles with vegetable shortening, the process of melting and preparing the shortening is a crucial step in ensuring the success of your candle-making venture. Here is a detailed guide on how to effectively melt and prepare vegetable shortening for creating beautiful candles.
Step 1: Gather Your Materials
Before you begin melting the vegetable shortening, make sure you have all the necessary materials at hand. This includes a double boiler or microwave-safe container, measuring cup, stirring utensil, thermometer, and of course, the vegetable shortening. It’s important to use a high-quality vegetable shortening that is specifically designed for candle making to achieve the best results.
Step 2: Melting the Vegetable Shortening
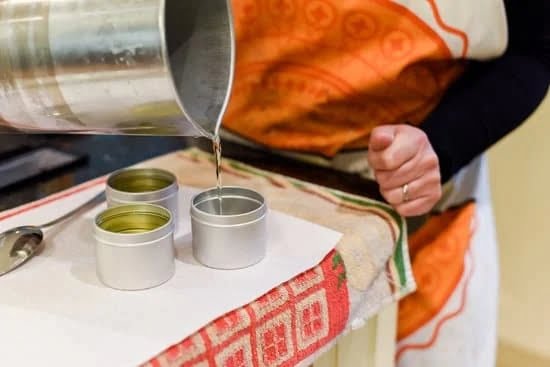
There are two common methods for melting vegetable shortening for candle making: using a double boiler or microwave. If using a double boiler, fill the bottom pot with water and place the top pot with vegetable shortening on top. Heat gently until the shortening melts completely. If using a microwave, heat in short intervals and stir frequently until thoroughly melted. Make sure not to overheat the shortening as it can affect the quality of your candles.
Step 3: Preparing for Candle Making
Once the vegetable shortening is melted, you can now prepare it for candle making by adding any desired fragrance oils or candle dyes. Stir gently until well incorporated and ensure that the temperature of the melted shortening is suitable for pouring into your candle molds. Remember to work quickly but carefully during this step to prevent premature solidification of the melted mixture.
By following these steps carefully, you can successfully melt and prepare vegetable shortening for making candles that are not only aesthetically pleasing but also environmentally friendly. Experiment with different fragrances and colors to create unique candles that will surely impress both yourself and others when lit up in your space.
Adding Fragrance and Color to Your Vegetable Shortening Candles
Once you have successfully melted and prepared your vegetable shortening for candle making, the next step is to add fragrance and color to enhance the aesthetic and sensory experience of your candles. Adding fragrance can help create a pleasant ambiance in your space, while adding color can make your candles visually appealing.
When it comes to choosing fragrances for your vegetable shortening candles, it is important to select scents that complement each other and suit the intended use of the candle. You can opt for essential oils or fragrance oils specifically designed for candle making. Be sure to follow recommended guidelines for usage rates to ensure that the scent is not overpowering.
In terms of adding color to your vegetable shortening candles, you have various options available. You can use liquid dyes, powdered dyes, or even natural colorants such as spices or herbs. It is important to use only dyes that are safe for use in candles and follow instructions carefully to achieve the desired hue without compromising the quality of your candles. Experiment with different combinations of colors and fragrances to create unique candles that reflect your personal style.
Pouring the Melted Vegetable Shortening Into Candle Molds
Making candles with vegetable shortening is a fun and easy way to create homemade candles that are environmentally friendly and non-toxic. One of the crucial steps in this process is pouring the melted vegetable shortening into candle molds. This step not only determines the shape and size of your candles but also ensures that they cool and solidify correctly.
Choosing the Right Candle Molds
Before you start pouring the melted vegetable shortening, it’s essential to choose the right candle molds for your project. You can use silicone molds, metal molds, or even recycled containers like mason jars or tin cans. Silicone molds are great because they are flexible and make it easier to remove the finished candles. Metal molds are sturdy and can withstand high temperatures, making them ideal for hot wax.
Preparing the Candle Molds
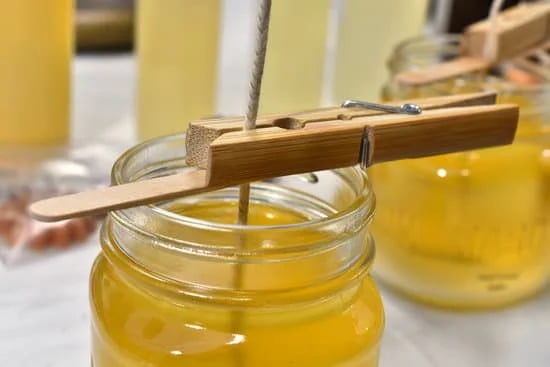
Prior to pouring the melted vegetable shortening into the candle molds, make sure they are clean and dry. You can use rubbing alcohol to wipe down silicone molds if needed. If you’re using metal molds, consider greasing them lightly with vegetable oil to aid in releasing the candles once they have solidified. Additionally, place a wick at the center of each mold and secure it in place by placing a pencil or chopstick across the top of the mold.
Cooling and Solidifying the Vegetable Shortening Candles
After pouring the melted vegetable shortening into your candle molds, the next crucial step in making candles with vegetable shortening is allowing them to cool and solidify properly. This process is essential to ensure that your candles set correctly and are ready for use.
It is important to place the filled candle molds in a cool, dry area where they won’t be disturbed while they solidify. The time it takes for the vegetable shortening candles to cool and harden can vary depending on factors such as the size of the candles and the temperature of the room. It is recommended to leave them undisturbed for at least a few hours to allow sufficient time for solidification.
One way to test if your vegetable shortening candles have fully solidified is by gently pressing on the surface. If it feels firm and doesn’t leave an indentation, then they are likely ready. Once the candles have completely hardened, carefully remove them from the molds. Your homemade vegetable shortening candles should now be ready for lighting and enjoying.
| Vegetable Shortening Candle Solidification | Process Description |
|---|---|
| Cooling Time | The time needed for proper cooling varies based on factors such as candle size and room temperature |
| Solidification Check | Gently press candle surface to check if firm; no indentation indicates readiness |
Tips and Tricks for Troubleshooting Common Issues in Vegetable Shortening Candle Making
When making candles with vegetable shortening, it is important to be prepared for some common issues that may arise during the process. Here are a few tips and tricks to help troubleshoot these issues and ensure that your candle-making experience goes as smoothly as possible:
- Uneven Burning: If you notice that your vegetable shortening candle is burning unevenly, it may be due to air drafts in the room or the wick not being centered properly. To fix this issue, try moving your candle to a draft-free area and adjusting the wick so that it is centered in the middle of the candle.
- Sinking Wicks: Sometimes, wicks can sink into the melted vegetable shortening before it solidifies, causing them to appear too short once the candle has cooled. To prevent this issue, try securing your wick in place using a skewer or chopstick until the vegetable shortening has completely hardened.
- Frosting: Frosting can occur when white spots or crystals form on the surface of your vegetable shortening candles. This is a common issue with natural waxes and can be caused by temperature fluctuations during cooling. To minimize frosting, try pouring your melted vegetable shortening at a slightly higher temperature and avoid sudden changes in temperature while the candles are setting.
By being aware of these common issues and implementing these tips and tricks, you can enhance your experience in making candles with vegetable shortening. Remember that practice makes perfect, so don’t be discouraged if you encounter challenges along the way. With patience and perseverance, you’ll soon become an expert in creating beautiful and fragrant vegetable shortening candles for yourself or as wonderful gifts for family and friends.
- Cracks or Sinkholes: If you find cracks or sinkholes in your finished vegetable shortening candles, it could be due to rapid cooling or air bubbles trapped within the mixture. To avoid this problem, try letting your melted vegetable shortening cool at a slower pace by covering it with a towel during cooling. You can also gently tap the sides of the mold to release any trapped air bubbles before the mixture solidifies completely.
- Poor Scent Throw: If you’re not getting enough fragrance from your vegetable shortening candles when burning them, consider increasing the amount of fragrance oil used next time or using stronger scents for better scent throw. Be sure to follow recommended guidelines for fragrance oil usage to avoid overpowering scents.
With these additional insights into preventing and addressing common challenges, anyone can successfully craft their own beautifully scented candles using vegetable shortening as a safe alternative wax option. The next time you decide to embark on a candle-making project,Making Candles With Vegetable Shortening will surely add another layer creativity into this traditional craft.
Conclusion
In conclusion, making candles with vegetable shortening is a wonderful and creative way to express your personal style while also enjoying the benefits of a natural, eco-friendly alternative to traditional paraffin candles. Not only are vegetable shortening candles easy to make, but they are also cost-effective and can be customized to suit any fragrance or color preference. By using simple tools and materials that are readily available, anyone can try their hand at candle making with vegetable shortening.
When choosing the right type of vegetable shortening for candle making, it is important to consider factors such as melting point, consistency, and scent compatibility. By following a step-by-step guide on how to melt and prepare the vegetable shortening, adding fragrance and color can easily transform your candles into unique works of art.
Pouring the melted vegetable shortening into candle molds allows for creativity in shape and design, while allowing the candles to cool and solidify properly will ensure a high-quality finished product.
Overall, making candles with vegetable shortening is a rewarding experience that can be enjoyed by beginners and experienced crafters alike. With these tips and tricks for troubleshooting common issues in candle making with vegetable shortening in mind, there is nothing stopping you from creating beautiful, fragrant candles that not only illuminate your space but also bring joy to those who use them.
So why not give it a try? Let your creativity shine through as you embark on this fun and environmentally friendly journey of making candles with vegetable shortening.

Welcome to my candle making blog! In this blog, I will be sharing my tips and tricks for making candles. I will also be sharing some of my favorite recipes.


