## Making Concrete Candle Holders
Making concrete candle holders can be an incredibly rewarding and simple process with surprisingly few materials. Concrete can provide each candle holder with a unique look that cannot be achieved with traditional materials. Here are some simple steps to making candle holders out of concrete:
### What You Will Need
– Concrete mix
– 5-10 pound bucket
– Large container
– Water
– Candles
– Molds of your chosen shape (silicone molds work well)
– Stirring spoon
– Sandpaper
– Wax paper
### Step-by-Step Process
1. Start by adding the concrete mix into a 5- 10-pound bucket and pour in the water. It is important to ensure you are following the directions for the ratio of mix to water.
2. Stir the concrete mix and water until you have a thick but pourable texture.
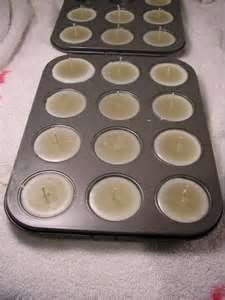
3. Lay down wax paper in the molds and pour the concrete in. Make sure the mold is completely filled and then shake the mold to ensure there are no air bubbles in the concrete.
4. Wait about 25 minutes for the concrete to start curing and then remove the excess concrete pouring over the edge of the mold.
5. Allow the concrete to cure for 24 hours before attempting to remove the candle holder from the mold.
6. To remove, simply twist the sides of the mold until the candle holder comes out.
7. If there are any sharp edges, they can be lightly sanded away.
8. Once the candle holder is out of the mold, place your candles inside and enjoy!
Making concrete candle holders is a great way to add a personal touch to your décor. With the right supplies and time you can have beautiful and unique candle holders that friends and family will love! ### Making Concrete Candle Holders
Concrete candle holders are a beautiful addition to any home décor. These candle holders can be used as centerpieces for a dining table, as accents for a fireplace mantel, or just as an additional light source in any room. Making them is a straightforward process that requires only a few supplies and a little bit of time.
#### Materials Needed
– Concrete
– Rubber gloves
– Mixing basin
– Stirring stick
– Mold (silicone works best)
– Candles
#### Preparation
Begin by mixing together the concrete according to the package directions. It is important to use only the amount that is necessary, as concrete can dry out quickly. Next, put on the rubber gloves to protect your hands.
#### Making the Candle Holders
Now that everything is ready, it is time to create the candle holders! Start by pouring the concrete into the mold. Make sure that it is evenly distributed throughout the entire area, and that all of the gaps are filled. Tap the sides of the mold to help ensure that the concrete is even throughout. Then, insert the candles into the concrete. Depending on the size of your mold, you may need to use more than one candle for each holder.
#### Finishing Up
After the concrete has had time to set, carefully remove the candle holders from the mold. Use caution, as wet concrete can be brittle and may break. Once you have removed them from the mold, allow them to dry and harden for at least 24 hours.
### Enjoy your New Candle Holders
After the concrete has dried, you can now enjoy your new candle holders! The candle holders will help to bring a beautiful new look to your home, and you can be proud that they were handmade. With just a few simple steps, you can be the proud creator of unique, handmade concrete candle holders.

Welcome to my candle making blog! In this blog, I will be sharing my tips and tricks for making candles. I will also be sharing some of my favorite recipes.

