Drip candles have a unique and mesmerizing beauty that can enhance any space. The process of making drip candles is not only enjoyable but also allows for artistic expression and creativity. In this article, we will delve into the art of creating drip candles in a coffee can. Whether you are a seasoned candle maker or just starting out, this guide will provide you with the necessary information to embark on your own drip candle journey.
Drip candles have gained popularity due to their versatility and charm. The dripping wax creates intricate patterns as it cascades down the surface of the candle, resulting in a visually stunning effect. From elegant and intricate designs to whimsical and playful ones, drip candles offer endless possibilities for customization.
They add ambiance to any setting, whether it’s a romantic dinner, a cozy night in, or even as decorative pieces for special occasions like weddings or parties. If you haven’t tried making drip candles before, now is the perfect time to explore this exciting art form.
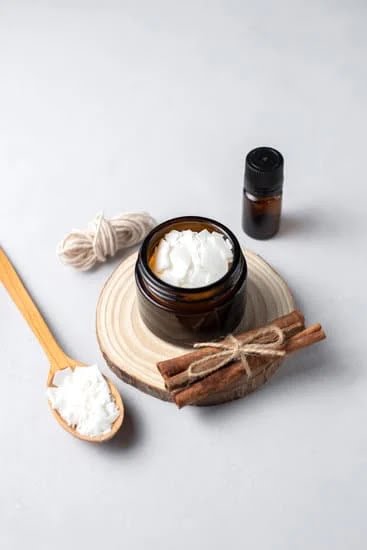
Before you begin your drip candle creation, it’s important to gather all the necessary supplies. We will discuss everything you’ll need in detail later in this article, but some key items include wax, wicks, a coffee can as a mold, dye for adding color, fragrances for pleasant scents, and various tools for creating different drip patterns.
With these supplies on hand and a little bit of patience and creativity, you’ll be ready to start making your own unique drip candles.
In the following sections of this article, we will guide you through each step of the process of creating drip candles in a coffee can. From preparing the coffee can mold and choosing the right wax to adding color and scent enhancements, we will cover it all.
We’ll also provide detailed instructions for achieving different drip patterns and offer tips for avoiding common mistakes during the creation process. Additionally, we’ll explore innovative ideas for displaying and using your finished drip candles.
So grab your coffee can, gather your supplies, and let’s dive into the art of creating drip candles. With this guide as your companion, you’ll discover the joy and satisfaction in making these captivating candles that will add a touch of magic to any space.
The Versatility and Charm of Drip Candles
Drip candles are not only a unique form of candlemaking, but they also offer versatility and charm that can add a special touch to any space. The method involves allowing melted wax to drip down the sides of a candle, creating beautiful and intricate patterns. The result is a visually stunning candle with an organic and rustic appeal.
One of the main reasons why you should give drip candles a try is their versatility. Unlike traditional candle making methods, where the shape and design are predetermined, drip candles allow for endless creativity. You have complete control over the pattern and design by manipulating the way the wax drips down the sides of the candle. This opens up a world of possibilities, from elegant and subtle patterns to bold and dramatic designs.
Furthermore, drip candles possess their own unique charm. The irregular drips and uneven layers create an aesthetic that cannot be replicated by other types of candles. They can add character to any setting, whether it’s for everyday use or for special occasions like weddings or parties. Drip candles also make great gifts, as they showcase your creativity and effort in making something truly special.
To create your own drip candles, you will need some basic supplies such as a coffee can as a mold, wax pellets or blocks, wicks, dye or color chips (optional), fragrance oils (optional), and a heat source like a double boiler or microwave. Once you have gathered these supplies, you can start experimenting with different techniques to achieve various drip patterns.
Give drip candles a try, and discover the beauty and charm they bring to your space. Whether you choose to display them on their own or incorporate them into home décor arrangements, their one-of-a-kind appearance is sure to impress. So gather your supplies and unleash your creative side – it’s time to embark on your drip candle journey.
Gathering Your Supplies
Gathering the right supplies is an essential step when it comes to creating the perfect drip candles in a coffee can. To ensure that you have everything you need for a successful project, here are some items that should be on your supply list:
- Coffee Can: The first item on your list should be a clean coffee can. This will serve as your mold for the drip candle. Make sure to choose a can that is tall enough to hold the desired length of your candle.
- Wax: Selecting the right wax is crucial for achieving the desired effect in your drip candles. Paraffin wax is commonly used for its affordability and accessibility, but you can also experiment with other types such as beeswax or soy wax.
- Wick: A good-quality wick is necessary to ensure that your candle burns properly. For drip candles, it’s best to choose a thicker wick to support the weight of the melting wax.
- Candle Dyes: If you wish to add color to your drip candles, consider purchasing candle dyes. These dyes are specifically designed for use in candles and come in various shades. Remember that adding too much dye can affect how well the wax drips, so start with a small amount and adjust as needed.
- Fragrance Oils (Optional): If you want to fill your space with a pleasant aroma while enjoying your drip candles, consider adding fragrance oils. Choose scents that complement the ambiance you want to create or match the theme of an event.
- Heat Source: To melt the wax, you will need a heat source like a double boiler or a melting pot dedicated solely for candle-making purposes.
- Thermometer: Having an accurate thermometer ensures that you maintain proper temperature control while melting and pouring the wax.
- Protective Gear: Working with hot wax requires caution, so don’t forget essential protective gear like gloves and goggles to keep yourself safe.
By gathering these supplies before starting your drip candle project, you will be well-prepared to create stunning and unique candles that add charm and ambiance to any space.
Preparing the Coffee Can
Once you have gathered all the necessary supplies for your drip candle project, it’s time to prepare the coffee can that will serve as your mold. Preparing the coffee can correctly is essential for optimizing the success of your drip candle creation. Here are some tips and tricks to ensure your coffee can is ready for the job.
Choosing the Right Size
The size of your coffee can will determine the length and width of your drip candle. Consider how long you want your candles to be and choose a coffee can that is deep enough to accommodate that length. Keep in mind that candles tend to shrink slightly as they cool, so it’s better to have a slightly longer can than necessary.
Cleaning and Lubricating
Before using the coffee can as a mold, make sure it is clean and free from any debris or residue. Wash it thoroughly with warm soapy water and dry it completely. To make sure the candle releases easily from the mold, lubricate the inside of the can with a thin layer of vegetable oil or non-stick cooking spray.
Securing Your Wick
To ensure that your wick stays in place during pouring and setting, secure it at one end of the coffee can. One option is to use a small piece of adhesive tape or hot glue to attach one end of the wick to the bottom of the can. Make sure it is centered and pulled taut before proceeding with pouring your wax.
Create an Optimal Work Space
Drip candles can get messy, so it’s important to create a designated work area that is easy to clean up afterwards. Place newspaper or a plastic tablecloth on your workspace to catch any wayward drips or spills. Keep paper towels or rags nearby for quick cleanup and consider using gloves if you prefer not getting wax directly on your hands.
Taking these precautions and following these tips will ensure that your coffee can is prepared optimally for creating your drip candles. Once your can is ready, you can move on to the next step of choosing the right wax to achieve the desired effect in your candles.
Choosing the Right Wax
When it comes to creating drip candles in a coffee can, one of the most important decisions you’ll make is choosing the right wax. The type of wax you select will not only determine how your drip candle performs but also its appearance and burn time. In this section, we will explore different wax options for your drip candle project, so you can make an informed decision and create candles that meet your desired specifications.
1. Paraffin Wax:
Paraffin wax is a popular choice for drip candle making due to its affordability and easy availability. It has a low melting point, which makes it ideal for achieving the desired drippy effect. This type of wax offers a smooth and glossy finish when hardened, adding an elegant touch to your drip candles.
2. Beeswax:
Known for its natural scent and golden color, beeswax is a great choice if you prefer an all-natural option for your drip candles. Beeswax has a higher melting point compared to paraffin wax, resulting in slower burning candles with less dripping. Additionally, it produces a warm and cozy ambiance when lit.
3. Soy Wax:
For those looking for an eco-friendly option, soy wax is worth considering. Made from soybean oil, this wax provides a clean and even burn without emitting harmful toxins into the air. Soy wax is known for its excellent fragrance-holding capabilities, allowing you to enhance your drip candles with enticing aromas.
4. Palm Wax:
If you want to add an exotic touch to your drip candles, palm wax may be the right choice for you. Derived from palm tree oil, this type of wax has a unique crystalline appearance that adds depth and texture to your finished candles. Palm wax also has good fragrance retention qualities and burns evenly.
Remember, each type of wax has different characteristics and specific requirements when it comes to melting and pouring temperatures. It’s essential to follow the manufacturer’s instructions for your chosen wax to ensure a successful drip candle creation.
By exploring different wax options, you can personalize your drip candles according to your preferences and achieve the desired look and performance. Whether you opt for paraffin, beeswax, soy wax, or palm wax, each choice offers its own unique qualities that will make your drip candle project one-of-a-kind.
Adding Color and Scent
One of the most enjoyable aspects of making drip candles in a coffee can is the ability to customize them with different colors and scents. Adding color and scent not only enhances the visual appeal of your candles but also creates a delightful ambiance when they are lit.
When it comes to adding color to your drip candles, there are various options available. The simplest way is to use wax dye chips or liquid dyes that are specifically designed for candle making. These dyes come in a wide range of colors, allowing you to create vibrant or subtle shades depending on your preference. It’s important to follow the instructions provided by the manufacturer when using these dyes to achieve the desired color intensity.
In addition to color, you can also incorporate fragrances into your drip candles for an extra sensory experience. There are many fragrance oils available that are safe for candle making and come in an array of scents such as lavender, vanilla, or citrus.
However, it’s important to keep in mind that some people may have allergies or sensitivities to certain fragrances, so it’s best to choose fragrances that have broad appeal. Start by adding a small amount of fragrance oil during the melting process and gradually increase the amount until you achieve your desired scent strength.
To keep track of the dyes and fragrances you use in your drip candles, consider creating a log or record sheet where you can note down the combinations and amounts used. This will help you replicate successful color and scent combinations in future projects.
Enhancing your drip candles with color and scent allows you to unleash your creativity and personalize each candle according to your own preferences or gift recipients’ tastes. Whether you prefer vibrant hues with invigorating scents or pastel shades with calming fragrances, experimenting with different combinations will result in unique and captivating creations.
| Supplies | Description |
|---|---|
| Wax dye chips or liquid dyes | Used to add color to the candles. |
| Fragrance oils | Adds scent to the candles for a pleasant aroma when lit. |
| Log or record sheet | A tool to keep track of the dyes and fragrances used in each candle for future reference. |
Drip Candle Techniques
Drip candles are not only captivating to look at, but they also offer a unique way to express your creativity. One of the most exciting aspects of creating drip candles is experimenting with different drip patterns. From simple and elegant to complex and intricate, the possibilities are endless. In this section, we will provide step-by-step instructions for achieving various drip patterns, allowing you to take your drip candle creations to the next level.
Basic Drip Pattern
To start with a basic drip pattern, light your pre-made or handmade drip candle and hold it vertically over a heat-resistant surface. As the wax starts melting, allow it to drip naturally on all sides of the candle in a random pattern. Rotate the candle slowly while dripping to ensure an even distribution of wax along its surface. This technique creates a charming and rustic look that works well for any occasion.
Spiral Drip Pattern
For those looking to add a touch of whimsy to their drip candles, the spiral pattern is an excellent choice. Gently tilt your lit candle towards one direction and allow the melted wax to flow down in a spiral motion around the circumference of the candle. Continue tilting and rotating the candle as you go along to create an evenly distributed spiral pattern from top to bottom.
Layered Drip Pattern
If you want to achieve a more visually appealing and complex design, consider trying out the layered drip pattern technique. Start by choosing two or more colored waxes that complement each other. Begin dripping one color onto your lit candle using any preferred method mentioned earlier (basic or spiral). After allowing it to dry slightly, switch colors and repeat the process, building layers of different colors on top of each other until you achieve your desired effect.
Controlled Drip Pattern
For those who prefer a more controlled and precise drip pattern, the controlled drip technique is ideal. To achieve this, use a heat-resistant tool such as a spoon or a stick to carefully guide the melted wax drips in specific directions. You can create straight lines, circles, or other geometric shapes by controlling the flow of wax with your chosen tool.
Remember, practicing these techniques may take time and patience to master. Don’t be discouraged if your initial attempts do not turn out exactly as you envisioned. The beauty of drip candles lies in their imperfections and unique characteristics that make each piece truly one-of-a-kind.
By exploring these various drip patterns and techniques, you will be able to add a personal touch to your drip candle creations while showcasing your artistic abilities. So gather your supplies, experiment with different patterns, and let your creativity shine through as you embark on your journey into the world of drip candle making.
Tips for Safe and Successful Drip Candle Creation
Safety should always be a top priority when engaging in any kind of crafting project, and making drip candles is no exception. To ensure a safe and successful drip candle creation process, there are several key tips to keep in mind.
First and foremost, it is important to have a designated work area that is well-ventilated. Drip candle making can involve the use of heat sources, melting wax, and potentially strong scents from dyes or fragrances. Setting up your workspace in a well-ventilated area, such as near an open window or using a fan, will help to dissipate any fumes and prevent them from becoming overpowering.
Another crucial tip for safe drip candle creation is to always use caution when handling hot wax. It is recommended to wear heat-resistant gloves or use tongs when working with melted wax to avoid burns. Additionally, be mindful of the temperature of the wax itself – overheated wax can cause splattering or boiling over, which can lead to injuries. Always follow the manufacturer’s instructions for melting and handling the specific type of wax you are using.
In addition to safety precautions with hot wax, it is important to handle any dyes or fragrance oils with care. Some dyes may stain surfaces or skin if not properly handled, so be sure to wear gloves and protect your work area accordingly. When adding fragrance oils, remember that different oils have varying flashpoints – the temperature at which they can ignite – so it is important to choose oils specifically designed for candle-making and follow recommended guidelines for their usage.
By following these safety tips during your drip candle creation process, you can minimize potential risks and ensure a safe experience while enjoying this unique art form. Remember, adhering to proper safety practices not only protects yourself but also allows you to fully immerse yourself in the creative joy of making beautiful drip candles without worry.
Innovative Ideas for Displaying and Using Your Drip Candles
Once you have successfully created your drip candles in a coffee can, it’s time to showcase your artistic creations. Drip candles have a unique charm and versatility that allows them to be used in various ways beyond traditional candle holders. Here are some innovative ideas for displaying and using your drip candles that will surely unleash your creative side.
One idea to consider is using the drip candles as decorative accents in vases or jars filled with colored sand or small pebbles. This not only adds a visually appealing element to any space but also provides an opportunity to play with different color combinations. Experiment with contrasting colors or stick to a monochromatic theme for a more sophisticated look.
Another creative way to use your drip candles is by incorporating them into centerpiece displays. Arrange them on a small tray or platter along with other decorative elements such as flowers, seashells, or ornaments. This creates a stunning focal point for dining tables, mantels, or any surface that needs an extra touch of elegance.
If you’re feeling adventurous, try suspending your drip candles from the ceiling using clear fishing line or narrow ribbons. This unique display method adds an element of whimsy and creates an ethereal ambiance in any room. You can hang them individually at varying heights or group them together for a cascading effect.
In addition to displaying, there are also many practical ways to use your drip candles. For example, you can repurpose old wine bottles by inserting the candles into the bottle necks and creating stylish torches for outdoor gatherings. Alternatively, place them in hurricane lanterns or mason jars with secure lids for portable lighting during camping trips or power outages.
The possibilities with drip candles are truly endless when it comes to unleashing your creativity. Whether you choose to display them as standalone pieces of art or utilize them for functional purposes, your imagination is the only limit. So go ahead and explore different ways to showcase your drip candles and let your creative side shine.
Conclusion
In conclusion, creating drip candles in a coffee can is a unique and enjoyable craft that combines creativity and practicality. The versatility and charm of drip candles make them a rewarding project to embark on, whether you are an experienced crafter or a beginner looking to try something new. By following the step-by-step instructions outlined in this article, you can create beautiful and customized drip candles that serve as both decorative pieces and functional light sources.
Gathering the necessary supplies for your drip candle creation is crucial to ensure successful results. From choosing the right wax to adding color and scent, each element plays an important role in the final outcome. Additionally, taking the time to properly prepare your coffee can as a mold will optimize your results, allowing you to achieve the desired drip patterns.
While safety should always be a priority when engaging in any craft activity, following the tips provided in this article will help you avoid common mistakes and ensure a safe experience. Finally, let your creativity shine by exploring innovative ideas for displaying and using your drip candles. Whether it’s creating unique centerpieces or incorporating them into daily rituals like meditation or relaxation routines, there are endless possibilities to unleash your creative side.
So why not give it a try? Embark on your own drip candle journey today and discover the joy of creating these stunning works of art. With patience, practice, and a little bit of imagination, you can become skilled at crafting drip candles that bring beauty and ambiance into any space. So grab your supplies, gather inspiration from various techniques, and enjoy the process of making truly one-of-a-kind drip candles in a coffee can.

Welcome to my candle making blog! In this blog, I will be sharing my tips and tricks for making candles. I will also be sharing some of my favorite recipes.


