Introduction
Making free standing candles is a great way to add atmosphere to any room or space. There are many different types of free standing candles, such as votive, tapered, and pillars. Votive candles are small and are usually housed in a metal or glass container that has a handle so the candle can be safely moved from one location to another. Tapered candles tend to be taller than votives and come in an array of widths; their ability to drip wax onto their sides makes them ideal for outdoor evening lighting. Pillar candles have sturdy bases that allow them to remain upright when placed on flat surfaces; some pillar candles can also come with elaborate decorations such as seashells, glitter, and patterns.
Benefits of Making Free Standing Candles
Making your own free standing candles can be a great way to express your creativity and have fun! There is something very rewarding about creating beautiful things, and making candles is no exception. It’s also an amazing opportunity to get creative with shapes and colors. You can make amazing, intricate designs by mixing different types of wax or adding handmade decorations. You also get to choose your own scents, which makes the candlemaking experience even more enjoyable as you explore different fragrances. Finally, the satisfaction of making something with your own two hands that could potentially last for many years is remarkable.
Supplies Needed
The supplies needed to make free standing candles are wax, wicks, dye, fragrance, molds, a thermometer, and a double boiler. Wax is the medium used to form the candle. The type of wax can vary based on the desired size, shape and strength of the candle. Wicks help provide an even burn and need to be appropriate for the type of wax chosen. Dye and fragrances are optional but can give a nice addition to the candle that may appeal to the senses. Candles must be formed in some kind of container or mold. A thermometer helps monitor the melting temperature of wax so it does not exceed its safe burning point. Lastly a double boiler allows wax to melt evenly without exceeding 180°F which is important when using multiple colors or fragrances. Each of these supplies play an important role in creating safe and reliable free standing candles.
Step-by-Step Instructions
1. Begin by selecting the wax and width of the candle you would like to make. Coreless wax sheets can be used for wickless candles, which will be secured with a rigid mold. If using moulded wax sheets, select one that closely matches the size of your wick.
2. Score the middle of the sheet along its length so it can easily fold in half and meet in the middle along its length without overlapping edges.
3. Place a length of pre-waxed wicking inside each side of the scored sheet at a slight angle so that when it is folded together, one end points towards the bottom and one towards the top. This will help create an even burning candle with no leaking or tunneling within the wax walls.
4. Carefully match up both sides of the sheet so they overlap evenly but do not press them together too tightly over the wick as this won’t allow air to circulate during burning as well as enabling heat to reach more deeply into any corners where liquid fuel might accumulate if too tightly pressed together.
5. If using a pre-made mold, place it around your folded sheet then use pillar wax glue or hot glue dots to attach it onto an upright surface such as a tabletop or flat work bench ” making sure that you maintain your desired level angle when doing this step so that your candle looks even when finished burning and sets properly in alignment with gravity before combusting completely down its center line backbone downwards!
6. Securely close off all external seams/gaps between your chosen material/mold so that they don’t leak any braised fuel during combustion process by sealing them off with either hot glue dots or pillar wax glue ” being careful not to apply too much pressure so as to keep an even balance when enjoying!
7. After your adhesive has cooled down slightly wait for five minutes then carefully add some additional wall decorations such as sticks, stones, twigs etc..to decorate around its verge perimeter (optional). Finally set light your proud creation and enjoy watching how beautifully luscious flames adorn this entire circumference until eventually diffusing out entirely!
Adding Decoration
Decorating free-standing candles can be a great way to personalize them and make them one of a kind. There are several different ways to decorate candles, with the most popular methods being decoupage, wrapping paper, ribbons and lace, glitter, paint, and stained glass. With decoupage one can take almost any type of paper, such as vintage postcards or scrapbooking paper and use mod podge to layer it onto the candle. Wrapping papers are available in dozens of colors and designs and can be applied using double-sided tape for easy removal. Ribbons and lace can be tied around the pillar of the candle for a delicate looking effect. Glitter also makes an excellent medium when sprinkled over tacky glue and/or mod podge to give sparkle where desired. Painting candles is fairly straightforward and all that’s really needed is some acrylic paints; though mica pigments are available for a shimmery effect if desired. Lastly, pre-cut pieces or strips of stained glass look beautiful on any candle when placed around the base or in the wax itself during melting. With these supplies and a bit of imagination your custom candle will be ready to go!
Safety Tips
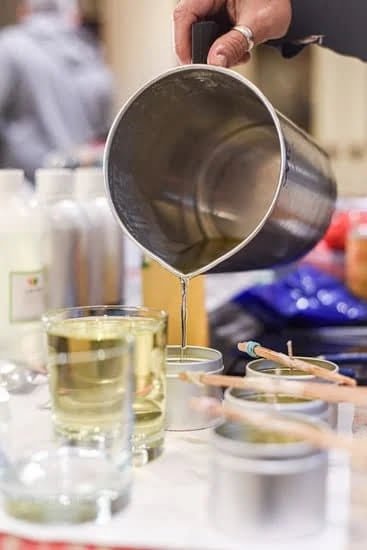
When making free standing candles, safety should always be the top priority. Hot wax can cause severe burns so always use caution when picking up melting pots and dripping wax. Be sure to wear heat resistant gloves and clothing when handling hot wax or wick materials. When pouring wax over wicks, make sure to leave a substantial gap between the lip of the pouring pot and the wick (approximately 1 inch). Never submerge a wick in hot wax, as it can easily ignite. Additionally, ensure that all materials are kept away from children and pets as they can become severely injured if exposed to hot molten wax or flaming candlewicks. Lastly, never leave burning candles unattended.
Troubleshooting
Common Errors
1. Air bubbles in the wax: This is a very common problem with free standing candles; air bubbles will appear in the wax as it cools and hardens. To resolve this, allow your candle to set completely before handling. Gently reheat the areas of the candle where air bubbles have formed, using a heat gun. Once they are melted down gently continue cooling until solid again.
2. Wicking too short: If you find that your wick is too short after making your candles, simply apply a drop of wax on its end and stick it to the bottom of the candle until hardened.
3. Wax shrinking away from mould: If you find that as your candle begins to cool, some areas are shrinking away from the mould, try boiling some water in another pot and place your mould inside for around 5 minutes, this will create warmth which should help remelt any areas that need covered better inside the mould.
Conclusion
Making free standing candles is an enjoyable and rewarding activity that can provide a sense of accomplishment. From the beginning stages of choosing the wax, wicks, and fragrances to finally admiring the glowing candles, each step of the process brings satisfaction. Whether you choose to make your candles in small batches or as a business venture, handmade candles can be a wonderful way to express your creativity. Not only do they provide an opportunity to enjoy yourself in a relaxing way, but also give you the chance to make beautiful gifts for special occasions or simply add unique decor to your home. Furthermore, creating and customizing each candle means you get to try out different designs and scents; providing great flexibility in creating décor that’s truly yours. No matter what kind of candlemakers you are ” from professional hobbyist to beginner ” making free-standing candles can bring joy with just about every step.

Welcome to my candle making blog! In this blog, I will be sharing my tips and tricks for making candles. I will also be sharing some of my favorite recipes.


