Introduction
Hanukkah, or the Festival of Lights, is an eight-day Jewish holiday that celebrates the miracle of rededication and liberation. According to Hebrew scripture, in 164 BC the ancient Syrian-Greeks attempted to force the Jews in Jerusalem to accept their pagan gods and worship them instead. The Maccabees (a small group of Jewish rebels led by Judas Maccabeus) fought for two years and eventually overthrew the Syrians, reclaimed their temple, and set about purifying it. As part of this process, they needed to rededicate a special golden Menorah (candelabra). The only oil that was available had been consecrated by the Syrians and was only sufficient for one day’s burning. Miraculously, it burned for eight days—long enough for proper oil to be obtained and consecrated anew.
The lighting of Hanukkah candles with a menorah is intended to serve as a reminder of this remarkable event in Jewish history. To honor this miraculous event of long ago each night of Hanukkah a candle is lit with a special Chanukiah—the traditional nine-branched candelabra used during Hanukkah — beginning from right to left with the new candle being added each evening until all eight lights are set burning on the eighth night. Because Chanukiot or menorahs hold multiple candles it is possible to light all 8 candles on each night at once corresponding evening prayers are recited each night before kindling the flames.
Making your own Hanukkah candles can be fun and rewarding experience. You can purchase pre-made supplies online or if you prefer make your own wicks with cotton string dipped in beeswax or paraffin wax; trimming and dipping until reaching desired length then placing wick holders inside prepared tins or molds filled with melted wax mixture which will secure them while cooling. Once they cool putting a label on each candle indicating which day you plan to light it helps keep track since lighting them consecutively during Hanukkah takes away some guesswork when getting ready for ceremonies. Enjoy preparing and celebratiing your very own creations!
History of Hanukkah and Hanukkah Candles
Hanukkah is a Jewish holiday that celebrates a historic victory for the Jewish people against the Syrian-Greek empire. It is also known as the Festival of Lights because of its primary ritual which consists of lighting Hanukkah candles each night. To celebrate this victory and rededicate their temple, the Jews lit a special eight-day candle, whose flames lasted far longer than expected despite only having enough oil to last one day. Lighting a menorah (the eight-day Hanukkah candle holder) each night of Hanukkah retells this miraculous story and is commemorated with thanksgiving and singing.
Hanukkah candles are special wax or vegetable oil candles that are carefully crafted out of wax or paraffin that have been molded with thread wound around them in order to make it easier to light multiple candles at once on the menorah. The shamash, which is the Hebrew word for ‘servant’ is an extra candle used to light the other eight (one candle per night). It is placed higher than all other candles in the center or side of the menorah. For more modern designs and convenience, battery operated lamps can be hung on traditional menorahs as electric replacements for oil or wax candles. Accessories such as decorative holders, colors, and shapes can be added to jazz up any family tradition!
Tools and Materials for Making Hanukkah Candles
In order to make your own Hanukkah candles, you will need the following supplies: beeswax sheets, wicks, scissors, a double boiler or saucepan with glass jar snugly fit above it, a candle-making mold (that will also act as your wick holder if using a single mold) and glass tweezers. You can also choose to use a needle-nose pliers if the wax sheet needs to be bent in some way.
To begin the candle making process, you’ll need to measure how much wax is needed for each candle. To do this, cut out small pieces of wax sheets with the scissors and add them to the pyrex jar that is placed on top of the double boiler or saucepan. Make sure it doesn’t exceed maximum capacity of what the vessel can hold – usually no more than 5 inches deep with at least 2 inches of space between the top of melted wax and bowl’s base. After that is done, turn on low heat and begin melting your wax until it becomes liquid.
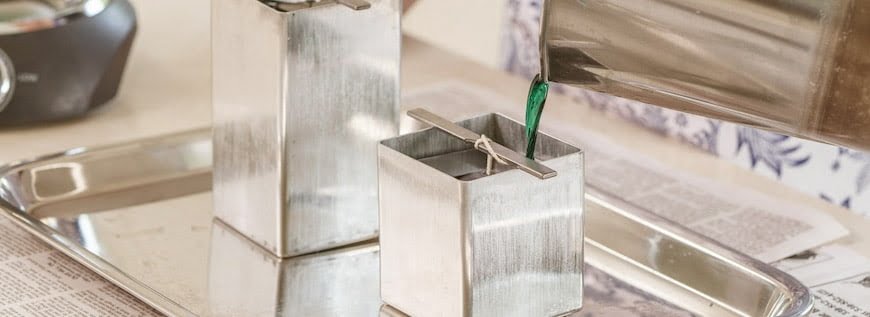
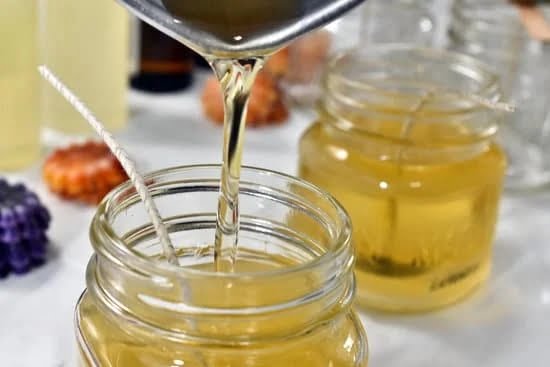
Once melted, turn off heat but keep jar in place as it should remain warm enough for molding purposes before removing or pouring any excess over vessel’s sides into molds below. Then insert wick into pre-determined hole in center (if using one-piece mold) or position tweezers around edges while using needle-nose pliers to clamp down onto candle so that both can be lifted together from bottom surface area when finished. Finally pour molten wax into desired shape (either round cylinders or decorative Hanukkah menorahs). Allow candles enough time to cool before taking them out and enjoy!
Tips for Choosing the Right Candles and Wicks
Choosing the right Hanukkah candles for your menorah is an important part of the holiday tradition. You want to ensure that you have enough light to fully illuminate all eight days of the festival.
When shopping for Hanukkah candles and wicks, there are several factors to consider:
1. Type – Paraffin wax candles are most common for use in a menorah, but beeswax varieties can also be found in stores. If you prefer a more eco-friendly option, look for soy candles or those made with vegetable oils.
2.Size – The length of the candle should be taller than the menorah it stands in, so measure your menorah prior to purchasing. Most traditional Hebrew blessings require that all hanging oil lamps or candle holders be at least three inches high, so this is a good guideline to follow when selecting a candle size (unless otherwise noted).
3. Burn Time – Look for candles that offer up to four hours of burn time per day, as traditionally recommended for each night of Hanukkah celebrations. This will ensure that you don’t have to extinguish your lights too quickly and can keep them burning all throughout the observance period.
4. Wicks – Consider pre-prepared wick bundles designed specifically for menorahs if desired; they provide even lighting while reducing smoking and flaring up much less often than regular cotton wicks would do when lit.
Step-by-Step Guide
1. Gather materials: Hanukkah wicks and wax, a container to hold the wick upright, a pot for melting the wax over indirect heat, and an old spoon for stirring.
2. Heat about four inches of water in the pot before placing it on low heat.
3. Measure out the desired amount of wax and place it into the pot to melt. Stir with the old spoon until all of the wax is melted.
4. Dip your wick into the melted wax for about two minutes to give it some structure just remember not to dip it too far, or else it won’t stay centered in your candle!
5. Place your wick into the desired container you prepared earlier (be sure that its upright!) and pour in the melted wax until its level with the lip of your container filling will take several minutes depending on how full you want your candle to be!
6. Let your candles set and cool before adding any decorations if desired or displaying them proudly!
Ideas for Decorating and Personalizing Hanukkah Candles
Decorating and personalizing Hanukkah candles is a great way to add your own creative spin to the holiday. One popular option is to get small, colorful stickers in star or festive shapes and decorate the outside of the candle holder with them. You can also use paint pens to draw symbols or designs onto them, like a dreidel, menorah, or Star of David. Glitter can also be used to give colorful accents. Other Fun ideas are making wax handprints, painting individual letters on each of the candles (to spell out “Hanukkah” or another word), or wrapping twine around the base of each candleholder. Finally, you might want to decorate labels that fit into the holders; use bright colors and fun shapes for a special touch. Be creative and have fun!
The Spiritual and Symbolic Significance of Lighting Hanukkah Candles
Across the Jewish world, lighting Hanukkah candles has always been one of the most meaningful and exciting parts of celebrating the eight-day festival. Through centuries of persecution, it was an important reminder to Jews that they were still connected to their faith and could express their religious identities without fear. Lighting a single candle quickly became symbolic with hope, renewal, and joy, as well as marking a special moment to gather together as friends and family in prayer. With each additional night of the celebration, burning another candle serves as a reminder to appreciate freedom from oppression and thank G-d for his blessings. The Hanukkah tradition is steeped in both physical and spiritual symbolism, representing what it means to be part of a greater people who have endured tremendous sacrifice over time. It symbolizes our reverence for diversity and highlights how we can find inspiration even when faced with darkness or hatred. When each night ends with all of the flames still burning bright, it’s also an affirmation that no matter how difficult life might become, our spirits will carry on.
Conclusion
After assembling the parts of your homemade Hanukkah candle, you can light your own miraculous lights in your home and celebrate the eight-day holiday with your family. Burning a Hanukkah candle can be a reminder of how God always comes through and delivers us during hard times. Each night, as you light the candles, take time to reflect on how the brave Maccabees faced impossible odds and won their battle against Antiochus’ army. Don’t forget to share stories about miracles throughout history for you and your loved ones to remember that miracles can happen anytime and anywhere. Above all, enjoy those eight sweet nights of celebrating the Festival of Lights with traditional foods and activities like playing dreidel games!

Welcome to my candle making blog! In this blog, I will be sharing my tips and tricks for making candles. I will also be sharing some of my favorite recipes.


