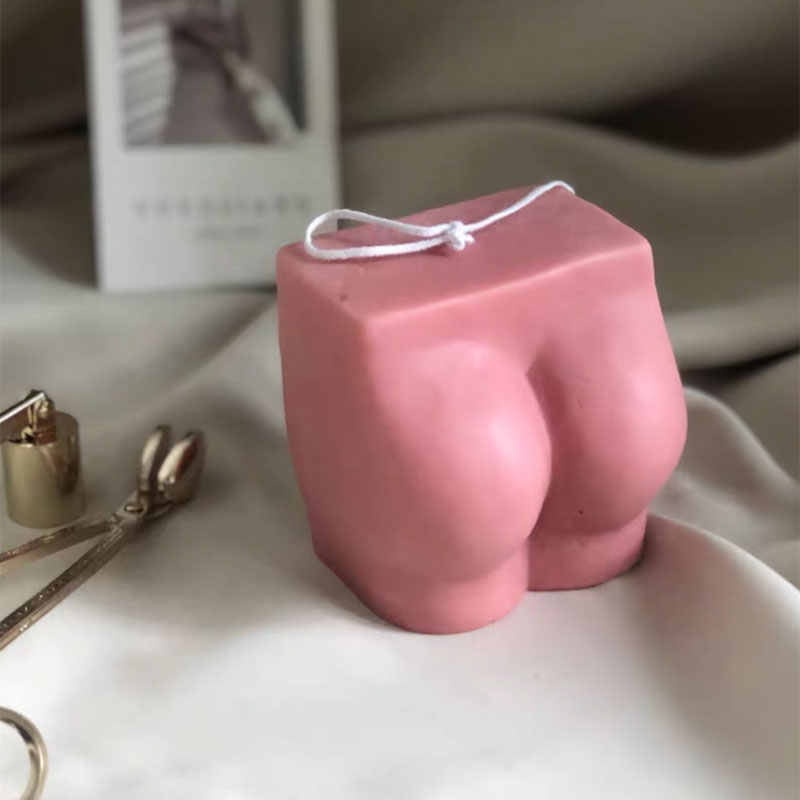
Making homemade scented candles can be a great way to save money and reduce waste. Not only are these candles a great way to infuse your home with fragrant aromas, they are typically made using natural ingredients that cause less environmental pollution than their store-bought counterparts.
In addition, you can get creative with different colours and scents by customizing your own unique candles. Moreover, making your own candles is also a fun pastime activity suitable for all age groups that can bring hours of relaxation and enjoyment.
Materials: What Materials You Need for Making Homemade Scented Candles When it comes to making homemade scented candles, there is no need to invest in expensive materials as the cost of supplies are relatively low.
The required items include wax either in pellets or blocks, wicks for the candle holder, essential oils or scented items such as vanilla extract, cinnamon sticks or pinecones for additional fragrance, double boiler and moulds if you wish to customize the shape of your desired candle.
Be sure to wear gloves when handling hot wax or other heated materials during preparation so as not to cause injury while crafting your unique candles.
Process: How To Make Homemade Scented Candles The process of making homemade scented candles consists of melting down your wax in a double boiler over medium heat before adding in the essential oils and stir them around until they are fully incorporated into the melted wax mixture.
Once cooled down slightly, pour a small amount of liquid wax into each candle holder with pre-fitted wicks and wait for it to set before adding additional layers in order to reach the desired height/thickness.
Here is where you may place any additional scents or decorations before allowing them to completely cool off overnight before burning them safely.
Safety Tips for Making Homemade Scented Candles
Scented candles can be a great way to make your living or workspace smell pleasant and inviting. While store-bought scented candles may be convenient, making your own homemade scented candles has its advantages. They can be customized to your favourite scents and colours, and you can often save money by using the supplies you already have at home.
As with any craft activity, it is important to take safety precautions when making your own candles. Below are some safety tips for making homemade scented candles:
- Always use a wick that is suitable for the wax type you are using, otherwise, it could affect the burn time of the candle.
- When working with melting wax, make sure the area is well ventilated since wax fumes can become trapped in poorly ventilated rooms.
- Wear gloves when pouring melted wax into containers so as not to burn yourself.
Before you start making a homemade scented candle, ensure that the container where you want to put your candle has been properly cleaned of all dirt and dust particles. This will maximize the life span of your candle by preventing corrosion from oils and other contaminants.
To clean glassware or metal containers, simply wash them with warm soapy water or use rubbing alcohol or vodka to sanitize them. Finally, make sure that the containers are completely dry before adding any wax or wick.
It’s also essential that you take extra care when melting wax while avoiding direct contact with heat sources like an open flame or electric melter; this could increase the risk of your wax catching fire or burning yourself. When melting wax in a pot on the stovetop, choose a pot with enough depth-a minimum of 3 inches-this will help prevent boiling over if there are leftovers on the surface of the melted wax during reheating.
Additionally, always monitor temperature levels closely as high temperatures can cause discolouration on cosmetic grade paraffin/soy/beeswax mixtures.
Lastly, always keep children and pets away from areas where hot wax is handled. This will help ensure their safety as they could easily get injured due to contact with spilt hot molten wax or unrestricted access to burning candles.
Tips for Choosing the Right Fragrance Oils for Best Results
Choosing the proper fragrance oils for your homemade scented candles is extremely important in ensuring that your candles look and smell great. In order to create perfect aromas, special attention must be paid to the type of oils used, the candle’s wax profile, and other additives in your recipe.
The first step when selecting fragrance oils for your scented candles is to take into consideration the type of wax you’ll be using. Different waxes have different melting temperatures which can affect how a fragrance oil behaves. For instance, if you settle on a soy candle wax blend it will need differ amounts of fragrance oil compared to a beeswax blend which requires additional beeswax to help fix any scent as well as stiffen up the candle.
Once you have taken into account the wax blend of your candles, it is important to understand what fragrance oils are best suited for them. Natural vegetable-based waxes such as soy are far more likely to work with essential oils and may need fewer fragrances than paraffin blends.
As a general rule, it’s always best to use a mixture of both essential and synthetic scents together for maximum effect – like merging floral or herbal notes with more rounded flavours such as vanilla or patchouli.
When smelling fragrances do not get overwhelmed by their intensity – add them one at a time until you achieve the desired aroma before committing wholeheartedly to one particular scent. There’s no single “right” ratio for how much essential oil should be added versus synthetic fragrances; however, typically 1 teaspoon per pound works best for both types of fragrances.
In addition to taking these tips into account when selecting your fragrance oils, always remember that experimenting is key. Don’t be afraid to mix and match different aromas so that you can create unique smelling combinations – adding spices, flowers or herbs can also contribute interesting layers and new dimensions of aroma profiles.
Last but definitely not least make sure any ingredients you source don’t contain any additional contaminants such as phthalates (Diethyl Phthalate). A good quality candle should feature 100% pure elements in order for it to burn cleanly without leaving behind black materials on surfaces or anything else that could harm our planet or people living close by.
Supplies and Tools Needed for Making Homemade Scented Candles
- Beeswax – 1 pound
- Coconut oil – 4 tablespoons
- Distilled water – 2 cups
- Fragrance oil of choice – 20-40 drops (depending on desired intensity)
- Double Boiler
- Glass jars, cups or other heat-resistant molds for vessels
- Wooden spoon for stirring
When beginning a homemade candle project it is important to have all the necessary supplies and equipment lined up and ready to go. The listed supplies are just the basics needed for making scented candles. Beeswax is the primary material used in this project.
This wax melts into a liquid state when heated but still maintains its shape after solidifying. Depending on how many candles an individual wants to make will determine which size of beeswax they should get. Coconut oil helps to keep the melted wax in liquid form while blending with other ingredients like fragrance oils and also serves as an analgesic or pain reliever when ones skin comes in contact with it.
To hold the melted wax, one must use vessels such as mason jars, large glass cups, or any mold made out of silicone such as baking tins. To avoid having any residue from accumulating on the vessel walls it is important to stick with containers that have a non-stick surface such as silica gel instead of ceramic or clay ones with glazes on them.
A double boiler should also be acquired if possible since it will offer more control over keeping consistent heat and melting components evenly without burning them.
Also keep in mind that it may take several batches before one masters his or her technique so they might want to get more supplies than needed for their first attempt. Gathering a few extra tools can help encourage a do-it-yourselfer and make their experience much smoother in terms of time and money spent while perfecting this craft.
Choosing the Right Wick for the Candles
When making scented candles, picking the right kind of wick is very important. This is because different types of candles require specific wicks. In relation to this, there are several considerations that need to be taken into account when selecting suitable wicks.
Firstly, it is important to consider the size and type of container that you will be using for your candle. If the surface area of the wax is large then a long and thick wick may be necessary in order to create enough heat for the wax to melt smoothly as it burns down.
Conversely, if you are using a smaller container then a thin and short wick should be chosen in order to prevent too much heat from accumulating during the burning process.
Secondly, take note of the type of wax that you are planning on melting for your candles. Waxes such as paraffin and soy-based don’t have similar qualities in terms of melting and burning point so it might be necessary to use a specific type of wick that can accommodate them both accordingly.
The same applies for beeswax which has a high melting point so a specially designed wick would be required in order to get optimal performance from this particular wax combination.
The Different Types of Wicks Available
- Cotton Core Wicks : These are made by winding together multiple strands of flat cotton thread onto a core or spool which produces a robust yet malleable string.
- Paper Core Wicks : These consist of paper strips which have been wrapped around an inner core allowing them to have greater tensile strength while providing even rates of heat output during combustion.
- Braided Cotton Core Wick : This type has been designed with thicker strands and consists of double braids woven together creating more efficient control over heat output.
- Hemp Core Wick : As implied by its name, hemp is used as both an inner core and outer wrapper material resulting in higher porosity increasing the rate flame propagation.
Preparing the Candle Container
Preparing the container is the first step when making a homemade scented candle. Depending upon the style one desires, there are several different materials that can be used to create your own unique candle.
- Glassware: Mason jars and larger wine glasses or goblets provide good containers for traditional pillar candles
- Metal Tins: Aluminum tins can be purchased at craft stores in a variety of sizes for votive, tea light, or container candles
- Ceramic Containers: Ceramic mugs or tea cups are perfect for large oval or round wax pillars
Once you have chosen a container, it needs to be washed and dried before use in order to remove any residue that may interfere with the bonding between wax and metal. For metal cans, make sure to file off any sharp edges inside or outside of the can prior to filling with wax.
It is also important that these containers are free from cracks or chips which could cause it to break due to heat generated by burning the candle. Lastly, if wishing to add wicks or decorations to your creations, make sure they are securely attached prior to adding wax.
For ceramic containers specifically, it is necessary that the sides are covered with either petroleum jelly (Vaseline) or lime wax before pouring in the hot wax and wicking. This will ensure that all exterior surfaces stay clean and free of any residue when finished. Once all steps have been completed and properly sealed, you’re now ready to move on and pour your wax.
Mixing the Wax and Fragrance Oils
To make homemade scented candles, the first step is to mix the wax and fragrance oils. The wax used in candles can be either paraffin or soy wax. Paraffin is a petroleum product with a high melting point, making it ideal for candle-making.
Soy wax, on the other hand, is made from hydrogenated soybean oil and therefore produces a softer, more natural candle. Fragrance oils are also available in a variety of flavors and can be added to give the candle a rich scent.
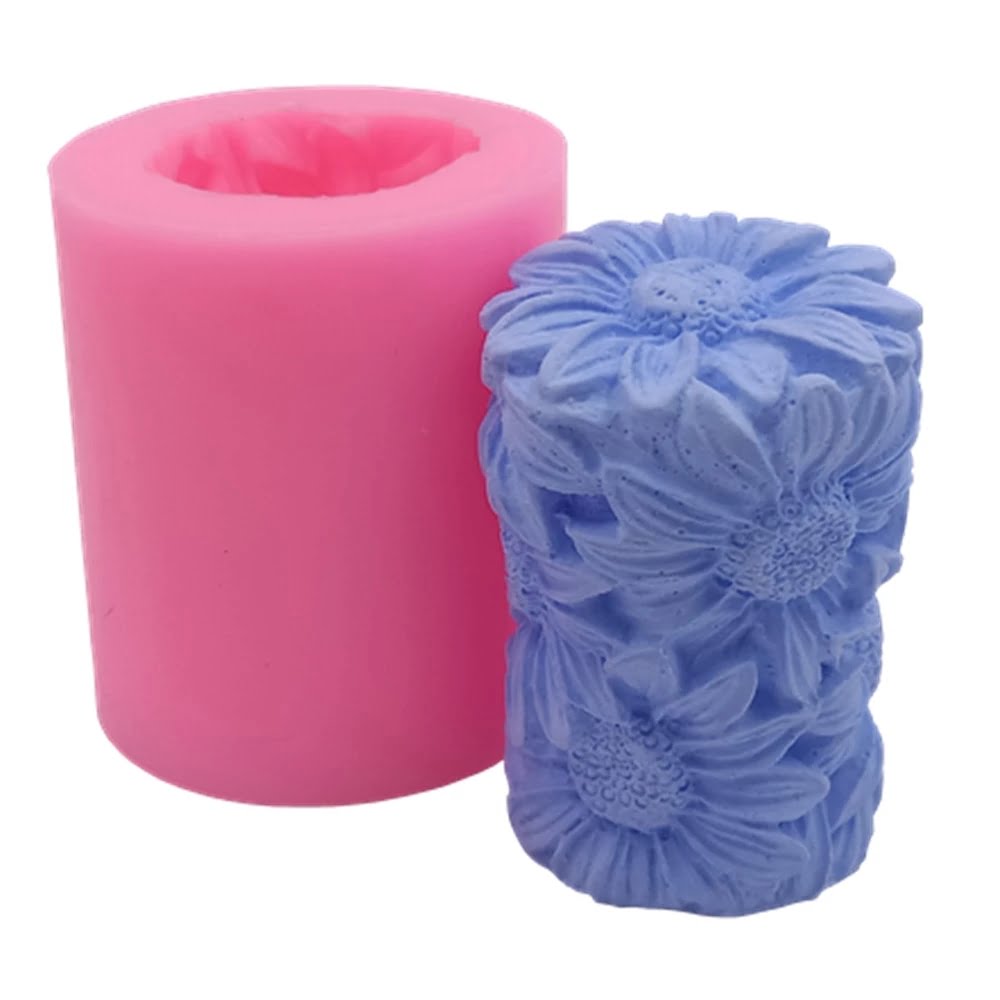
Creating the Candle Molds
Once the wax and essential oils have been chosen, it is time to create the candle molds. Candle molds come in all shapes and sizes, ranging from simple tin frames to intricate designs such as snowflakes or poinsettias. It is important to use non-toxic materials when creating molds, as some materials may react with the hot wax and cause discoloration or burning.
Adding Color and Finishing Touches
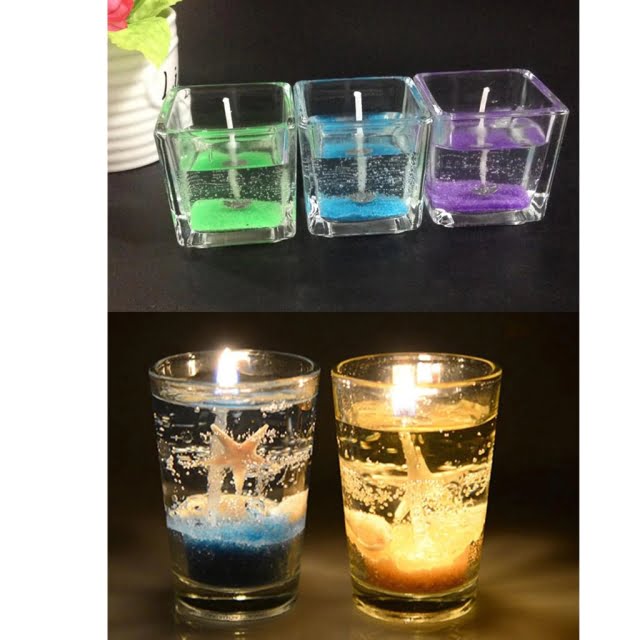
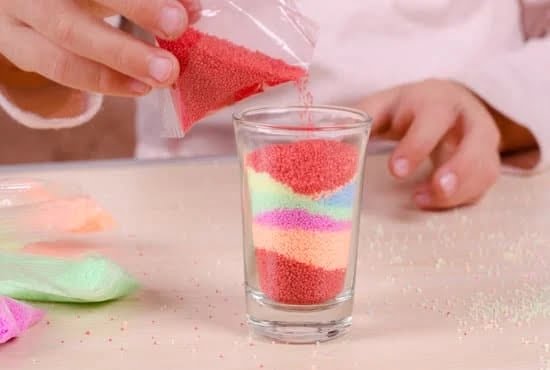
Another great way to customize homemade candles is by adding color. Color dyes can be added directly to melted wax before pouring it into the mold or after, using special candle-specific color blocks that melt right away while dipping the wick into it before setting it in place inside its holder. Once all of this has been completed, some decorative touches such as ribbons or glitter can be added to make each candle truly unique.
Pouring the Candle into the Container
Making your own scented candles at home is a fun process that can have you enjoying the finished product in no time. Once all of your supplies have been gathered, it is time to pour the candle into the container of your choice. Before beginning this step, you should assemble any wicks that will be used in the candle and make sure they are securely held in place by the chosen wick holder.
Once all of the items are ready to go, it is time to heat up your wax. This can be done with either a dedicated wax warmer or a double boiler. The wax needs to be heated until it reaches its melting point, which for most soy waxes is around 175°F (80°C).
When melted, you can then add your chosen scent to the wax if desired. Some people also like to add dye or glitter as well – but this is entirely optional.
After everything has been added, carefully pour the liquid wax into each of your containers until it reaches just below the brim. You should allow for some extra room in case there is any expansion during cooling. After pouring, place your wicks into each container so that they stand upright.
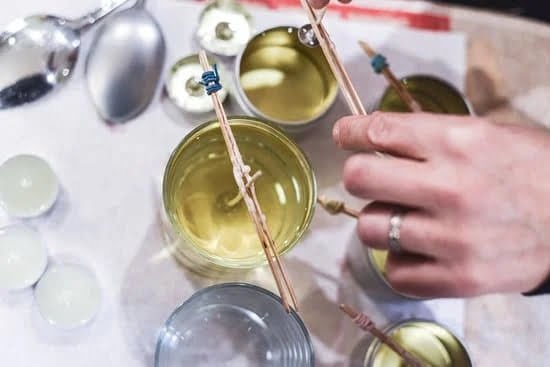
If you find that they start leaning one way or another while cooling, use a chopstick or pencil to gently maneuver them into an upright position without disturbing the surface too much. Finally, leave them undisturbed and allow for 24 hours for them to cool completely before using them – or giving them away as gifts.
Finishing Touches
The wick is an important part of a scented candle as it allows the wax to draw up and generate heat and scent. The size of the wick should be proportional to the amount of wax used in the candle so it’s essential to ensure that it suits the vessel you are using.
When adding a wick, be sure to cut any excess strands away from the very top and allow each candle to set for several hours before lighting.
In order to give candles a professional touch, many crafting enthusiasts embellish their work by creating decorative labels or adding sparkle with glitter and confetti. Moreover, embellishing is also a great way to add personality to the candles which makes them all unique from one another. To finish off, adhere labels that include details about your product such as: fragrance notes, approximate burn time, and warnings such as ‘trim your wick before each burn’ if needed.
What You’ll Need
- Candle wicks
- Labels
- Glitter or Confetti
- Glue gun/ double sided tape/ craft glue
Next, use either adhesive such as glue guns or double sided tapes for best results when attaching your labels to your candle vessels without damaging them. However if you prefer a more creative approach than roll up magazine pages into thin strips into flowers and fix them with craft glue onto plain glass plates or mason jars for an extra touch. Use hot glue for extra durability if necessary.
Lastly, glitter and confetti is another great addition that will provide beautiful eye-catching design that lasts long after you’ve enjoyed burning your scented candles. Glitter will remain intact even after burning whereas confetti falls away with heat, making them safe alternatives when burnt correctly. Place them onto each individual layer once you have let them cool enough so they stick without immediately melting before pouring on top of flammable wax layers.
Curing the Candle to Set the Wax
When making candles, the final curing time is necessary, and it should not be overlooked. After pouring the wax into a container and allowing it to cool for several minutes, take a blunt object such as a wooden spoon and use it to smooth out any air bubbles that may have been created during the pouring process. This step will help the candle form better and result in an aesthetically pleasing finish.
Once satisfied with the surface of the melted wax, insert a wick into the candle. The wick should be centered in the mold or container before being twisted gently around a pencil or chopstick and laid across the top of the pot so that it rests against the sides.
Coating With Scented Oils
Once this is done, wait for up to 30 minutes for it to solidify at room temperature before showering drops of our favorite essential or scented oils over its surface. The scent should be evenly distributed so that each part gives off good aromas when lit.
Furthermore, once satisfied with how much oil has been added sprinkle some glitter over it for added decoration. Not only does this make an attractive candle but also adds another layer of fragrance and makes a good gift too.
Melting Wax For Second Pour
The next step involves melting some additional wax in order to re-pour over the first layer so that each candle becomes fully encased in wax and no fumes can escape from beneath its surface. When choosing what wax type to add on hades pouring try experimenting with soy melted together with beeswax along with others like coconut wax or rattan extract as well adding different colorants to enhance its look further still.
Finally leave your creation filled up containers until cool then cut their wicks down create perfectly sized candles ready light.
Troubleshooting Common Problems with Making Homemade Candles
Scented candles can be a fun and creative project for people of all ages that yields beautiful results. While the task may seem simple, there are still several common issues that can arise when making these candles at home. Fortunately, most of these problems have easy resolutions and you will soon be able to enjoy your homemade scented candles.
The first issue is failure to properly melt the wax. This issue is fairly easy to overcome with proper candle-making experience or by following the instructions of a reliable source closely. It is very important to make sure that the wax reaches its melting point before pouring it into containers or molds.
Many DIYers invest in an electric pot specifically for this purpose. Additionally, avoid placing the wax near open flames as it could create a fire hazard. If your melted wax cools too quickly, place it back in the electric pot and warm it up until ready for pouring.
Another common issue with making scented candles involves fragrance oils and essential oils not adequately scenting a candle once lit. This could be because fragrance oils need specific amounts of heat in order to effectively disperse their aroma throughout an area; if the candle’s wick isn’t large enough, it may not get hot enough to do so.
To remedy this problem, increase the size of the wick by adding an extra one or two inches to its length during assembly and also make sure you are using high-quality essential oils or fragrance oils whenever possible.
Finally, another rather unpleasant issue with making scented candles is when they don’t burn evenly or create large, unsightly bubbles on their surface when burning. Both of these aesthetic issues can often be fixed simply by leaving your new candles alone for at least 24 hours after they have been poured; giving them time allows any trapped air bubbles in the wax to escape over time before re-melting them if necessary, depending on their severity.
Additionally, households with animals such as cats should avoid adding decorations like feathers too close to where the candle flame would be; as little fires caused by stray sparks traveling upward can potentially occur from these materials which could lead to dangerous situations that must be avoided at all costs.
All in all, making homemade scented candles shouldn’t require a lot of trial and error; as long as you are careful about avoiding mistakes such as overheating your wax, carefully selecting high-quality fragrances and failing to size a wick appropriately – you can get beautiful results that will help brighten up any space.
Plus after gaining some practice through troubleshooting processes and testing out different techniques – eventually anyone will become quite adept at creating amazing homemade scented candles in no time.

Welcome to my candle making blog! In this blog, I will be sharing my tips and tricks for making candles. I will also be sharing some of my favorite recipes.

