Introduction
Lavender is known for its calming and therapeutic effects, as well as its nostalgic, floral scent. Lavender oils are typically created through steam distillation of lavender flowers, which captures their delicate floral aroma. Burning candles enhanced with these essential oils can add an aromatherapeutic ambiance to any room or setting. Popular essential-oil blends that are often used to create a lavender aroma include notes of sweet orange, lemon, frankincense, patchouli, ylang-ylang and even rosemary. These scents can bring a different dimension to the candle and create unique fragrances unique to your candle-making designs. When combined in different ratios and amounts, you can create fragrances ranging from light and refreshing to deep and complex. Fragrance experts often recommend using high-quality essential oils in your homemade candles for the best results.
Gathering the Supplies
When making lavender scented candles, you will need to gather some basic materials. The most important supplies are the wax pellets, wick cores, and essential oils for scenting the candles. When choosing wax for your homemade candles, look for sustainable and eco-friendly options such as soy or beeswax that provide a beautiful warm glow without impacting our environment. You’ll also need wick cores made of natural cotton string, or better yet bamboo which is a renewable resource. Finally, use pure essential oils to scent your lavender candle: use either a highly concentrated single oil like lavender; or make an aromatic blend with a few drops of rosemary and chamomile oils to create an herbal scent. Addition items such as thermometers and melting pots can help ensure consistent results when pouring the wax.
Melting the Wax
When making lavender scented candles, melting the wax is an important step. This can be done using a few different techniques. One method of melting wax is through a double boiler system. Place a glass or ceramic bowl into a larger pot filled with water. Make sure no water spills into the inner bowl when setting it up in the pan. Then turn the heat of your burner on to medium-high and wait for the wax to reach its desired temperature before adding it to molds or containers.
Another way to melt your wax is by utilizing an electric hot glue gun. Start by filling the chamber with wax until it nearly reaches the max capacity line, then plug in your device and watch as it warms up and melts the contents inside. Be careful not to use too high of heat as this will cause smoke and charring on your product if left unattended for too long. After choosing a suitable temperature level, start dispensing melted wax into molds or containers as needed! Finally, you can also melt your wax directly in an open flame, such as a pilot or candle flame. Make sure the container you’re using is heatproof before turning on any flames and wait for your mix of wax to reach liquid consistency while constantly stirring with safety precautions in place throughout the whole process!
Pouring the Candles
Making your own scented candles is incredibly easy, fun, and a great way to customize your home. Lavender is a favorite scent for many, so it’s a great choice for your first homemade candle. Before pouring the wax into the candle jars, you’ll want to make sure the wick has been placed in the center of the jar and was secured with a wick tab or similar device (This will help keep your wick centered while you pour). When pouring the wax, it’s important to ensure that you’re not pouring too fast”pouring too quickly may cause tunneling or air bubbles in your finished candle.
To properly pour a lavender-scented candle:
1. Begin by heating wax on low to medium heat until completely melted
2. Add essential oils or fragrance oil at this time according to manufacturer’s instructions
3. Once at desired temperature (approximately 95-110 degrees Fahrenheit), slowly pour into candle jar
4. Move the jar in circular motions so that all sides are evenly coated with wax
5. Fill the jar no more than 2/3 full of wax, this allows room for burning and a safety margin
6. Allow cooling for 12-24 hours before lighting
For an extra level of detail and explanation, video tutorials are always helpful! There are many available online that explain these steps in greater depth – providing visuals can also make some processes easier to understand than reading instructions alone. Additionally, if you’re just starting out making candles it’s best practice to start with smaller containers as they tend to cool much quicker than larger ones do!
Decorating the Candles
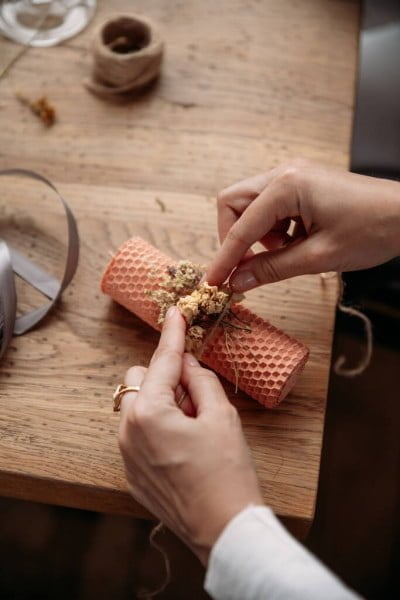
Making your own candles is an amazing way to personalize an event or gift. After you have made your lavender scented candles, there are a variety of ways to decorate and customize them to make them even more special. You can add color and texture to the surface by wrapping ribbons of various sizes and colors around each candle. This makes for a nice decorative effect when presenting multiple candles together. Additionally, you can use both large and small glitter shapes, such as stars and hearts, to add some sparkle. Finally, why not try using some stencils on the surface of the candles? This is a great way to create unique and meaningful designs, such as words or images!
Testing & Enjoying the Candles
To prolong the burning time of your lavender scented candles, always trim the wick of your candle before lighting to prevent the flame from getting too large. This helps to prevent too much heat from escaping and burning through the wax too quickly. You should also avoid placing your candles in a drafty room or area as this can cause them to burn rapidly and unevenly. Additionally, you should make sure there is enough space between multiple candles so that heat is allowed to dissipate without overheating any other candles in its vicinity.
When storing lavender scented candles, always make sure they’re covered in a cool, dry place away from direct sunlight or heat sources. Extreme temperatures can cause the wax of a candle to melt and reduce its scent-holding capacity as well as drastically shortening its burning time. Depending on their type, storage containers for these types of candles should be airtight or vented so that air isn’t trapped inside along with your candle and causing it to eventually lose its scent over time. Finally, you want to protect the wick before you place your candles away; wet wicks can encourage further deterioration when stored in tightly sealed containers.
Additional Tips & Tricks
1. Offer scents such as rose, lemon, and eucalyptus to combine with lavender, creating a unique scent combination.
2. Try different wicks – certain waxes may need different size or type of wick based on the thickness of the candle and/or the heat they produce while burning.
3. Why not add bits of organic dried flowers and herbs in your candles for a nice aesthetic bonus?
4. Vacuum out any air bubbles that form on the surface when the wax has cooled down and settled in the bowl or container you’re using.
5. Use a hair dryer to help warm the wax up if it gets too hard to work with then gently stir the wax until it’s back to its original temperature before continuing on with making your candles.
6. Coat your wick with essential oil prior to dipping into your melted wax for extra floral aroma!
Conclusion
Creating your own aromatherapy candles with lavender can be a therapeutic experience. The calming effect of the floral scent and the meditative process of hand-pouring the wax will help you relax and distress. Making our own candles can also create a special ambience in any home. It is truly amazing how such an easy project can have so much impact on a living space, not to mention its potential effects on health and wellbeing. Aromatherapy candles are one of the simplest and most cost effective ways to make an environment calmer and more inviting ” Your call to action should be for everyone to take some time out this winter and learn about aromatherapy candle making, create their own or simply buy some ready-made ones to relax during the long winter nights!

Welcome to my candle making blog! In this blog, I will be sharing my tips and tricks for making candles. I will also be sharing some of my favorite recipes.

