Introduction
Making mason jar candles is a great way to create attractive pieces of décor and decorations to be used in your home. Not only do mason jar candles look beautiful, but they can also provide a wonderful scent throughout any home. In addition, handmade mason jar candles are easier to customize to match the personalities and unique tastes of those who live there. By making your own mason jar candles, you have more control over the size, shape, and ingredients which means you get exactly what you want – plus it gives you an enjoyable activity that can be enjoyed with friends and family!
Making mason jar candles offers a variety of benefits. For starters, homemade mason jar candles typically burn for longer than store-bought varieties ” saving time and money on replacements. Plus, you don’t have to worry about any funny chemicals or synthetic fragrances hidden in your wax ” another bonus as all of the waxes used in homemade mason jars can be all-natural or organic if desired. Furthermore, by adding different colors of wax or embedding your candle with herbs or gems like rose quartz or lapis lazuli ” it makes them even more personalized and special! Not only do these homemade mason jar candles add beautiful items to any room they arrive in but they also provide pleasant aromas throughout the home too. Making them allows you to choose exactly how strong the scent should be depending on what type of essential oils are being added during production.
Getting Started
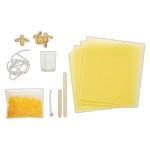
Making mason jar candles requires a few simple supplies. You will need a pint-sized mason jar with a lid, soy wax, slow burning wicks with metal bases, dye chips or blocks, and your favorite fragrance oil. Optional items include paperclips and mica powder for color if you choose not to use dye chips. Additionally, make sure you have scissors, an old pot that can be used exclusively for candle making (never cook in it again!), an old spoon, an empty juice container or something similar that you can use as a double boiler set-up, and something to place under the mason jar so any possible excess wax does not spill onto your tables or countertops. Now you are ready to get started on creating your masterpiece!
Preparing the Mason Jar
Making mason jar candles is a simple and easy craft that can be done with few supplies. Before you get started on making the candles, make sure to prepare the mason jars by cleaning them thoroughly inside and out. Remove any labels or price tags, and rinse with warm soapy water to remove all traces of glue. To ensure that the candle wax sticks well to the sides of the Mason jar, lightly sand with fine-grade sandpaper around the interior surface. Once done, use a dry cloth to wipe away any dust particles leftover from sanding. Lastly, place the jar in an area that can hold tight without tipping over while wax is poured inside.
Choosing the Wax and Wick
Choosing the wax and wick for your Mason jar candles is an important step in making them. Depending on the type of wax you choose, that will determine what type of wick should be used. Waxes like soy, paraffin, beeswax and coconut typically require a flat-braided or square braid cotton wick. Want to make something extra special? There are some more unique waxes available such as palm, bayberry and lanolin which can also require a specific size or style of wick. It’s recommended to use wicks with a built-in sustainer or tab so they can be easily attached or suspended inside the jar. Before purchasing any candle materials, it’s important to read up on the type of wax you are using so you know which wick is compatible with that particular formula/style/brand. This will ensure optimal burning results when lit!
Melting and Pouring the Wax
Local craft stores generally carry a wide variety of wax for candle making. Begin by setting up your workspace with the jars, a heat source like a double boiler or hot plate, thermometer, ladle and any colorants or fragrances you would like to add. Make sure you have plenty of room to spread out and be careful to avoid any fire hazards like flammable objects or water near the heat source.
When ready, measure the amount of wax needed for the candles according to package instructions and place into your double boiler. Heat until completely melted then add coloring dyes or essential oils for fragrance. Stir constantly and use a thermometer to check temperatures as wax should never exceed 160-180 Fahrenheit (71-82 Celsius). When fully heated and ingredients are blended properly, remove from heat and carefully pour wax into each jar leaving ¼ inch headspace at top of jars. Wait until wax has set before handling or lighting candles.
Adding Fragrance, Color and Accessories
Making a mason jar candle is a simple and enjoyable project that anyone can do! Adding fragrance, color, and custom accessories to your candles will give them a beautiful, personalized touch.
Adding fragrance to your mason jar candles is an essential part of the process. Fragrances not only make your candles smell amazing, but many have uplifting or calming benefits as well. There are additives specifically designed for use in candle making that you can find at any craft store; simply add the recommended amount of this additive according to the instructions on the product label. For extra scent, consider adding an essential oil–just make sure it is labeled safe for use in candle making before you purchase it.
Another fun element to add to your mason jar candles is color. This can be done with wax chips or powdered dye specifically made for use in making candles. Color makes your candles look unique and vibrant and also enhances certain fragrances”for example adding yellow suggests a citrusy lemon scent or green may imply minty aroma! The dyed wax needs to be melted separately from the general base wax that’s used in candle making and then combined together once melted so that the wax retains its hue over time.
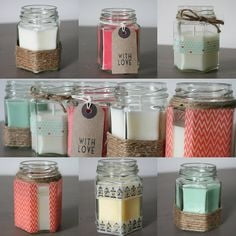
Finally, adorning your mason jar candles with accessories like decorated lids or clasps create visually warm table settings when lit (and unlit). Securing lids onto jars with magnets gives them a polished look, while ribbons wrapped around your jars imparts zestful energy”experimenting with decorations is half the fun of creating homemade candles!
Finishing Touches and Curing
After making mason jar candles, it’s important to recognize that the process isn’t quite finished. In order to get a perfect candle, some finishing touches and curing will be necessary.
Finishing touches include: applying wicks correctly so that they stay in an upright position; trimming excess wick at the top with scissors; adding fragrance or essential oils if desired; and creating a label for your candle. Once these steps are complete, your candle needs to cure for one week so the scent and texture can settle. During curing, leave your mason jar in an area free from dust and away from warm temperatures as this could cause damage or melting of the candle. After a week has passed, you should now have a perfectly formed mason jar candle that is ready to light up any room!
Storage and Maintenance Tips
Making your own Mason jar candles can be a fun and therapeutic way to have something of beauty in your home for a fraction of the price of store-bought candles. After you’ve created and lit your new candles, there are some key things to remember when storing and maintaining them.
When not in use, it’s important to keep your candles somewhere cool and dry. Keeping them out of direct sunlight is advisable since increased temperatures can cause the wax inside the Mason jar to melt or soften, creating an unpleasant aesthetic on the sides of your container. Additionally, if you’re concerned about temperature fluctuations during extreme weather conditions, you could invest in a candle warmer, which would maintain an ideal temperature for all of your homemade creations.
Another helpful tip for storage is to cover the lids if you’re keeping multiple jars close together. This will help maintain the high-quality scent of each candle and prevent any cross contamination between different scented containers ” because no one wants to end up with a vanilla/lemon hybrid! Additionally, making sure you securely place the lids back onto each jar once they’ve cooled enough after use will help maintain their scent as well as protect against any spills that might occur; both situations would cause damage to any surfaces they come into contact with!
Troubleshooting Tips
If you’ve run into some trouble while making your Mason jar candles, here are a few tips to help you out. When measuring out wax flakes and fragrance oil, use a kitchen scale for accuracy. If the fragrance doesn’t seem as strong as it should be, melt a bit of the wax first, add the desired odorant amount and mix the mixture before pouring into the jar. This will help achieve more even distribution of the fragrance in your candle. If it seems like your wick is too soft and not standing up straight, try dipping it in melted wax from an old candle and allow it to cool before placing back in the jar to harden. Finally, if bubbles appear on the surface of your finished product, you can try passing a flame over them (without igniting them) for a few seconds or place them in the refrigerator for a short time before lighting.
Conclusion
Making Mason jar candles can be a fun and exciting craft activity. With the right supplies and a few simple steps, anybody can make their own unique candle creations to enjoy or give away. It is important to ensure that all tips and safety precautions are followed when crafting candles, while following basic instructions on the wax, wick and other supplies used. The finished product can then either be gifted or used for decoration around the home – whichever you prefer! With these key steps in mind, you can now begin making your very own Mason jar candles to share and enjoy!

Welcome to my candle making blog! In this blog, I will be sharing my tips and tricks for making candles. I will also be sharing some of my favorite recipes.

