Introduction
Olive oil candles are a type of candle made from burning pure olive oil, typically in an earthenware receptacle, as a source of light. They were used traditionally by Ancient Greeks and Romans and have recently experienced a resurgence due to their popularity with “green” households. Olive oil candles are smokeless, odorless, and burn at a steady rate, making them an ideal choice compared to traditional wax candles. The main advantages they offer are that they do not leave soot residues, create less smoke upon combustion, and thus require much less maintenance than wax candles. In addition, olive oil candles can be produced relatively easily and inexpensively around the home.
Making olive oil lamps or candles is an ancient practice originating with the use of amphoras for storage by early Mediterranean cultures as long as 7500 years ago in what is today Syria and Turkey. There is evidence that the Minoans on Crete were using clay or stone containers for lighting from around 2000 BC onwards. Many other cultures across the world also utilized vegetable-based oils in preparing wicks for primitive lamps. This has since been adapted as part of folk culture such as in Hanukkah and Diwali festivals where it is customary to keep an “oil lamp” burning throughout these festivals.
Benefits of Making Your Own Olive Oil Candles
Making your own olive oil candles is a creative and fun way to liven up any space. Not only do they look great, but they offer some additional benefits that you won’t find in traditional candles. Olive oil candles last much longer than traditional wax, with the average wick burning for four to eight hours. This means you’ll get more bang for your buck from your homemade creation than from a store-bought candle. Additionally, olive oil is known for being both an anti-inflammatory and anti-bacterial ingredient, making it a safe addition to any room of your home. Finally, by using natural ingredients like essential oils and herbs, you can customize these items to fit whatever mood or scent profile you’re going for. Whether it’s citronella for summer nights or chamomile to help you relax after a long day, everyone can find something that can be added to make these personalized gems shine.
Selection of Oils and Beeswax for Olive Oil Candles
When it comes to making olive oil candles, there are a few key things to consider. First, you will need to decide what type of oils and beeswax you would like to use. While all natural waxes work fine for this project, some people like the smoother texture that beeswax provides. When selecting the type of oil for your candle, consider a high quality olive oil such as extra virgin or cold-pressed varieties. This helps ensure that your candle will burn cleanly, without producing smoke or soot. Additionally, using a heavier grade oil helps prevent the wick from smoking due to too much heat. Once you have selected your oils and beeswax, it is time to melt them together in a double boiler setup over low heat until melted. The ratio of oil and beeswax should be about 5:1 respectively; with more wax than oil being used due to its higher melting point. Afterward, pour the melted mixture into candle molds and let cool before removing from mold(s). Finally, trim any excess wick before lighting – and enjoy!
Required Materials and Tools for Making Olive Oil Candles
Materials:
– Olive oil
– Beeswax pellets or blocks
– Eucalyptus essential oil
Tools:
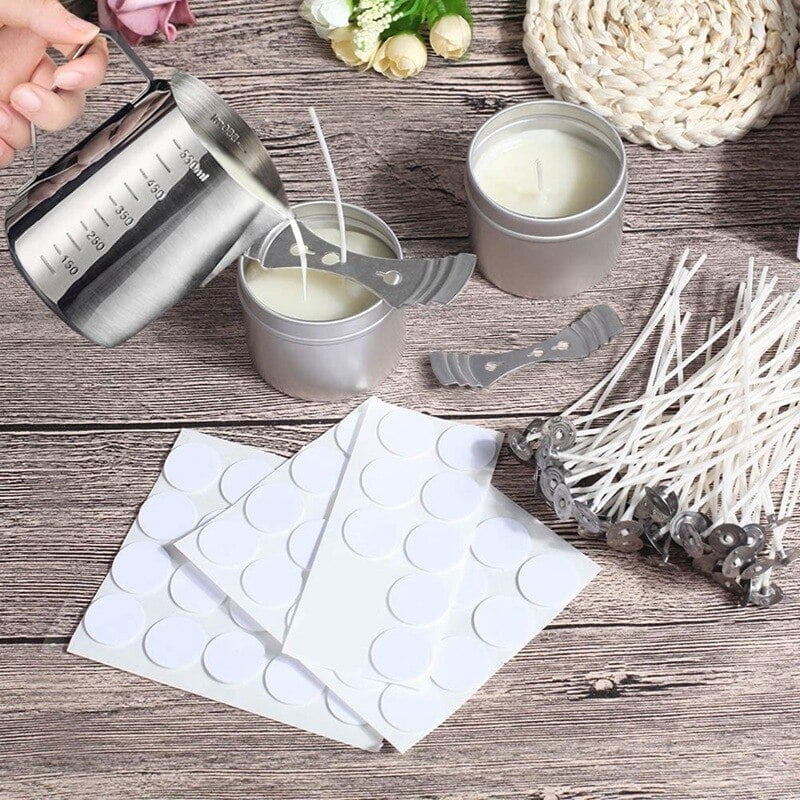
– Pot
– Glass measuring cup or metal container (for double boiler)
– Candle wick and metal tabs
– Container for candle (i.e. mason jar)
– Chopstick or pencil to hold wick upright while it sets in the wax
Additional tools/materials:
– Saucepan and water
– 2x large bowls (for wax and olive oil)
– Thermometer (optional but helpful to record temperature of wax mixture)
– Fragrance oils (optional, used in addition to essential oils for scenting wax)
Optional decorating materials:
– Beads, natural stones, dried flowers, ribbons, etc.
Step-by-Step Guide to Making Olive Oil Candles
1. Gather the Materials: You will need 100% pure olive oil, cotton wicking material such as candle wicks, a container or holder for your candles (optional), and a stove top or hot plate for heating.
2. Calculate the Amount of Olive Oil Needed: Measure the size of your desired container and use that to determine how much olive oil you will need in order to be able to fill it.
3. Prepare the Container: Create an area on your stovetop or hot plate that is at least 6 inches away from any heat source as this is where you will be placing your container with the olive oil in it. Ensure that the surface is level and flat before setting down the container.
4. Heat the Olive Oil: Place the measured amount of olive oil into a saucepan, then put this onto the area on your stovetop or hot plate that is already prepped with no direct heat source (as indicated in Step 3). Maintain heat between 105°F-120°F and stir occasionally until all of the oil has become like liquid honey(this should take between 15-30 minutes). Once liquified turn off heat but keep saucepan on designated surface .
5. Attach Wicks: Cut cotton wick material into desired lengths accordingly for each candle you plan to create; making sure to add additional 8 inches for knotting overhang at base of jar/holder etc.. Securely insert one end of wick into wooden skewer then hold othr end up half way dipped in oil resting atop container ensuring it stays straight and secure as it burns while creating candle.
Closely monitor where flame sits while holding tip taut until harden in place after each session ( making sure any unburned sections have been burned off).
6. Pour Olive Oil Into Desired Containers: Carefully pour heated olive oil into desired containers then twist skewer back out leaving secure tightly compressed rolled knot behind joined scew protruding upwards alongside burnable length of firmly secure cotton thread forming manadatory core of each burning independent steady warmly glowing candle..
Adding Fragrance and Color to Olive Oil Candles
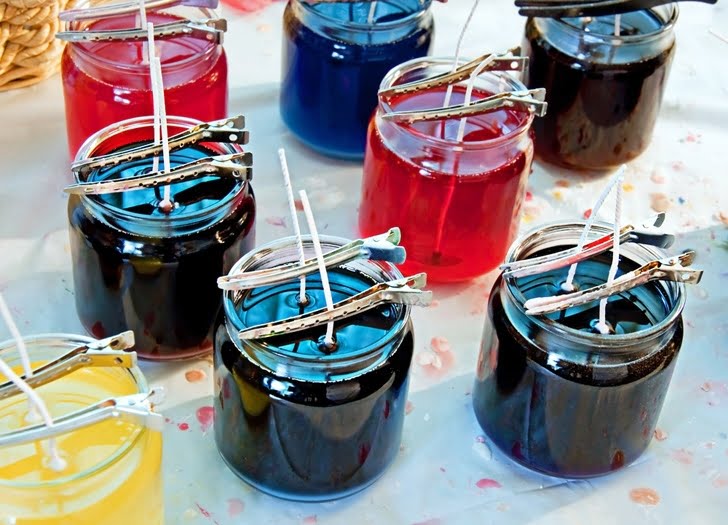
Making olive oil candles with fragrance and color is a great way to create something special. You can make refrigerator-set candles or you can melt the wax on the stovetop. Here’s what you’ll need to get started: old candle wax, olive oil, an essential oil of your choice for fragrance, wicks, metal containers or molds, and optional coloring (such as dye blocks or powdered dyes).To begin melting the wax, break it up into smaller pieces and put it in a double boiler before placing it on the stove top over low heat. Once melted, slowly add in ¼ cup of olive oil for each pound of wax for a longer lasting candle. Now add in just enough essential oil to provide a light scent and stir the mixture together until blended. If you want to add color, then now’s the time! Simply mix in colored blocks or powdered dyes until a suitable color is achieved. Finally pour the liquid into your metal containers/molds that have been prepped with wicks and allow them to cool completely before moving on to your next project! After 24 hours, your candles are ready for use!
Tips for Decorating and Embellishing Olive Oil Candles
Once you’ve made your olive oil candles, you can make them even more special by adding a few decorative touches. To start, you can paint your candle with different colors of paint or dyes to create a stunning marbled effect when the candle is lit. Furthermore, you can mix natural elements like petals and branches into the wax before letting it set. These provide visual texture and interest when the candle is lit. You can also embellish your olive oil candles using fabric and ribbon pieces that suit your interior design theme. These don’t need to be glued on since the heat from the flame will cause them to curl around the candle. Finally, for an added level of personality, you can use ink stamps to add images such as flowers or birds onto the surface of the wax before letting it dry.
Burning and Caring for Olive Oil Candles
Making olive oil candles can be a fun and aromatic way to light your home! To make an oliive oil candle, you’ll need an empty tin can or glass container, some long kitchen matches, candle grade olive oil (used motor oil is not recommended!), cotton wicking material or pre-tabbed wicks, and something to hold the Wick in place. Once you have all of your materials gathered, you’re ready to begin.
First, pour the olive oil into your container. Then take a piece of cotton wick and tie it in a knot around one end of the match that is slightly longer than the height of the container. Place the other end of the match in the center of your container so that it stands steady by resting on both sides. Pour the olive oil over top of the match until the wick is completely submerged in liquid. Finally, fasten a weight (such as a heavy screw) at end of match for stability.
Once your candle is assembled and secure, trim off any excess wick sticking out from above your container’s rim so no extra flame is exposed when lighting your candle. Before lighting each time, ensure there is still enough olive oil in the container to fully submerge your wick before proceeding with caution. To keep your olive oil candles burning longer and cleaner use only long kitchen matches – be sure not to blow lightly on flames as this causes smoke release by drawing air across them. When it’s time to extinguish your flame simply cover with lid or snuff out with lid closure – most importantly never leave burning unattended! To recondition your candle for reuse, gently heat olive oil on stovetop then let cool before filling containers again; submerging your already used wicking can also help bring back original scent & intense light output effectiveness. Last but not least enjoy yourself responsibly – because once lit from within these soothingly fragrant candles will beautify and inspire any room they grace!
Conclusion
Olive oil candles make a great DIY project because they are simple to make, non-toxic, and easy to find supplies for. Plus, olive oil is a natural source of light that burns cleanly and slowly. As an added bonus, each candle can be personalized with essential oils and other materials to give it an individual touch. So why not try making your own olive oil candles today? With some creativity and basic supplies, you can create beautiful homemade candles that are both eco-friendly and economical!

Welcome to my candle making blog! In this blog, I will be sharing my tips and tricks for making candles. I will also be sharing some of my favorite recipes.

