Introduction
Making pillar candles at home is a great way to bring a creative, comforting ambiance to any room. With some basic ingredients and supplies, anyone can make these fun and decorative additions to the home. There are many benefits of making pillar candles at home.
One benefit of making pillar candles at home is that you have complete control over the design and colors. By selecting your own wax, wick, and dyes, you can easily customize the look and size of your homemadepillar candles. This means that even a novice candle-maker can create unique pieces that fit perfectly with the style and atmosphere of their home.
Another perk of making pillar candles at home is that they tend to be less expensive than purchasing pre-made ones. Not only do handmade pillar candles cost less upfront, but they also last much longer than store-bought ones because they use less wax per burn. Additionally, when you make them yourself, you know exactly what goes into the candles ” no harsh chemicals or synthetic additives ” so you can feel good about burning them without fear of exposure to unhealthy toxins or fragrances.
Finally, another great reason for making your own Pillar Candles is due to the potential for creativity it allows for. Since you’re in control of all aspects from design to packaging ” plus scent – you have scope for letting your imagination run wild! You can get as creative as you would like whether it’s adding glittery paint, customized shapes or labels with clever messages written on them. Even something as simple as giving each candle its own personality by selecting a different scent for each will turn a regular house into an inviting aroma-filled environment sure to be enjoyed by all who enter!
Gather Your Supplies
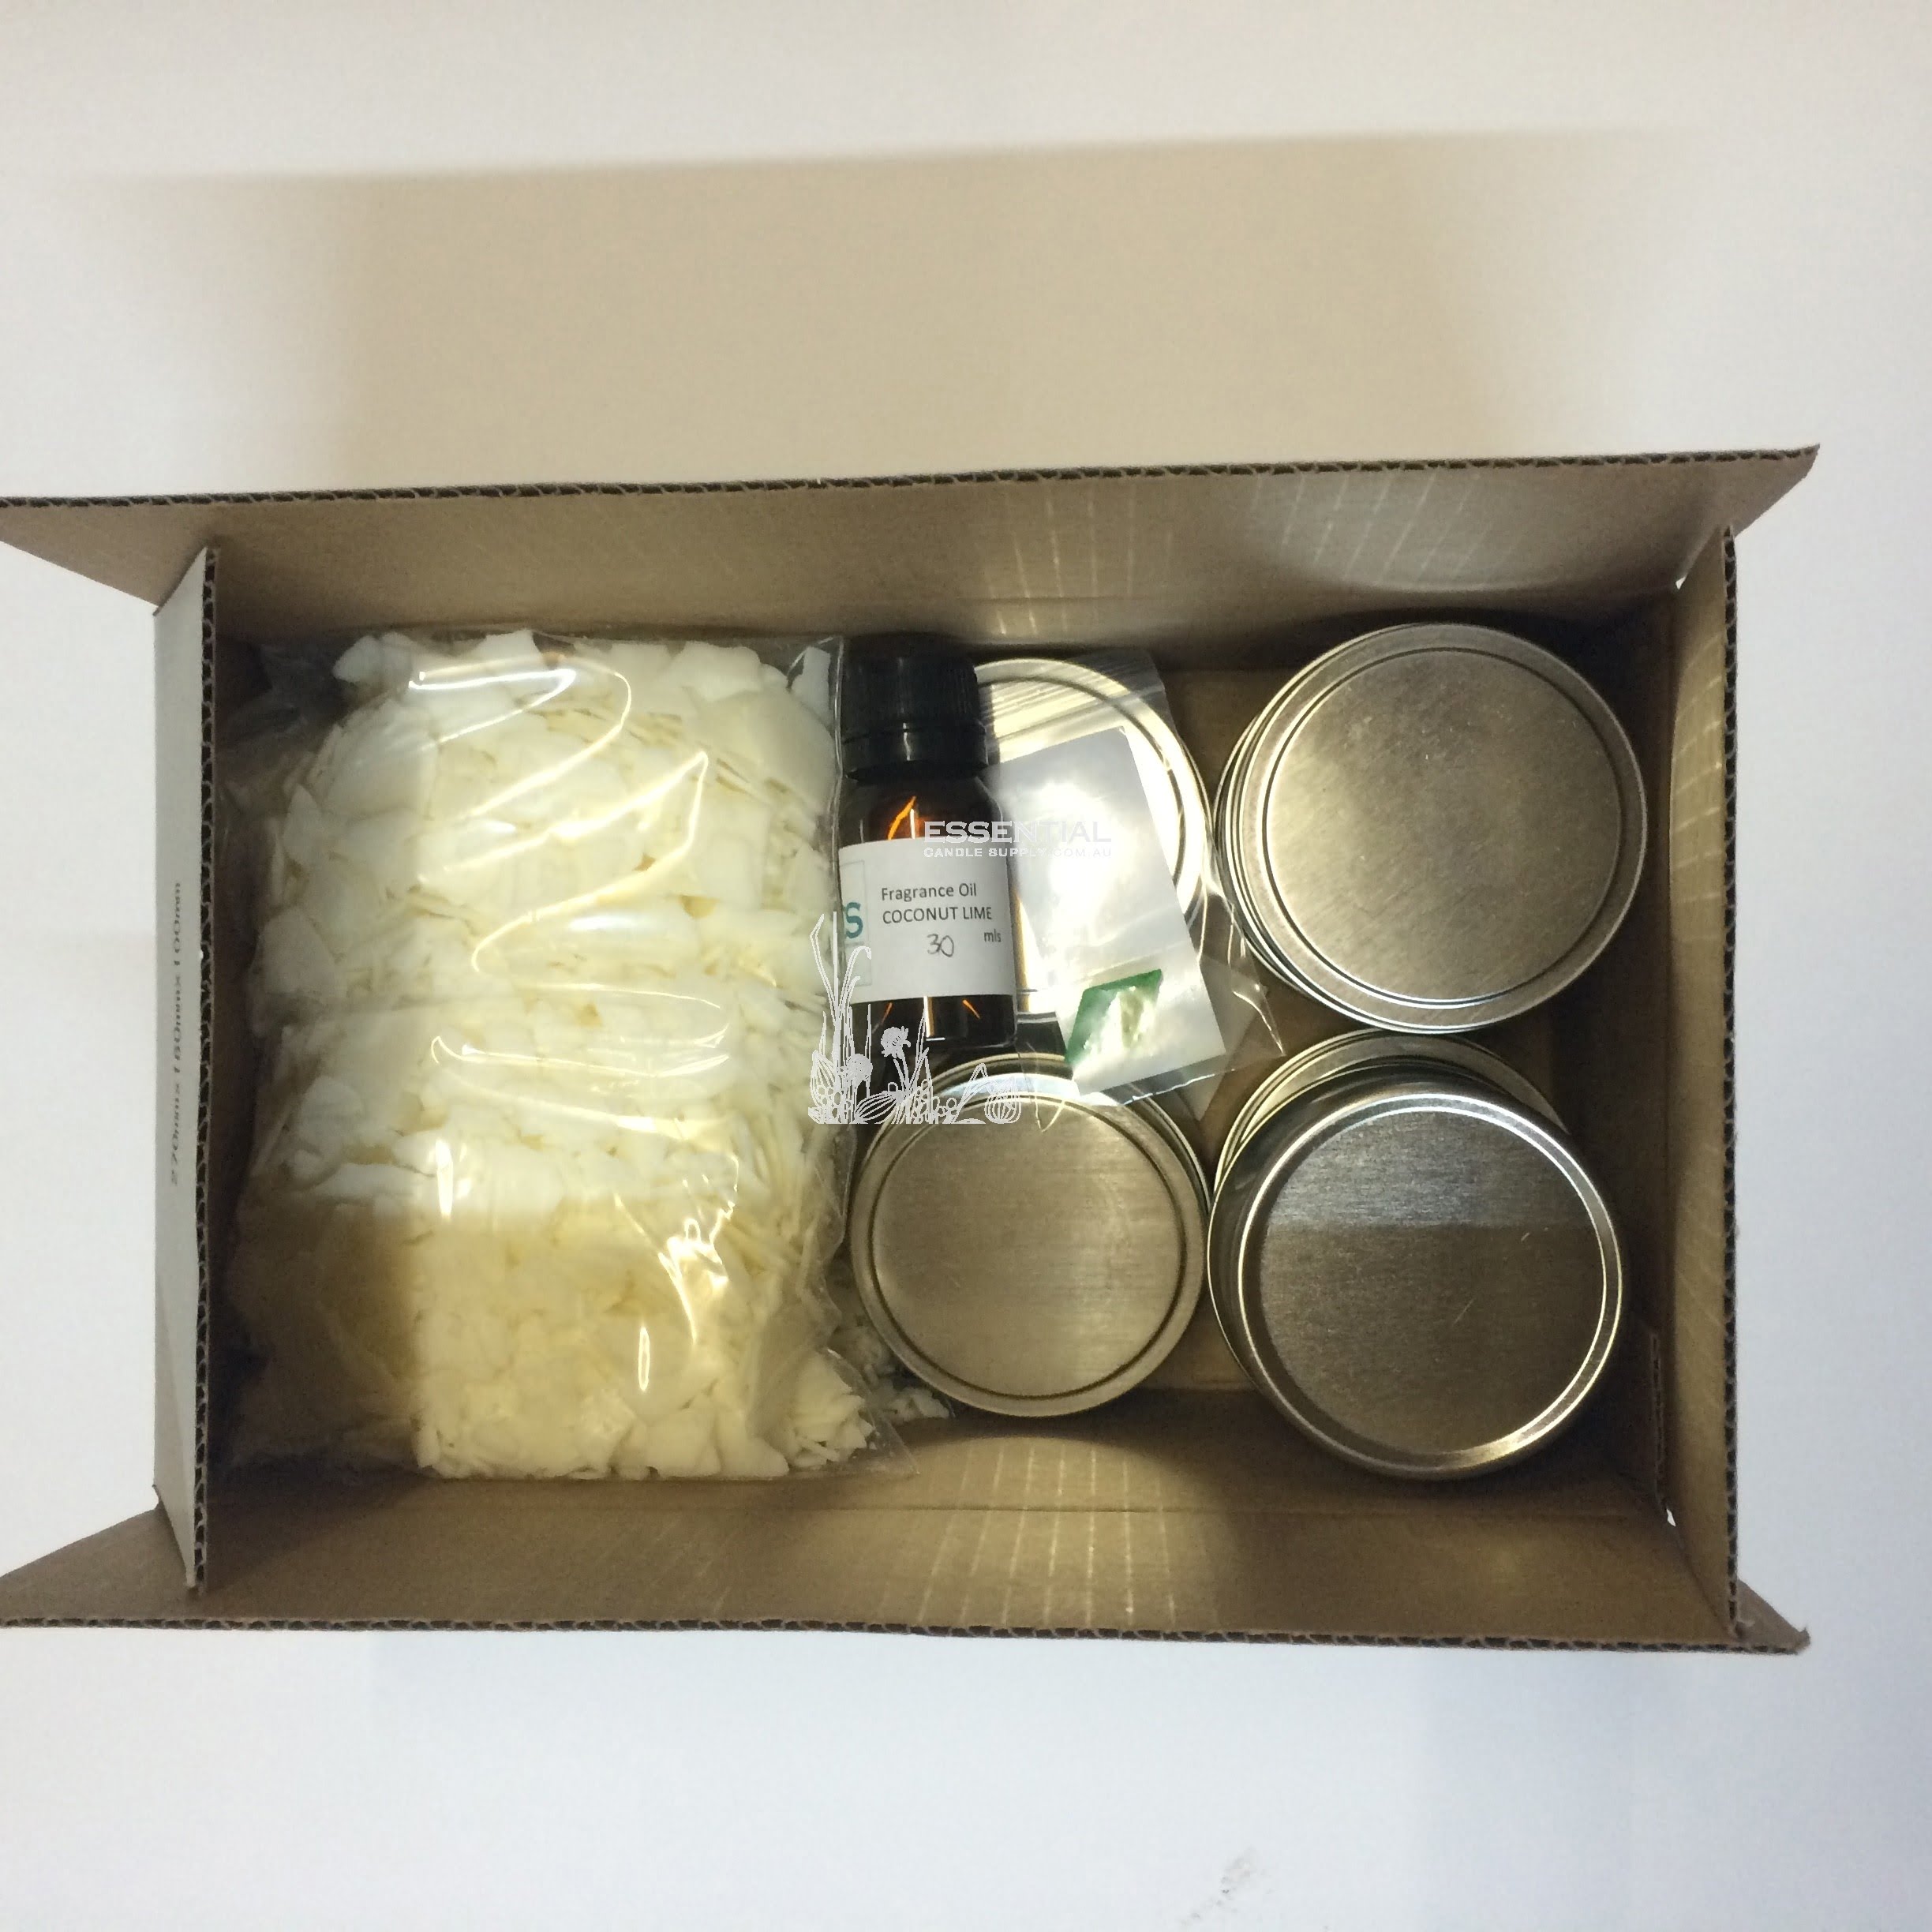
Before embarking on your candle making journey, make sure you’ve gathered all the necessary supplies. Depending on the type of pillar candle you want to make, you may need beeswax, paraffin wax, paintbrushes, wicks, a thermometer, dyes and scent oils. Additionally you may need some sort of heat source like a double boiler or an electric melting pot in order to melt the wax. For any embellishment such as decorative shapes and quotes, molds will be necessary in order to create them. You will also need something for your base – either a glass jar or a stand alone mold with a pre-cut hole at the bottom specifically designed for candles – so that you can pour the melted wax into this container and shape it as desired. Lastly, protecting gear like oven mitts is important to keep your hands safe while pouring and handling hot wax. Once all these materials are prepared and ready to go, your Candle Making adventure is about to begin!
Setting Up Your Workspace
Before attempting to make pillar candles, it is important to set up an appropriate workspace. Doing so requires a bit of preparation in order to ensure the process runs smoothly, safely and accurately. As such, some tips to consider when setting up a work space for making pillar candles include:
1. Gathering the necessary materials. Collect all of the items needed: wax, wick, wick sustainers, wicking needle and dye chips/fragrance oils/color blocks as desired. This helps reduce the chance of having to stop mid-process while searching for forgotten items.
2. Securing a safe spot. Selecting an area that’s away from pets or kids minimizes the chance of accidental spills or interference with supplies during setup and candle-making time. Heating elements should be out of reach at all times to avoid burn injuries or fires caused by contact between heat and flammable items like wax, dyes or oils.
3. Assembling required tools and equipment. Fetch your double boiler system (or your favorite wax melting pot) as well as mixing sticks for stirring waxes, glues for securing wicks (if building molds), thermometers for gauging proper temperatures when pouring wax into molds, scales if precise measurements are needed when adding dye chips/fragrance oils/color blocks plus scissors for cutting off excess wick material after attaching it properly to molds/containers is essential.
4. Setting up a cooling area outdoors or near an open window are ideal environments in which heated containers can cool down quickly without taking excess heat into other areas of the house where family or others might find themselves at risk due to burning temperatures around them or nearby hot surfaces like walls covered with wallpaper that can ignite with heat contact brought in from freshly made candles placed upstairs during production period(s).
Preparing Your Molds
Making your very own Pillar candles is an enjoyable and rewarding activity. Before you can begin to create these beautiful decorations, you must first properly prepare your molds for candle making. The following steps will ensure that the pillar candles you make stay pristine and long-lasting:
1) Start by cleaning the inside of the mold with either rubbing alcohol or soap and warm water. This removes any form of dirt or dust that has been caught in its ridges.
2) Then, take a paper towel and apply a thin layer of petroleum jelly on the inside walls. The petroleum jelly works as a lubricant allowing the liquid wax to move through easily while also serving as a sort of barrier between itself and the mold so it won’t stick when cooled. Be sure to let this dry before moving on to your next step.
3) Now, take a wick and tie it around one of the sticks (a pencil works well). Then place this wick between two objects such as railroad tracks or other materials so that it stands straight in the center of your mold with about an inch above what will be your top level for wax once poured. This will allow better control in how tall your candle grows and also allows for an even burning across both sides from having your wick in place prior to wax pouring.
4) Last but not least, melt your wax pellets over low heat then slowly pour into each individual pillar candle mold ensuring to fill up almost all the way yet leaving some room for potential air pocking or topping off after cooling if needed. For best results use larger molds which will keep more heat while hardening and also make removal easier once completely cooled off.
Preparing Your Wax
Once the type of wax has been decided, it’s important to accurately measure out the amount needed for the candles. Generally, two types of measurement are used for measuring out wax: weight and volume. Weight measurement is more accurate and should be used if scales are available. Temperature also plays an important role in measuring because wax melts when heated up and so its volume changes with temperature. It’s best to check the melting point of the wax to make measurements successfully. Otherwise, using standard measuring cups works well for most types of waxes. If necessary, choose containers which facilitate accurate pouring, such as spouted pitchers or graduated beakers which can help you achieve a proper measurement without any mess. Once everything is measured correctly, place the materials into a double boiler or some kind of melter in order to heat up the wax slowly until all ingredients have liquified evenly in order to prepare it for pouring into molds.
Melt Your Wax
When making pillar candles, the first step to take is to melt your wax. This can be done in a double boiler, on low heat ” this will make sure that your wax melts evenly and without burning. To prepare it for pouring, you’ll need to make sure that you have all of the supplies necessary. The most important things are a wax thermometer and a wick bar which will be used to hold the wick in place once inserted into the candle form before adding melted wax. You should also have supplies such as dye chips or crayons for coloring your wax as well as fragrance or essential oils for scenting it, if desired. Proper stirring utensils are also essential for mixing the other ingredients into the wax thoroughly and keeping it from overheating or cooling down too quickly. Once you have everything at hand, you’re ready to start melting your wax!
Color Your Wax
Adding color to your wax is an important part of creating pillar candles. You can use a combination of candle dyes and/or pigments to give your finished product a beautiful, rich finish. The process for adding color has different steps, depending on the type of wax you are using.
For paraffin or beeswax, you should begin by measuring out up to 1 teaspoon of dye or pigment for every pound of wax. Then, melt the wax at around 180°F in order to activate the dye or pigment. Be sure to check the manufacturer’s guidelines in terms of what temperature you should use – too high and it might burn off some of the color! Once melted, slowly add your measured amount into the molten wax while stirring so it is fully blended in. To get an even more vibrant color, consider adding a bit more than your measurements suggest.
Once blended in, pour the colored wax into prepared molds for each individual candle and allow it time to cool before handling it – typically overnight. Then, after assembling you have completed personalizing your own pillar candle!
Pour Your Wax
Pour your wax into your mold carefully. If you haven’t done this before it may help to have someone assist you, as pouring hot wax can be dangerous. Make sure to wear heat-resistant gloves and safety glasses for protection. Start by preparing the wax for melting. You will want to cut or break up the wax in small pieces that can fit into a double boiler or wax melter. Once it is completely melted, reduce the heat on the stove or hot plate before pouring your liquid wax into the mold. The molten wax should reach at least 2 inches above the top of your pillar candle so that it can firmly attach itself after hardening up. Take extra precaution when moving and handling your mold as it may need to be placed on a level surface when poured inside; be sure to give yourself plenty of room away from other objects to properly complete this procedure safely. Lastly, again make sure that you are wearing appropriate safety gear and watch out for splatters and steam coming out of the melting pot, since it is still very hot!
Adding Fragrance
Adding fragrance or essential oils to your pillar candles is a great way to make them smell amazing! To do this, you need to obtain some fragrance oil and an appropriate additive. Depending on the type of wax you’re using, you may need either a natural or synthetic additive that can blend the fragrance oil with the wax to create an even dispersion. Natural additives are typically made from beeswax while synthetic additives are made from paraffin wax. Once you have chosen the appropriate one for your project, simply add between 8% – 10% of fragrance/essential oil by weight into your wax as it melts. Make sure that you mix the oils in completely before pouring your candle into molds. If not thoroughly mixed, your scent might be unevenly distributed throughout the candle. Finishing touches like decorative ribbon, glitter or colored dye can also be added for a personalized touch!
Releasing and Cleaning
When it comes to releasing and cleaning your pillar candles from the molds, you must use some prep work in order to get the best possible outcome. Begin by cooling the candles completely before trying to remove them from the molds. When ready, use a butter type knife or something analogous to separate the mold from the sides of the candle before flipping them out into a clean area for easy cleanup.
You may also want to take this time to file down any sharp edges missed in the pouring of your candles after they have been released from the molds. Using some medium grit sandpaper can be perfect for rounding off rough patches; bear in mind that too much filing can make your finished product look awkward, so proceed with caution. Make sure all areas are wiped clean before painting or priming if necessary with a damp rag and dry completely before starting another layer of wax. If sprucing up with glitter, then this comes next too. Ensure that each layer is properly baked before doing another one if more than one finish is desired. Once everything is complete and you are satisfied with your results, go ahead and add artwork such as ribbons and tags if desired.
Finishing Touches
To complete the final look of a pillar candle, it will need to be trimmed and smoothed. This involves trimming off any excess wax around the outer rim of the pillar to ensure an even shape and size as well as creating a smooth surface. The first step is to dip the entire candle in cold water for several seconds or until all surfaces are cool to the touch. Once cooled, use a sharp, thin-bladed knife to carefully trim away any ragged edges or extra wax that has been inadvertently added during pouring. Then, lightly sand down any imperfections with a fine emery cloth and simply buff with a clean cloth until the candle is completely smooth and glossy. Finally, place the pillar in its holder before lighting it up!
Aftercare Tips
Once you have made your own pillar candles, there are a few things that you can do to make sure that they last as long as possible.
First of all, it is important to store your pillar candles in a cool, dry place. This will prevent them from becoming brittle and drying out too quickly. Additionally, keep the candles away from direct sunlight as this can cause them to fade or discolor.
When burning the candles, make sure that you always follow the “Burn For No More Than 4 Hours” rule. Burning them for too long can cause uneven melting and cause the wax to pool at the bottom of the candle. In addition, make sure to clean up any dripping wax before it hardens and accumulates on your furniture. Regularly trimming the wick (about ½ inch) will also help with even burning and minimize smoke and soot buildup.
Finally, practice proper aftercare by ensuring that you extinguish your candles carefully using a snuffer or spoon when they have burned ¾ of the way down. Punching down cooling wax after use is another great way to maintain your pillar candles and prevent them from forming air pockets.
Conclusion
Making pillar candles at home allows for more control over unique and specialized candle designs. Certain materials and techniques can be used to create one-of-a-kind products for any décor or ambience. To make a handcrafted pillar candle at home, one needs wax, wicks, a pouring pot or double boiler, an old pot, glue gun, dye or crayons, fragrance oil (optional), scissors, and an old pan or container of cold water. The wax is first melted in the pouring pot over low heat. Then the wicks are inserted into molds that have been coated with cooking spray as adhesive. Afterward, the melted wax is poured into the prepared molds and allowed to cool slightly before gently pushing down on the center of each mold so that they form even pillars. Once cooling has completed the mold is removed from around each candle and the tops are smoothed out if needed. Fragrance can then be added before coating with sealants like beeswax or paraffin wax to complete them.
By deciding to make pillar candles at home along with understanding the steps involved in doing so provides advantages such as creating interesting designs as well as customizing products with unique dyes coloring fragrances to suit specific tastes and décor style preferences for personal use in ones home or to give away as gifts.

Welcome to my candle making blog! In this blog, I will be sharing my tips and tricks for making candles. I will also be sharing some of my favorite recipes.


