Are you interested in exploring the art of making poured beeswax candles? Whether you’re a seasoned candle maker or a beginner looking to try something new, beeswax candles are a beautiful and natural option for creating handcrafted candles. In this article, we will delve into the basics of beeswax, provide a step-by-step guide on how to make poured beeswax candles, and offer tips for enhancing and troubleshooting your creations.
Beeswax is a popular choice for candle making due to its many benefits and qualities. From its pleasant honey-like aroma to its long, clean burn time, beeswax offers unique advantages that set it apart from other candle-making materials. Understanding the properties of beeswax is essential for creating high-quality poured candles that you can enjoy for hours on end.
Before you dive into making poured beeswax candles, it’s important to gather the essential materials and tools needed for this craft. From wax to wicks and containers to molds, having the right supplies on hand will ensure that your candle-making experience is smooth and enjoyable. By following this introductory section, you’ll be well-prepared to embark on the exciting journey of creating your very own poured beeswax candles at home.
The Basics of Beeswax
Beeswax is a natural and versatile material that has been used for centuries in candle making. As a byproduct of honey production, beeswax offers several benefits and qualities that make it an ideal choice for creating high-quality candles. Its unique properties contribute to the overall beauty and performance of beeswax candles, making them a popular choice for both experienced and novice candle makers.
One of the key benefits of using beeswax for candle making is its clean-burning nature. Beeswax candles produce little to no soot when burned, resulting in a cleaner and healthier environment compared to paraffin or other types of wax. Additionally, beeswax emits a subtle honey-like aroma when lit, providing a natural and pleasant fragrance without the need for artificial scents. This makes beeswax candles an excellent choice for individuals who are sensitive to strong fragrances or have allergies.
Furthermore, beeswax has a higher melting point than other types of wax, which means that it burns at a slower rate and can last longer. This makes beeswax candles more cost-effective in the long run, as they typically have a longer burn time compared to alternative candle materials.
In addition to its extended burn time, beeswax also produces a warm and soothing glow when lit, creating a cozy ambiance in any setting. These qualities make beeswax an appealing option for those looking to create candles with both aesthetic appeal and practical functionality.
Getting Started
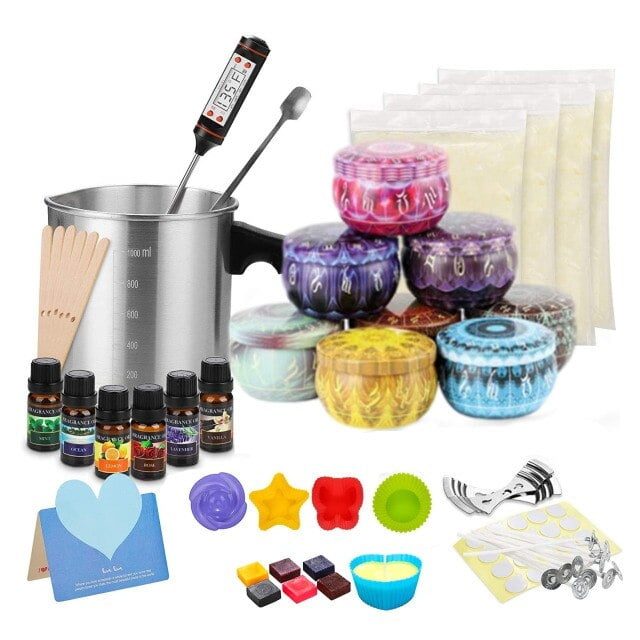
When it comes to making poured beeswax candles, having the essential materials and tools is crucial to ensure a successful and enjoyable experience. The first thing you will need is, of course, beeswax. Beeswax has many benefits for candle making, including its naturally sweet aroma, clean-burning properties, and long-lasting nature. It is important to use pure beeswax for the best results in your candles.
In addition to beeswax, you will also need wicks specifically designed for use with beeswax. These wicks are often made of cotton and are free from lead or other harmful substances. Selecting the right wick size for your candle can significantly impact its burn time and overall performance.
You will also need a double boiler or a dedicated wax melting pitcher to melt the beeswax safely and evenly. A thermometer is essential for monitoring the temperature of the melted wax to ensure it remains within the safe range for pouring. Additionally, having a heat-resistant stirring utensil and a pouring pot with a spout will make the process of making poured beeswax candles much more manageable.
Finally, consider any additional decorative elements you may want to incorporate into your candles such as colors, scents, or botanicals. Having these materials on hand before starting your project will help streamline the candle-making process and allow for seamless experimentation with different techniques.
| Essential Materials | Tools Needed |
|---|---|
| Beeswax | Double boiler or wax melting pitcher |
| Beeswax-specific wicks | Thermometer |
| Optional decorative elements (colors, scents) | Heat-resistant stirring utensil and pouring pot with spout |
Step-by-Step Guide
Now that you have gathered all the necessary materials and tools for making poured beeswax candles, it’s time to start creating your own handcrafted candles. Follow these detailed instructions to guide you through the process:
Prepare Your Work Area
Before you begin making poured beeswax candles, it’s important to prepare your work area. Cover the surface with a protective layer such as newspaper or a craft mat to catch any spills or drips. Make sure you have enough space to work comfortably and safely.
Melt the Beeswax
Start by melting the beeswax in a double boiler or a dedicated wax melting pot. It’s important to use gentle heat and avoid direct contact with an open flame to prevent the wax from overheating or catching fire. Stir the beeswax occasionally as it melts to ensure even heating.
Adding Fragrance and Color (Optional)
If you want scented or colored candles, this is the time to add fragrance oils and dye chips to the melted beeswax. Be mindful of the recommended usage rates for fragrance oils and choose dyes that are specifically formulated for use in candle making.
Preparing the Wick and Container
While the beeswax is melting, prepare your chosen wick by adhering it to the bottom of your candle container using a wick sticker or hot glue gun. Ensure that the wick is centered and straight before pouring in the melted beeswax.
By following these step-by-step instructions, you can create beautiful poured beeswax candles that not only offer natural beauty but also fill your space with lovely scents and warm light. Experiment with different colors, fragrances, and decorative accents to personalize your creations according to your taste and style. With practice, you’ll gain confidence in making poured beeswax candles and enjoy the process of creating unique pieces for yourself or as thoughtful gifts for others.
Enhancing Your Candles
When it comes to making poured beeswax candles, there are numerous ways to enhance your creations with color, scent, and decorative accents. Whether you want to create a unique visual aesthetic, add a pleasant aroma, or personalize your candles for special occasions, the following tips can help you elevate your beeswax candle-making experience.
To add color to your beeswax candles, consider using natural dyes or pigments specifically designed for candle making. Some popular options include mica powder, liquid candle dye, and natural colorants such as turmeric or beetroot powder. You can experiment with different shades and combinations to achieve the perfect look for your candles.
Adding fragrance to your beeswax candles can create a delightful sensory experience. When selecting scents, opt for high-quality essential oils or fragrance oils that are safe for use in candles. Popular choices include lavender, vanilla, citrus blends, and herbal aromas. Be sure to follow recommended usage rates to ensure that the scent is pleasantly noticeable without being overpowering.
In terms of decorative accents, the possibilities are endless. Consider incorporating dried flowers, herbs, or botanical elements into your candles for a rustic and charming touch. You can also use embeds such as crystals or small figurines to create one-of-a-kind designs within your candles. Additionally, experimenting with different types of molds and containers can lead to striking visual effects when making poured beeswax candles.
Troubleshooting
Uneven Cooling and Sinking
One common issue when making poured beeswax candles is experiencing uneven cooling or sinking in the center of the candle. This can be caused by pouring the wax at too high of a temperature, which can lead to uneven cooling.
To avoid this problem, be sure to monitor the temperature of the wax closely and pour it at the recommended temperature specified in your candle making instructions. Additionally, using a heat gun to even out the surface of the candle after pouring can help prevent sinking.
Cracking or Splitting
Another issue that may arise when making poured beeswax candles is cracking or splitting of the finished product. This can occur if the wax cools too quickly or if there are air bubbles trapped within the wax as it solidifies. To reduce the risk of cracking or splitting, consider allowing the wax to cool at room temperature rather than in a cold environment. Additionally, gently tapping the sides of the container while pouring can help release any trapped air bubbles.
Inconsistent Color Distribution
In some cases, you may encounter issues with inconsistent color distribution in your poured beeswax candles. This can happen if the colorant is not thoroughly mixed into the melted wax before pouring. To address this problem, ensure that you mix your colorant evenly and thoroughly into your melted beeswax before pouring it into your mold. Consider using a toothpick or skewer to swirl and mix in the colorant for a more consistent distribution throughout your candle.
Safety First
When making and burning beeswax candles, it is crucial to prioritize safety to prevent accidents and ensure a positive experience. Beeswax, although natural, still requires careful handling and proper precautions to avoid any potential hazards. Here are some important safety tips to consider when working with beeswax for candle making.
First and foremost, always work in a well-ventilated area when melting beeswax. Beeswax should be melted using a double boiler or dedicated melting pot to reduce the risk of fire. Avoid direct heat sources such as stovetops or open flames when melting beeswax, as it is highly flammable. Additionally, never leave the melting beeswax unattended, as overheating can lead to combustion.
Another essential safety precaution is to keep flammable materials away from the area where you are making and burning beeswax candles. This includes paper, fabric, and any other items that could easily catch fire if they come into contact with hot wax or an open flame. It’s also important to have a fire extinguisher within reach in case of an emergency.
Finally, when burning beeswax candles, trim the wick to ¼ inch before each use to prevent excessive flickering or smoking. Always place your candles on a stable and heat-resistant surface away from drafts, curtains, or anything else that could catch fire. Never leave burning candles unattended and keep them out of reach of children and pets.
| Safety Precaution | Explanation |
|---|---|
| Work in a well-ventilated area | To reduce the risk of fire and ensure proper ventilation when melting beeswax. |
| Avoid direct heat sources | Direct heat sources such as stovetops or open flames should be avoided during the melting process. |
| Keep flammable materials away | To prevent accidents caused by items catching fire near hot wax or open flames. |
Enjoying Your Creations
After putting time and effort into making poured beeswax candles, it’s important to find creative ways to display and use your handcrafted creations. Whether you plan to keep them for personal enjoyment or give them as gifts, there are numerous ways to showcase the beauty and functionality of beeswax candles. Here are some ideas to inspire you:
1. Decorative Candle Holders:
Consider placing your poured beeswax candles in decorative holders or containers that complement your home decor. Look for unique candle holders made from materials like wood, glass, metal, or ceramic. You can also repurpose old jars or tins by transforming them into charming candle holders with a touch of creativity.
2. Creating Centerpiece Displays:
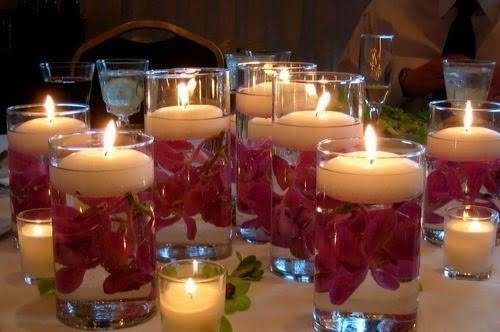
Utilize your handmade beeswax candles as stunning centerpiece displays for special occasions or everyday use. Arrange them on a decorative tray along with other elements such as flowers, greenery, or seasonal accents to create a visually appealing focal point for your table or mantle.
3. Outdoor Illumination:
Take advantage of the natural beauty of beeswax candles by using them to illuminate outdoor spaces. Whether you’re hosting an evening gathering in your garden or simply enjoying a quiet night on the patio, consider placing your handcrafted candles in lanterns, mason jars, or hurricane vases to create a warm and inviting atmosphere.
These are just a few creative suggestions for displaying and using your handcrafted poured beeswax candles. The possibilities are endless when it comes to showcasing the artistry and warmth that these unique candles bring to any space. Get inspired and explore different ways to enjoy and share the beauty of your handmade creations.
Conclusion
In conclusion, making poured beeswax candles is not just a craft, but an art form that allows individuals to create beautiful and functional pieces for their homes. The process of working with beeswax, from melting it down to adding color and scent, provides a sense of satisfaction and creativity that is unmatched. Whether you are a seasoned candle maker or just starting out, the art of making poured beeswax candles offers endless possibilities for personal expression and enjoyment.
Furthermore, embracing the beauty of making poured beeswax candles also means understanding and appreciating the benefits of using natural beeswax. As mentioned in the article, beeswax has unique qualities that make it an ideal choice for candle making, such as its clean-burning properties and subtle honey-like aroma. By utilizing this natural material, candle makers can take pride in creating eco-friendly products that are both visually appealing and environmentally conscious.
Lastly, the art of making poured beeswax candles extends beyond the act of crafting itself. It involves creating a warm and inviting atmosphere within one’s home, as well as offering handmade gifts to loved ones.
Additionally, with proper care and attention to safety precautions, individuals can enjoy the beauty and ambiance of their handcrafted candles for hours on end. Overall, those who immerse themselves in the world of making poured beeswax candles will discover endless opportunities for creativity, relaxation, and self-expression.
Frequently Asked Questions
How Do You Make Beeswax Poured Candles?
To make beeswax poured candles, start by melting the beeswax using a double boiler. Once melted, add any desired scents or colors and then carefully pour the wax into prepared candle molds. Allow the wax to cool and solidify before removing the candles from the molds.
How Many Candles Does 1 Lb of Beeswax Make?
The number of candles that 1 lb of beeswax can make depends on the size of the candles being produced. On average, 1 lb of beeswax can be used to produce around 4 medium-sized candles or 6 smaller ones.
What Temperature Do You Pour Beeswax Candles?
When pouring beeswax candles, it is important to do so at the right temperature to ensure a smooth and even finish. The ideal pouring temperature for beeswax is around 145 to 165 degrees Fahrenheit. This allows for proper flow and helps prevent air bubbles from forming in the candles as they cool.

Welcome to my candle making blog! In this blog, I will be sharing my tips and tricks for making candles. I will also be sharing some of my favorite recipes.


