Introduction
Making professional soy candles can be a rewarding and creative process, one which offers unique benefits over traditional paraffin wax. For starters, soy candles are almost entirely composed of eco-friendly ingredients, making them a sustainable choice for people who care about the environment. Because of their natural origin, soy candles generally burn cleaner than paraffin ones and tend to release far fewer toxins into the air when lit.
In addition to being eco-friendly, soy wax is also extremely easy to work with due to its low melting point. This means that it’s easier to shape and mold your desired candle type without running the risk of overheating or burning your hands. Furthermore, since soy wax is resistant to fading and discoloration from continued exposure to light, you can be sure your creations will remain vibrant for years to come.
What’s more, if you invest in quality ingredients such as natural fragrance oils and color dyes specifically formulated for use in candle-making projects, you can produce truly stunning pieces with unique aromas and colors. Although individual orders do take longer than large batches of store-bought candles, you’ll be able to fill specific requests with a unique personal touch in no time at all!
Choosing Your Soy Wax
There are five main types of soy wax on the market: Soy 444, Soy 464, Soy Blend 409, Coconut and Palm Wax Blend, and All Natural.
Soy 444 is a midpoint between soft and hard waxes. It has good glass adhesion properties and a good scent throw; however, performs best in cooler climates. This wax would be a good option for winter months where temperatures don’t exceed 80°F (27°C).
Soy 464 is a softer wax with strong adhesion properties and an excellent scent throw. Its melting point is around 140-145°F (60-63°C). However, since the texture remains soft in higher temperatures it might not perform well during warm months when temperatures may go above 80°F (27°C).
Soy Blend 409 is a blend of natural vegetable oils such as coconut oil and soybean oil that provide some benefits to other soy waxes mentioned before. It also has great hot and cold Throw as well as added rigidity to the candle. This blend is better suited to warmer climates because of its melting point at 120-125ºF (49-52ºC).
Coconut and Palm Wax Blend contains 5% beeswax which provides robustness within its C02 structure producing increased structural integrity compared to just using soy or paraffin alone. They are safe for inhalation due to low smoke emissions during burning time. The majority of elastomers within this mix have melting points below 100°F (38°C) making them suitable in most climates all year round.
All Natural Candles are pure natural non-GMO blends made without any chemical additives or fragrances unlike other candles which often contain synthetic dyes and fragrances. These soy candles burn both cleanly, with virtually no sooting or residue formation left on the jar due to their limited smoke emission profile. Depending on the climate you live in each type of natural candle will differ in performance, but generally this type of wax can withstand higher levels of heat for longer periods better than standard waxes since these generally have lower melting points below 95°F (35°C).
To determine what type of wax would work best for your specific needs, you should look at all the pros and cons each one offers – from its burn time and adhesion properties to its aesthetic appearance – then decide which works best for your particular project goals.
Scenting Your Candles
Scenting your soy candles with the right aroma is an essential part of the professional candle-making process. To ensure that you create the perfect end product, it’s important to understand the various products and techniques available to you in order to scent your creation. There is a wide range of different types of scents available, including essential oils, fragrance oils, herbal scents, and natural aromas that can be used individually or combined together.
To successfully use these scenting options in your soy candle creations, it’s essential to understand different sniffing tools such as dropper bottles and pipettes as well as measuring spoons and jiggers for precise amounts for mixtures. Additionally, pairing complimentary scents is an important technique for creating well-rounded fragrances with multiple layers of aroma. Small batches should be created during this testing phase in order to keep cost down while still obtaining a quality result.
In addition to understanding the various tools and techniques used for scenting soy candles, it’s also important to consider cost-efficient choices when selecting aromas for your finished product. This could include opting for additive-free synthetic fragrances or choosing a combination of natural ingredients like flowers and herbs from discounted local stores which usually have unrefined versions at lower prices than specialty shops or online vendors. Using this approach will help you select quality ingredients at reduced costs without sacrificing on fragrance or having to buy expensive branding lines.
Candle Wicks
There are two main types of wicks used in soy candles: cotton core wicks and flat braided wicks. Cotton core wicks have a cotton core surrounded by paper threads, whereas flat braided wicks are made from woven paper and sometimes contain a metal filament. The appropriate wick selected is essential to achieving successful results with handmade soy candles because it plays a major role in the burning characteristics of the candle.
Cotton core wicks provide the ideal balance between flame size and fluid wax consumption for most typical soy blends, leaving very little sooting or smoking when burned correctly. They are often used for container candles as they enable an even melt pool and do not need any tabbing (tying down) with a small weight to keep them upright while burning. Additionally they produce a large flame that will burn down quicker than a standard flat braid, making them better suited to shallow molds and jars where higher heat settings are often necessary to melt any stubborn wax residue at the edges.
Flat braided wicks create more of an ambient glow when burned however they require slightly longer burn times than cotton core wicks due typically having lower temperature ratings. They should be tabbed prior to each burn cycle in order that those elusive vapors will be able to properly lift away from the rising surface wax, drawing up new strands of liquid wax into contact with the flame’s top cone, ensuring that there is plenty of material being vaporized for complete combustion without producing soot particles. Flat braids are best suited for deeper vessels like tumblers/lowball glasses where higher temperatures do not need to be achieved in order for all of the material inside to melt properly.
The Melting Process
Step 1: Start by melting the soy wax in a double boiler on medium heat. Ensure that you are continuously stirring with a metal spoon to prevent burning or clumping.
Step 2: Once the wax has been fully melted, remove it from the heat and add any fragrances, colorants or essential oils. For even scent distribution, stir for about two minutes.
Step 3: Carefully pour the melted soy wax into the container of your choice. Generally speaking, using new and unused containers is recommended. Remember to allow any pre-existing fragrance and colorants you have added to settle before filling to capacity.
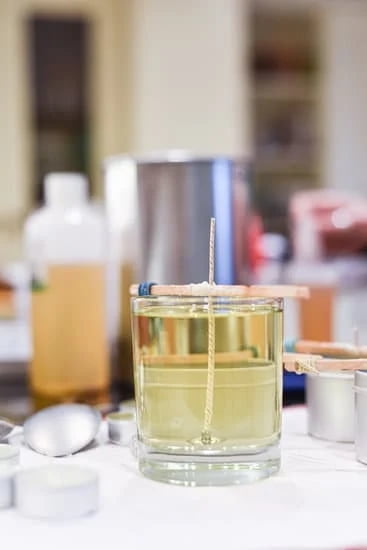
Step 4: Place a wick in the middle of each container and clip down securely while ensuring they remain straight and centered ” this will help prevent crooked candles!
Step 5: Allow your homemade soy wax candles to cool overnight without disturbing them ” this will ensure enough time for your candles to form an even shape throughout.
Step 6: Once fully cooled, trim the wicks down to ¼ inch for optimal burn time & season your newly formed candles with love by writing labels & packaging them in decorative bags if desired!
Labeling & Packaging
Labeling and packaging is a key factor in making a successful, professional soy candle. Attractive labels should include the brand name, color, scent, size, and other applicable information. Packaging should be just as important. By using materials that match the style of your branding, you can have an overall cohesive presentation that wows customers and helps create positive impressions of your products.
When it comes to cost-effectiveness, you will want to consider minimizing costs wherever possible while not sacrificing the aesthetics or appeal of your product. Many candle makers are opting to use shrink wrap for their products as it can help protect them during shipment and keep the quality high without much added cost. Various sizes of tissue paper can also be used for wrapping candles that look more aesthetically pleasing than shrink wrap but provide some protection from heat and moisture damage. Ultimately, it’s up to you to find what works best for your business and budget.
Troubleshooting
When it comes to making professional soy candles, the process is mostly straightforward. However, there are some common problems that can arise when making soy candles at home. Here are a few typical issues and how to avoid them:
1. Discoloration – As soy wax is derived from plants, it has a tendency to discolor in hotter environments. To prevent this, ensure that your melting temperature does not rise too high and avoid adding colors or fragrances with a high concentration of dye.
2. Cracking – Soy wax needs to cool gradually when setting in order to avoid cracking. This can be done by setting the mold in a cooler area away from direct sunlight or other heat sources until the candle sets completely.
3. Weak Scent Throw – If you find that the scent of your finished product is weak or fades quickly, this could be due to using a low-quality fragrance oil or not using enough scent for the amount of wax used. It’s also possible that you did not let the fragrance mix properly with your wax as it melted which affects scent throw as well so make sure you pour slightly slower and swish the liquid before pouring into molds if necessary.
By following these simple tips, you should be able to make beautiful soy candles with minimal hassle!
Conclusion
After exploring the many tips for creating professional soy candles, it is important to take into account all the details discussed in the blog. From picking quality ingredients to properly curing the candles and labeling them correctly, a great deal of care needs to be put into making sure each candle looks its best and smells great. By taking time with each component, you can create a perfect candle that will be appreciated by anyone who purchases or receives it. Even if you are just starting out with homemade soy candles there is no need to be hesitant or less than proud of your work when it comes to producing something professional quality. With guidance and an eye for detail, you can easily make soy candles that capture the beauty and charm of a professionally made product.

Welcome to my candle making blog! In this blog, I will be sharing my tips and tricks for making candles. I will also be sharing some of my favorite recipes.


