Introduction
Transform used crayons into colorful scented candles with this fun, easy DIY project. This quick craft can be enjoyed by anyone and is a great way to recycle old crayons. It’s particularly enjoyable for kids, who will love experimenting with various colors and aromas. Choose your favorite colors and scents, then let the creativity begin!
These homemade candles are especially beautiful when arranged in groups or layered over one another; you can also customize them to any size container you have on hand. Plus, you’ll be delighted by the beautiful aroma that fills your home! To make these scented candles, you’ll need wax chips (or an old candle), crayons (any type of wax-based pencils like colored pencils or oil pastels will work too), wicks and essential oils (for fragrance). Sort the wax or chips into separate containers according to their colors; melt each group slowly on low heat to achieve liquid form. Carefully pour each melted wax separately into a candle container while inserting the wick. Add a few drops of your desired essential oil while still hot, combine gently, then let cool completely before using. Enjoy your relaxing, homemade candle lights!
Benefits of Making Scented Crayon Candles
Making scented crayon candles provides a fun way to repurpose old crayons and reuse them in an interesting and creative project. In addition to being an enjoyable activity, making scented crayon candles also has many benefits. One benefit is that it can help teach lessons about sustainability and the importance of reusing materials in creative ways. Additionally, due to the size of the resulting candle, this project is particularly useful for creating decorations for small spaces such as shelves or centerpieces. Furthermore, using different colors and fragrances of wax can lead to unique creations! Not only do these candles look beautiful but they can be used for aromatherapy; various essential oils can be mixed with the melted wax for added benefits and enjoyment. Finally, this type of candle makes a great gift! With personalization ranging from colors to packaging, you are sure to make someone feel special during birthdays and holidays. Making scented crayon candles is a wonderful way to get crafty while also teaching important lessons.
Preparing the Supplies
Making scented crayon candles is an easy and rewarding craft project. To get started you will need a few supplies: wax, crayons for coloring and scent, wicks with clips, containers, double boiler pot and scissors. To begin, cut your wicks to fit within your container and secure the bottom of the wick with the clip. Melt wax in a double boiler pot on low heat until it liquidates. Mix melted wax with crayons that have been broken into pieces, while stirring until they become fully dissolved to give you desired color. Once the color has been achieved, add in a few drops of scent oil and continue to stir until mixed fully. Carefully pour mixture into containers and allow to cool for two to three hours before adding your newly created candle to your next crafting project!
Heating, Melting, and Pouring the Wax
Making scented crayon candles involves heating, melting, and pouring wax. To begin, you will need to gather the supplies to make the candles. You will need unscented wax flakes or chunks, crayons of your choice for coloring and scenting the candles, candle wicks, and glass containers for each candle.
Once you have all of your supplies ready, you can begin heating the wax to melt it. Place it into a pan or double boiler on a low heat setting. Be sure to stir it frequently with a wooden spoon so that it melts evenly and there are no unmelted lumps that could clog up the wick when lit. After all of the wax has melted completely, you can add crayon chips of your choice to add color and scent to the candles. Stir until everything is combined then turn off the heat source.
Next comes pouring the melted wax into the designated containers while making sure that they are level and stable so they don’t tip over as you pour in them. Once you have poured in all of the wax, place a wick in each container based on their size and secure it with a bit of hot glue/decoupage glue for added stability if needed. Let them cool overnight before burning them!
Preparing and Inserting the Crayons
Inserting the crayons into the candle molds is an important part of the scented crayon candle making process. Firstly, you will need to preheat your oven to about 200 degrees Fahrenheit. Secondly, peel off any wrapping from each crayon and break them into smaller segments. This will help them fit into the molds more easily and allow for faster melting during baking. Once all of your crayons are broken into pieces, it’s time to start arranging them in your candles’ molds. Start by placing one broken piece against each side of the mold and then fill in the center with smaller pieces until completely full. Make sure that there are no gaps in between pieces or they may not melt correctly. Finally, secure a wick near the base of each mold before popping them in the oven to bake for around 15 minutes or until your desired result is achieved.
Finishing off the Candles
Once your crayon candles are complete, it is important to double-check that the finished product looks and smells as you would like. This can involve giving them a final check for any nicks or scrapes and making sure all of the wicks have been trimmed to the same length. You should also give the candles a good sniff, in order to make sure your desired scent is present. If you’re not satisfied with how they smell, add an extra drop of essential oil and/or some pieces of chopped wax crayon. Place the finished candles on a cookie sheet and allow them to cool overnight before using them or gifting them away!
Tips and Techniques for Making Scented Crayon Candles
Creating your own scented crayon candles is an easy and fun DIY project that can help to add a pleasant aroma to any space. Before you begin making your own candles, there are some tips and techniques you should be aware of that can help ensure best results.
First, choose the right wick – the size of your wick will depend on the type and size of your candle vessel. Try to use the longest cotton core wick possible for your candle vessel. Make sure it fits snugly in the container you have chosen.
Next, select a wax – soy wax or beeswax are generally used for candles that include crayons because they are easy to work with and burn nicely. For even burning of your candle, add a bit of stearic acid when melting your wax in an old pot or pan before adding your crayons. Place a thermometer in the mixture so that you can monitor its temperature – depending on the type of wax used, temperatures should stay between 175-200 degrees Fahrenheit while working with it.
Finally, once all your ingredients and tools are gathered together, it’s time to melt your crayons and create beautiful colors in the mix – pour approximately two to three ounces of melted wax into each mold or container before adding colorful crayons into each one at different levels for interesting shades when lit. Add a few drops essential oil if desired for added scent before allowing them to cool completely, then carefully remove from molds and enjoy!
Creative Ideas for Decorating the Candles
When making scented crayon candles, there are plenty of ways to get creative with customizing the design. To finish off the look of your candle, add some fun and unique decorations! One approach is to draw wax lines around the outside of the candle with a crayon of a contrasting color. You can also get creative by using string or ribbons to tie decoration pieces onto the outside of the candle. Dried flowers, beads or any other small objects that fit your chosen theme for the candles can be added for an extra special touch. Embellishments such as buttons, feathers, glitter or paint can also be used to decorate the candles in different colors and shapes. Finally, you may want to add a label onto each candle with some identifying words or images that describe their scent.
Conclusion
Scented crayon candles are a fun and easy project that can make a unique and personalized present. The process of melting the crayons together can be done in minutes, then you can pour the wax into any shape or size container to create a one-of-a-kind candle. With this simple recipe, you can craft creative gifts that will bring color and scents to any home or occasion. So go ahead and try making your own scented crayon candles today!
Additional Resources
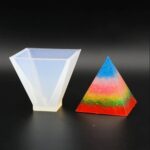
One way to make these scented crayon candles even more unique and originally your own is by making them into shapes, colors, and sizes that will suit you best. There are a variety of molds available for purchase at craft and hobby stores such as silicone candle molds, wax embeds and embed molds, cakepop molds, silicone bar soap molds, candy molds and more. However, if you want to create something completely unique you can also make your own homemade crayon candle mold using plastic containers or shallow cardboard boxes. Another option is to use cartoon or animal cookie cutters – just remember to line them with parchment paper so your melted wax won’t stick to the cookie cutter!

Welcome to my candle making blog! In this blog, I will be sharing my tips and tricks for making candles. I will also be sharing some of my favorite recipes.


