Are you a candle enthusiast looking to add a personal touch to your candle-making process? One way to do so is by making silicone molds for candles. Silicone molds offer various benefits and versatility in the candle making process, allowing for the creation of unique and intricate designs that may not be achievable with traditional methods.
Silicone molds are flexible, durable, and non-stick, making them ideal for creating detailed and delicate candle shapes. Unlike rigid molds, silicone molds can be easily bent and twisted to release the finished candles without causing damage. Additionally, they can withstand high temperatures, ensuring that they can be reused multiple times without losing their shape or durability.
In this article, we will guide you through the process of making silicone molds for candles, from choosing the right silicone material to customizing your molds to create one-of-a-kind designs. We will also provide essential safety measures and troubleshooting tips to ensure a successful mold-making experience.
Whether you are a beginner or an experienced candle maker, incorporating silicone molds into your candle making process can elevate your craft and allow you to unleash your creativity in new ways.
Choosing the Right Silicone Material
When it comes to making silicone molds for candles, choosing the right silicone material is crucial to ensure the success of your projects. There are various types of silicone materials available, each with its own unique properties and suitability for candle making. Understanding the differences between these materials will help you make an informed decision based on your specific needs and preferences.
Types of Silicone Materials
There are two main types of silicone materials used for making molds: tin-cure (condensation cure) silicone and platinum-cure (addition cure) silicone. Tin-cure silicones are more cost-effective and easier to work with, but they may not be as durable or heat-resistant as platinum-cure silicones. On the other hand, platinum-cure silicones offer superior tear strength, heat resistance, and long-term stability, making them ideal for creating long-lasting candle molds.
Suitability for Candle Making
When selecting a silicone material for candle making, it’s important to consider factors such as mold durability, flexibility, and resistance to high temperatures. Since candles require molds that can withstand exposure to hot wax and frequent use, platinum-cure silicones are often the preferred choice due to their exceptional heat resistance and longevity. Additionally, platinum-cure silicones produce molds with minimal shrinkage and excellent detail replication, resulting in high-quality finished candles with intricate designs.
Ultimately,before choosing a silicone material for making molds for candles, it’s essential to assess your specific needs and priorities in terms of mold performance, durability,and budget constraints. By understanding the characteristics of different silicone materials availableand their suitability for candle making,you can make an informed decision that will result in successful and satisfying candle-making experiences.
Preparation and Safety Measures
When it comes to making silicone molds for candles, preparation and safety measures are crucial to ensure a successful outcome. Working with silicone materials and chemicals requires careful attention to detail, as well as the use of proper safety equipment to protect yourself during the process. In this section, we will discuss the necessary steps you need to take to ensure your safety and success in making silicone molds for candles.
Workspace Preparation
Before you begin making silicone molds for candles, it’s important to prepare your workspace properly. Choose a well-ventilated area with good lighting where you can work comfortably. Lay down protective coverings on your work surface to prevent any spills or damage. Additionally, make sure to gather all the necessary tools and materials before starting the process.
Personal Protective Equipment
Working with silicone materials involves coming into contact with chemicals that may pose health risks if not handled properly. Therefore, it is essential to wear personal protective equipment such as gloves, safety goggles, and a face mask to protect yourself from any potential exposure. This will help minimize the risk of skin irritation or inhalation of fumes during the mold making process.
Proper Handling and Storage
When handling silicone materials for making molds, it’s important to follow the manufacturer’s instructions carefully. Store the silicone products in a cool, dry place away from direct sunlight and extreme temperatures. Make sure to use them within their designated shelf life to ensure optimal performance and quality of your silicone molds for candles.
By taking these preparation and safety measures seriously, you can ensure that your experience in making silicone molds for candles is not only successful but also safe. Following these steps will help reduce any potential risks associated with working with silicone materials and chemicals while achieving professional results in creating unique candle designs.
Step-by-Step Guide to Making Silicone Molds
When it comes to making silicone molds for candles, following a step-by-step guide is essential to ensure success in the process. Here’s a comprehensive guide on creating silicone molds for candles, from mixing the silicone to pouring and curing:
1. Choose the right silicone material: Select a high-quality platinum-cured silicone material that is suitable for candle making. Ensure that the silicone is food-grade and safe for use with wax and fragrance oils.
2. Prepare your work area: Before starting the mold-making process, make sure to clean and prepare your work area. This includes having all the necessary tools and supplies within reach, such as measuring cups, stirring sticks, and release agent.
3. Mix the silicone: Follow the manufacturer’s instructions to accurately measure and mix the silicone base and catalyst. Use a separate container for each component to ensure proper measurements.
4. Degassing the mixture: After mixing the silicone, it’s important to degas the mixture to remove any air bubbles. Place the mixed silicone in a vacuum chamber or use a degassing tool to achieve this.
5. Pouring the silicone: Once degassed, carefully pour the mixed silicone into your mold box or container that houses your original candle design.
6. Curing process: Allow the poured silicone mold to cure based on the manufacturer’s recommended time frame. It’s important not to disturb or move the mold during this period as it can affect its final quality.
Following these steps will help you create high-quality silicone molds for candles that will allow you to produce professional-looking and intricate candle designs for your customers or personal use. With proper preparation and attention to detail, making stunning and unique candles with custom-made molds becomes an exciting venture in candle making.
Customizing Your Silicone Molds
Once you have mastered the art of making silicone molds for candles, the next step is to explore the various ways to personalize and customize them to create unique and intricate designs. Customization allows you to unleash your creativity and produce one-of-a-kind candles that stand out in the market.
One way to customize your silicone molds is by adding texture and patterns to the interior surface of the mold. This can be achieved by pressing different materials such as lace, fabric, or even textured paper onto the bottom of the mold before pouring the silicone.
Another popular method of customizing silicone molds for candles is by adding color. You can mix pigments or mica powders into the silicone before pouring it into the mold to create colorful and visually appealing designs. Additionally, you can also use paint or specialized dyes on the cured silicone mold itself to add color and vibrancy to your candle creations.
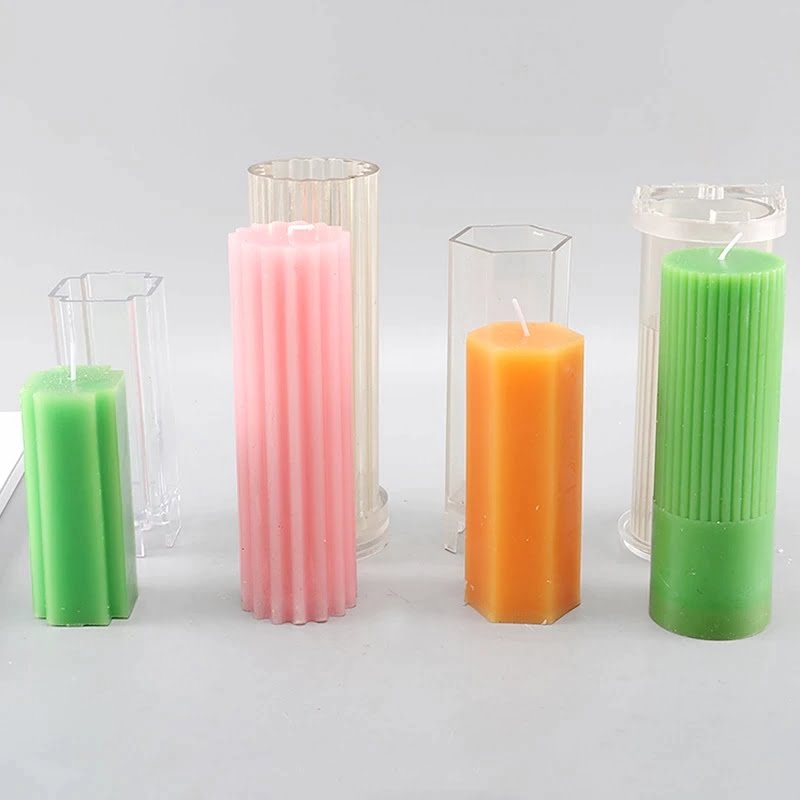
Furthermore, consider experimenting with varying shapes and sizes of silicone molds to cater to different preferences and demands in the market. Developing a range of sizes and shapes will allow you to offer a diverse collection of candles that appeal to a wider audience. You can create standard cylindrical molds, as well as intricate geometric or novelty shapes for special occasions or seasonal themes.
Here are some ideas on how you might customize your silicone molds for candle making:
- Embedding dried flowers, herbs, or other decorative elements
- Layering different colors of wax in the mold
- Mixing scents directly into the silicone before pouring
- Creating multi-piece molds for more complex candle designs
By customizing your silicone molds for candles, you can elevate your candle making hobby or business with truly unique and stunning creations that will captivate customers.
| Customization Ideas | Description |
|---|---|
| Adding Texture | Pressing materials onto bottom of mold for textured surface |
| Adding Color | Mixing pigments into silicone or painting cured mold |
| Varying Shapes and Sizes | Creating different shapes and sizes of molds for diverse collection |
Troubleshooting Common Issues
Creating silicone molds for candles can be a rewarding and creative endeavor, but it’s important to be prepared for potential issues that may arise during the process. One common issue that candle makers may encounter when making silicone molds is air bubbles in the mold material. These air bubbles can result in imperfections in the finished mold, which can affect the quality of the candles produced.
To prevent this issue, it’s essential to mix the silicone material thoroughly and carefully to minimize the presence of air bubbles. Additionally, using a vacuum chamber or degassing the silicone before pouring can help remove any trapped air.
Another common problem with silicone mold making is improper mold release, which can make demolding difficult and potentially damage the mold or the finished candle. To address this issue, applying a suitable mold release agent before pouring the silicone is crucial. There are various types of mold release agents available, including sprays, powders, and liquids, so it’s important to choose one that is compatible with both the silicone material and the candle wax being used.
In some cases, candle makers may experience difficulties with achieving a smooth and even surface on their silicone molds. This can occur due to uneven pouring or insufficient support during curing. To troubleshoot this issue, ensuring that the mold is placed on a level surface and properly supported during the curing process is essential. Additionally, carefully following the manufacturer’s instructions for mixing and pouring the silicone material can help achieve a smooth finish on the mold.
| Common Issue | Solution |
|---|---|
| Air bubbles in mold material | Mix silicone thoroughly and use vacuum chamber or degassing |
| Improper mold release | Apply suitable mold release agent before pouring |
| Uneven surface on molds | Ensure level surface and proper support during curing process |
Using Silicone Molds for Candle Making
Once you have successfully created your silicone molds for candles, it’s time to put them to use and create stunning, professional-looking candles. The process of using silicone molds for candle making is relatively simple, but there are a few key steps to ensure that you achieve the best results. Below is a step-by-step guide on how to use silicone molds to create beautiful candles:
1. Prepare your workspace: Before starting the candle making process, it’s important to prepare your workspace. Make sure your work area is clean and free from any debris that could affect the quality of your candles.
2. Melt your wax: Begin by melting the wax for your candles in a double boiler or melting pot. Once the wax has reached the desired temperature and consistency, add any colorants or fragrances if desired.
3. Pouring the wax into the mold: Carefully pour the melted wax into the silicone mold, making sure not to overfill it. You can also add decorative elements such as dried flowers or botanicals at this stage to customize your candles.
4. Allowing the wax to cool and set: Let the wax cool and solidify in the mold for several hours or overnight, depending on the type of wax used.
5. Removing the candle from the mold: Once the wax has completely set, gently remove the candle from the silicone mold by carefully peeling back the edges of the mold.
6. Finishing touches: Trim any excess wick and smooth out any imperfections on the surface of your candle if needed.
By following these steps and taking care throughout each stage of the process, you can create beautiful, professional-looking candles using silicone molds.
Remember that practice makes perfect when it comes to using silicone molds for candle making. Experiment with different colors, scents, and designs to discover what works best for you.
Additional Tips and Resources
In conclusion, making silicone molds for candles can open up a world of possibilities for candle makers. The benefits and versatility of silicone molds make them an ideal choice for creating unique and custom candles.
By choosing the right silicone material and following necessary safety measures, candle makers can ensure their success in creating high-quality molds. With a step-by-step guide, individuals can easily learn how to make their own silicone molds, allowing them to customize their designs and explore various creative options.
Customizing silicone molds for candles is an exciting part of the process, as it allows for personalization and the creation of intricate designs. Troubleshooting common issues that may arise during the mold-making process are also addressed in order to help avoid any potential obstacles.
Additionally, using silicone molds to create professional-looking candles is demonstrated, allowing individuals to see the results of their hard work come to life. Finally, by providing additional tips, tricks, and resources, this article aims to equip readers with all they need to know about making silicone molds for candles, including recommended products and tools.
Overall, making silicone molds for candles is a rewarding craft that offers endless opportunities for creativity. Whether you’re a beginner or an experienced candle maker, employing silicone molds can elevate your candle-making process and allow you to produce stunning and unique creations that truly stand out. With the right materials, preparation, and guidance, anyone can successfully learn how to make their own silicone molds for candles and take their candle-making hobby or business to the next level.

Welcome to my candle making blog! In this blog, I will be sharing my tips and tricks for making candles. I will also be sharing some of my favorite recipes.


