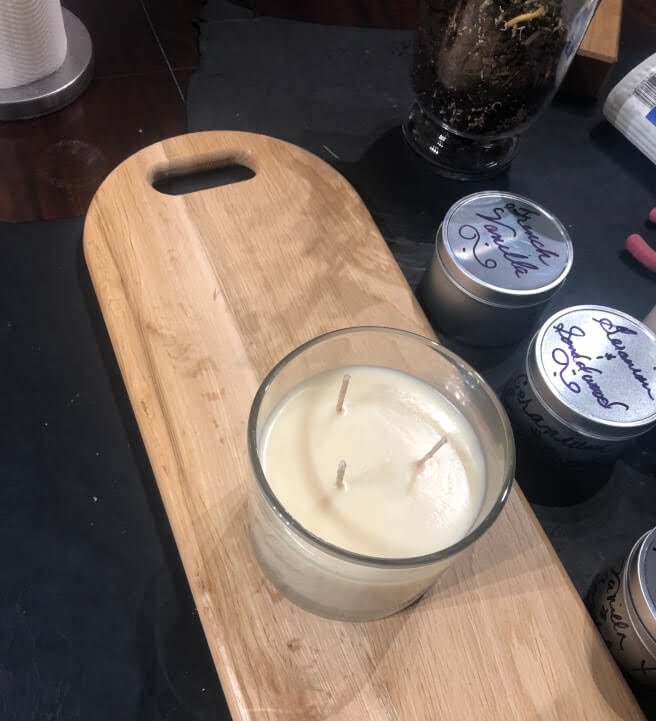
Are you curious about making your own soy candles at home? Making soy candles in a crock pot is a cost-effective and customizable way to create personalized, handmade candles.
With the ability to control the process from start to finish, you can choose the scent, color, and container for your candles, making them unique to your preferences. In this article, we will explore the concept of making soy candles in a crock pot, discuss its benefits, and provide step-by-step instructions for creating your own beautiful candles.
When it comes to candle making, using a crock pot offers many advantages. Not only does it make the process easier and more convenient, but it also allows for better temperature control when melting the soy wax.
This method is not only cost-effective but also provides an opportunity to customize every aspect of the candle-making process. From selecting the fragrance oils and colors to choosing the containers, making soy candles in a crock pot allows for endless customization options.
Whether you are new to candle making or a seasoned pro, making soy candles in a crock pot is a fun and rewarding activity that allows you to express your creativity while producing high-quality products. By following our step-by-step guide and tips, you can enjoy the satisfaction that comes with creating your own unique soy candles at home. So let’s dive in and explore the world of candle making using this innovative method.
Gather Your Supplies
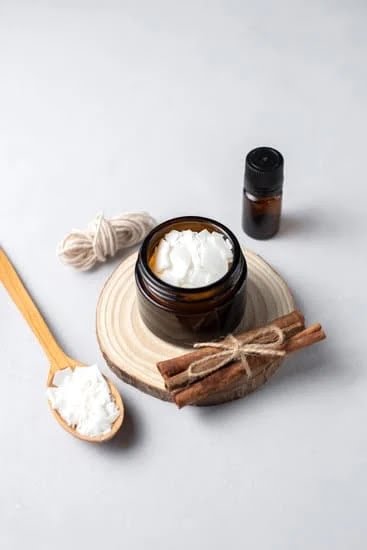
When it comes to making soy candles in a crock pot, having the right supplies is crucial to ensure a successful and enjoyable candle-making experience. Here’s a detailed list of all the necessary supplies you’ll need:
1. Soy Wax: The foundation of your soy candles, soy wax is a natural and eco-friendly option that’s perfect for candle making. Make sure to use high-quality soy wax for the best results.
2. Fragrance Oils: To add a delightful scent to your candles, you’ll need fragrance oils. There are countless options available, allowing you to customize your candles with various scents such as lavender, vanilla, citrus, and more.
3. Wicks: Choosing the right wicks is essential for proper burning and scent throw. Make sure to select wicks that are appropriate for the size of your candle containers and will provide an even burn.
4. Thermometer: A thermometer is necessary for monitoring the temperature of the melted soy wax to ensure it reaches the optimal pouring temperature without overheating.
5. Crock Pot: Of course, you’ll need a crock pot for melting the soy wax. Using a crock pot provides a safe and efficient way to melt the wax without risk of overheating or burning.
In addition to these essentials, other helpful supplies include a pouring pitcher, stirring utensil, adhesive stickers for securing wicks in containers, and any additional decorative elements such as dried flowers or herbs if desired. With these supplies on hand, you’ll be well-equipped to begin making beautiful soy candles in your crock pot.
And don’t forget; before getting started with your candle-making adventure gather everything per Instruction 5 and make sure you have ample workspace in an area where accidents can easily be wiped away without causing damage or staining anything. By doing this first, you’ll make everything easier in case things get messy while making soy candles in a crockpot.
Preparing the Crock Pot
To start making soy candles in a crock pot, it is important to properly prepare the equipment for the candle-making process. Preparing the crock pot correctly can ensure that the soy wax melts evenly and at the right temperature, resulting in high-quality candles with a smooth finish.
Setting Up the Crock Pot
The first step in preparing the crock pot for making soy candles is to ensure that it is clean and free of any residue from previous use. Once cleaned, place the desired amount of soy wax into the crock pot based on the size of the batch you want to make. It is essential to use a thermometer to monitor and maintain an optimal temperature throughout the melting process.
Setting and Monitoring Temperature
Set the crock pot to its lowest heat setting and allow the soy wax to melt gradually. It is crucial not to rush this process by using high heat, as overheating can lead to discoloration and affect fragrance retention in the finished candles. Use a thermometer to monitor and maintain a temperature of around 170-180°F (76-82°C) for optimal results.
Safely Melting Soy Wax
It’s important to make sure that there are no flammable materials or strong drafts near the crock pot while melting the soy wax. Keep an eye on the melting process while allowing the wax to liquefy completely without boiling or scorching. By following these steps, you can safely melt soy wax in a crock pot without compromising its quality.
By following these step-by-step instructions on how to prepare your crock pot for making soy candles, you can ensure that your candles turn out beautifully, with even melting and optimal fragrance retention. This method also offers a cost-effective way of creating custom candles with unique scents and colors tailored to your preferences, making it an ideal option for candle enthusiasts looking for a fun and creative DIY project.
Adding Fragrance and Color
When making soy candles in a crock pot, one of the most exciting and creative steps is adding fragrance and color to the melted soy wax. The possibilities are endless when it comes to customizing the scent and appearance of your candles. Whether you prefer a calming lavender scent, a festive cinnamon aroma, or a fresh citrus fragrance, adding essential oils or fragrance oils can help you achieve the perfect scent for your candles.
To add fragrance oils to your melted soy wax, it’s important to do so at the right temperature. Typically, the ideal temperature for adding fragrance oils is between 150-160°F (65-70°C).
This allows the fragrance oil to properly bind with the wax and gives you enough time to mix thoroughly before pouring. It’s essential to follow the specific instructions provided by your chosen fragrance oil manufacturer as different oils may have varying recommended temperatures for optimal results.
In addition to fragrance oils, adding color to your soy wax can further enhance the appearance of your candles. There are various options for coloring your candles such as liquid dye, dye chips, or even natural ingredients like beetroot powder or turmeric.
When choosing a colorant, it’s crucial to use ones specifically designed for candle making to ensure they blend well with the wax and do not affect its burning properties. Be mindful that some dyes may require more thorough mixing than others in order to achieve an even color throughout the candle.
| Tips | Details |
|---|---|
| Choose high-quality fragrance oils | Selecting reputable suppliers can ensure strong scents and better burn performance. |
| Mix colors in small batches | Test different color combinations on smaller amounts of wax before committing to larger batches. |
| Note down your measurements and experiments | Keeping track of how much scent or color you used will help maintain consistency when recreating successful candle variations. |
Pouring the Candles
After preparing the melted soy wax with the desired fragrance and color, it’s time to pour the candles into their containers. This step is crucial in ensuring that the candles set properly and look professional. Proper positioning of the wicks and avoiding spills or mess are important aspects of this process.
Positioning the Wicks
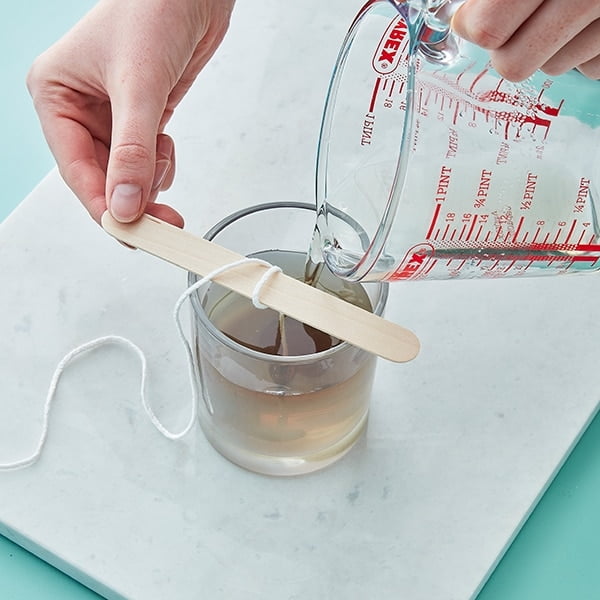
Before pouring the melted soy wax, it is essential to ensure that the wicks are properly positioned in the candle containers. Use a wick holder or chopsticks to keep the wick centered while you pour the wax. This will prevent any uneven burning once the candles are lit. Make sure to secure the wick in place so that it remains straight as the wax cools and sets.
Avoiding Spills and Mess
When pouring the melted soy wax into the containers, do so carefully to avoid any spills or mess. Use a steady hand and pour slowly to control the flow of wax into each container. It may be helpful to place newspaper or paper towels underneath the containers to catch any drips. Additionally, having a clean-up kit ready nearby, including rubbing alcohol for easy cleaning of any spilled wax on surfaces or hands, can help minimize any potential mess.
Setting Time
Once you have poured the melted soy wax into the candle containers, allow them to cool and set at room temperature. Avoid moving or disturbing them during this process to ensure that they set evenly and smoothly. The setting time can vary depending on factors such as room temperature and size of the candles, but typically it takes several hours for them to fully set.
In following these detailed instructions, you can confidently pour your melted soy wax into candle containers with proper wick positioning and without creating a mess. Taking care during this crucial step will result in beautifully crafted soy candles that are ready for use once they have finished setting.
Cooling and Setting
When making soy candles in a crock pot, it’s important to allow the candles to cool and set properly to ensure a high-quality finished product. Here are some helpful tips on how to achieve the optimal cooling and setting process for your homemade candles:
1. Choose the Right Room Temperature: The ideal room temperature for allowing soy candles to cool and set is around 70-75°F (21-24°C). It’s important to avoid extreme temperatures, as hot or cold environments can affect the setting process and result in imperfections such as frosting or cracking. If necessary, use a thermometer to monitor the room temperature and make adjustments as needed.
2. Be Patient: It’s crucial to exercise patience when allowing your soy candles to cool and set. Rushing this process can lead to uneven cooling, which may cause the candles to develop sinkholes or air pockets. Allow the candles to naturally cool at their own pace, typically taking around 4-6 hours for small containers and up to 12 hours for larger ones.
3. Avoid Disturbances: Once you have poured the melted soy wax into the candle containers, it’s essential to avoid any disturbances that may disrupt the cooling and setting process. Make sure the candles are placed on a flat surface where they won’t be disturbed, and refrain from moving them until they are completely set.
Remember that achieving a proper cooling and setting process is essential for creating professional-looking soy candles with a smooth finish. By following these tips, you can ensure that your homemade soy candles turn out beautifully every time, adding a personal touch of craftsmanship to your home decor or gift-giving endeavors.
Trimming and Caring for Your Candles
Once you have successfully poured and set your candles, it’s important to properly trim and care for them to ensure a longer burn time and better scent throw. Follow these steps to keep your soy candles in optimal condition:
1. Trim the wick: Using a pair of wick trimmers or scissors, trim the wick of the candle to about 1/4 inch before lighting it. This helps prevent black soot from forming on the container and ensures a cleaner, more even burn.
2. Avoid tunneling: To prevent tunneling (when the candle burns straight down the middle, leaving wax along the sides), make sure to allow the candle to burn long enough for the entire surface to melt evenly each time you light it.
3. Store properly: When not in use, store your soy candles in a cool, dry place away from direct sunlight and heat sources. This will help preserve their scent and color for longer.
It is important to note that proper care for your soy candles will not only prolong their lifespan but also enhance your overall candle-making experience. By following these simple steps, you can enjoy beautifully scented and long-lasting soy candles made right in your crock pot.
Decorating and Packaging
When it comes to making soy candles in a crock pot, the fun doesn’t stop after pouring the melted wax into the containers. Decorating and packaging your finished candles is an important step that not only adds a personal touch but also enhances their overall presentation. There are numerous creative ideas on how to decorate the candle containers and package the finished candles for a professional and attractive look.
One popular way to decorate candle containers is by adding decorative labels or stickers. You can purchase pre-made labels or create your own using printable sticker paper. These labels can include the scent of the candle, any special features (such as essential oils), and even your own branding if you plan on selling the candles. Additionally, you can add ribbons, twine, or charms around the neck of the container to add an extra flair.
When it comes to packaging your finished soy candles, presentation is key. Consider placing each candle in a clear cellophane bag tied with a ribbon or twine for an elegant look. Alternatively, you can also use gift boxes or custom-designed packaging that reflects the theme or scent of the candle. Don’t forget to include care instructions and safety information on each package to ensure that your customers can enjoy their candles safely.
Overall, taking the time to decorate and package your soy candles not only enhances their appearance but also adds value to your homemade creations. By paying attention to these details, you can create a professional and attractive presentation that will impress anyone who receives or purchases your beautifully packaged soy candles made in a crock pot.
Conclusion and Tips for Success
In conclusion, making soy candles in a crock pot is a fun and cost-effective way to create personalized candles for yourself or as thoughtful gifts for friends and family. By using a crock pot, you can easily control the temperature of the wax and customize the scent and color of your candles. The process outlined in this article provides step-by-step instructions to ensure success, from gathering the supplies to decorating and packaging the finished product.
One important tip for success when making soy candles in a crock pot is to be patient and attentive throughout the process. From preparing the crock pot and melting the wax to pouring the candles and allowing them to cool, it’s crucial to follow each step carefully. Additionally, troubleshooting common issues such as uneven cooling or wick centering will help you achieve professional-looking candles with excellent burn times and scent throw.
We encourage readers to explore the art of making soy candles in a crock pot as a creative and rewarding hobby. Experiment with different fragrance oils, colors, and container styles to create unique candles that reflect your personal style. With practice and attention to detail, you can master the art of candle making in no time.
Whether you’re making candles for yourself or for others, the joy of creating something handmade and beautiful is truly satisfying. So gather your supplies, fire up that crock pot, and enjoy the creative process of making soy candles at home.
Frequently Asked Questions
Can You Make Candles Using a Crock Pot?
Yes, you can make candles using a crock pot. It’s a convenient way to melt the wax and safely control the temperature while adding fragrance and color. Just be sure to use a designated crock pot for this purpose.
Can I Use a Crockpot Instead of a Wax Warmer?
Yes, you can use a crockpot instead of a wax warmer. The gentle heat of the crockpot will effectively melt the wax and release the fragrance, creating a cozy atmosphere in your home.
How Long Does Wax Take to Melt in Slow Cooker?
The time it takes for wax to melt in a slow cooker can vary depending on the quantity and type of wax used. Generally, it can take anywhere from 1 to 3 hours for the wax to completely melt and reach an optimal temperature for candle making.

Welcome to my candle making blog! In this blog, I will be sharing my tips and tricks for making candles. I will also be sharing some of my favorite recipes.

