Are you looking to add a touch of elegance and natural beauty to your home? Making tapered beeswax candles could be the perfect creative project for you. Tapered beeswax candles have a timeless appeal, with their slender shape and warm glow creating an inviting atmosphere in any room. Not only are these candles visually striking, but they also hold cultural significance and have a rich history dating back centuries.
Tapered beeswax candles have been a symbol of light, warmth, and celebration in various cultures around the world. From religious ceremonies to romantic dinners, these candles have held a special place in human tradition. The process of crafting these exquisite candles is both rewarding and enjoyable, making it an ideal hobby for anyone interested in candle-making or alternative crafts.
In this article, we will explore the step-by-step process of making tapered beeswax candles, discuss the materials needed, offer tips for achieving the perfect tapered shape, and provide ideas for decorating and personalizing your creations. Additionally, we will delve into the benefits of using beeswax candles over other types such as paraffin or soy, as well as how to care for and maintain your handmade tapered candles.
Whether you’re new to candle-making or looking to expand your skills, join us on this journey of creativity and inspiration.
Materials Needed for Making Tapered Beeswax Candles
Making tapered beeswax candles is a craft that requires the right materials to ensure quality results. The key ingredient, of course, is high-quality beeswax. Beeswax can be sourced from specialty suppliers or local beekeepers who produce their own beeswax. It’s important to choose a pure and natural beeswax without any added chemicals or fillers for the best candle-making experience.
In addition to beeswax, there are several essential tools needed for making tapered beeswax candles. This includes wicks, which should be made of natural fibers like cotton, as well as molds specifically designed for creating tapered candles.
A thermometer is also crucial for monitoring the temperature of the melted beeswax to ensure it doesn’t overheat or cool too quickly. Optional additives such as essential oils and natural colorants can be used to customize the scent and appearance of the candles.
Quality Beeswax and Where to Source It
When it comes to sourcing quality beeswax, look for reputable suppliers that offer pure, unadulterated beeswax. Another option is to connect with local beekeepers who may have excess wax for sale. It’s important to verify the purity and quality of the beeswax before purchasing it.
Essential Tools
The necessary tools for making tapered beeswax candles include candle wicks, taper molds, a double boiler or wax melting pot, a thermometer, a pouring pitcher, and various stirring utensils. Additionally, having a work surface protected by wax paper or aluminum foil will make cleaning up easier once you’re finished with your project.
Optional Additives
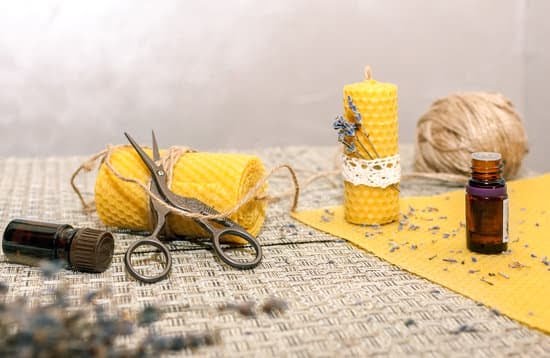
While not essential, adding fragrance oils or essential oils to your tapered beeswax candles can enhance their ambiance. Natural colorants such as dried flowers or herbs can also lend a unique aesthetic appeal to your homemade candles. Always use caution when working with scents and colors and ensure they are safe for use in candle-making before adding them to your beeswax.
Step-by-Step Guide to Making Tapered Beeswax Candles
To begin making tapered beeswax candles, start by preparing the beeswax for melting. Quality beeswax is essential for achieving a clean burn and beautiful finish. It’s important to source pure, natural beeswax from a reputable supplier. Once you have your beeswax, cut it into small, uniform pieces to ensure even melting. Using a double boiler or wax melter, gently heat the beeswax until it reaches the optimal temperature for pouring into the molds.
Pouring the Melted Beeswax Into the Tapered Candle Molds
Once the beeswax is melted and ready to pour, carefully fill each tapered candle mold with the liquid wax. Take care to pour slowly and steadily to avoid air bubbles or uneven distribution. It’s helpful to have a designated workspace with a level surface to ensure that the candles set straight and uniform. Keep an eye on the temperature of the wax throughout this process, as maintaining consistency will result in a more professional-looking finished product.
Adding the Wick and Ensuring a Straight Taper
As the melted beeswax begins to cool slightly, it’s time to insert the wick into each candle mold. Choose high-quality wicking material that is appropriate for beeswax candles, ensuring that it is centered and straight within each mold. This step is crucial for achieving an even taper and ensuring that your candles burn properly once they are finished. Take your time with this step to avoid any misalignment or slanted tapers in your finished product.
Cooling and Removing the Finished Candles
After adding the wicks, allow the tapered beeswax candles to cool completely before removing them from their molds. Depending on environmental factors like temperature and humidity, this process may take several hours or even overnight. Once cooled and set, carefully remove each candle from its mold by gently twisting or tapping on the base of the mold if necessary. Admire your finished tapered beeswax candles and enjoy knowing that you have created something beautiful with your own hands.
Tips for Achieving the Perfect Tapered Shape
When it comes to making tapered beeswax candles, achieving the perfect tapered shape is essential for a beautiful and professional-looking finished product. There are several techniques that can help ensure your candles have a clean and uniform shape. One important tip is to carefully monitor the temperature of the melted beeswax to prevent irregularities in the taper. Using a thermometer and being attentive during the melting process is crucial in creating well-formed candles.
Another tip for achieving the perfect tapered shape is to properly prepare the molds before pouring the melted beeswax. Ensuring that the mold is clean and at the right temperature can help prevent issues such as air bubbles or uneven tapers. Additionally, using high-quality wicks that are straight and properly positioned in the molds will contribute to a consistent and symmetrical shape.
Troubleshooting common issues like air bubbles and uneven tapers can be addressed by gently tapping the side of the mold or using a heat gun to smooth out any imperfections. Creating custom designs and variations with different molds, such as spiral or twisted tapers, can also add an extra touch of uniqueness to your tapered beeswax candles.
By employing these tips and techniques, you can elevate your candle-making skills and consistently produce stunning tapered beeswax candles.
| Tip | Description |
|---|---|
| Monitor Temperature | Use a thermometer to monitor melted beeswax temperature for an even taper. |
| Prepare Molds | Ensure molds are clean and at the right temperature before pouring wax. |
| Troubleshooting | Address issues like air bubbles by tapping mold or using heat gun; create custom designs. |
Decorating and Personalizing Tapered Beeswax Candles
When it comes to making tapered beeswax candles, the process doesn’t end with simply creating the shape. Decorating and personalizing your handmade candles adds an extra touch of creativity and uniqueness. Whether you plan to keep these candles for yourself or give them as gifts, there are various ways to embellish and customize them to make each piece truly special. Here are some ideas for decorating and personalizing tapered beeswax candles:
- Using natural materials like flowers or herbs for embellishments
- Dipping and layering techniques for unique patterns and textures
- Adding decorative wax seals or ribbons
One way to personalize tapered beeswax candles is by incorporating natural elements such as flowers or herbs into the design. You can carefully press dried flowers or sprinkle small herb leaves onto the surface of the candle while the wax is still slightly soft. This creates a beautiful, organic look that celebrates nature’s beauty.
Another technique for adding visual interest to your tapered beeswax candles is through dipping and layering. By dipping the finished taper in colored beeswax or layers of different shades, you can achieve stunning patterns and textures that make each candle one-of-a-kind.
To add a touch of elegance, consider using decorative wax seals or tying ribbons around the base of the taper. This simple yet effective method instantly elevates the appearance of your handmade candles, making them ideal for special occasions or as luxurious gifts.
By incorporating these creative techniques into your candle-making process, you can turn a simple craft into a personalized work of art that brings joy both to yourself and those who receive your handcrafted tapered beeswax candles as thoughtful gifts.
Benefits of Using Beeswax Candles
Beeswax candles offer a range of benefits, making them an ideal choice for anyone interested in creating their own tapered candles. Here are some advantages to consider:
- Health and environmental advantages: Beeswax candles are a healthier option compared to paraffin and soy candles. They do not produce toxins or chemicals when burned, making them a great choice for individuals with allergies or sensitivities. Additionally, beeswax is a renewable resource and using it supports sustainable beekeeping practices.
- Unique properties of beeswax: Beeswax candles have a natural honey-like scent and a warm, golden color that adds to their appeal. The natural properties of beeswax also result in longer burn times and less dripping compared to other types of wax.
- Longevity and clean-burning qualities: Beeswax burns longer than other types of wax, making it a cost-effective option in the long run. It also produces a bright, steady flame that emits a natural light similar to sunlight, creating a warm and inviting atmosphere.
It’s clear that choosing beeswax for making tapered candles not only allows for creative expression but also provides numerous benefits over other candle materials. By understanding these advantages, candle makers can confidently create beautiful tapered beeswax candles that enrich both the environment and the experiences of those who use them.
Pacific Northwest-based candle artisan Erika Perkins shared her insight on the matter. “Working with beeswax has been such a rewarding experience for me,” she said. “Knowing that I’m crafting clean-burning candles that are both environmentally friendly and visually stunning gives me a sense of pride in my work.” With this in mind, exploring the world of DIY tapered beeswax candles opens up possibilities for eco-conscious creativity and personal well-being alike.
Caring for Tapered Beeswax Candles
Investing time and effort in making tapered beeswax candles can be a rewarding experience. To ensure that your handmade candles maintain their quality and beauty, it’s important to provide proper care and maintenance. Proper storage, gentle handling, and occasional upkeep are key to preserving the shape, scent, and overall appeal of your tapered beeswax candles.
To start, it’s crucial to store your tapered beeswax candles in a cool, dry place away from direct sunlight. Exposure to heat or sunlight can cause the wax to soften or even melt, leading to deformed shapes and loss of fragrance. Additionally, storing your candles in an airtight container will protect them from dust and preserve their natural scent.
When handling your tapered beeswax candles, it’s best to do so with clean hands. Oils and dirt from your skin can transfer onto the candles, affecting their appearance and potentially causing damage over time. Using a soft cloth or gloves when handling the candles can help maintain their pristine condition.
Proper cleaning and maintenance of tapered beeswax candles can prolong their lifespan. To remove dust or light debris, gently wipe the surface of the candles with a soft cloth. Avoid using water or harsh cleaning agents as these can damage the wax. If you notice any blooming (a hazy film) on the surface of the candles, simply buff them gently with a soft cloth to restore their luster.
| Candle Care | Recommendation |
|---|---|
| Storage | Store in a cool, dry place away from sunlight |
| Handling | Handle with clean hands or gloves to avoid transferring oils or dirt |
| Cleaning | Gently wipe with a soft cloth; avoid water and harsh cleaning agents |
By following these simple guidelines for caring for your tapered beeswax candles, you can enjoy their beauty and natural fragrance for years to come. Taking the time to care for your handmade creations not only preserves their quality but also ensures that they continue to bring warmth and ambiance to any space they adorn.
Conclusion and Inspiration
In conclusion, creating tapered beeswax candles is a rewarding and enjoyable craft that offers a range of benefits. The process of making these candles provides a sense of satisfaction and accomplishment, as you watch the raw materials transform into beautiful, functional pieces. Furthermore, the personal touch and handmade quality of tapered beeswax candles make them ideal for gifting or adding a special touch to your home decor.
The versatility of beeswax allows for endless possibilities when it comes to personalizing and decorating your tapered candles. Whether you choose to incorporate natural elements like flowers and herbs, experiment with dipping and layering techniques to create unique patterns, or add decorative wax seals and ribbons, the creative options are limitless. Not only do these touches enhance the visual appeal of the candles, but they also make them uniquely yours.
I encourage readers to delve into the world of candle-making and explore their creativity by making tapered beeswax candles. Whether you’re looking for a new hobby or simply want to add a personal touch to your living space, crafting these candles can be an inspiring and fulfilling experience. So gather your materials, follow the step-by-step guide, and enjoy the process as you create your own unique tapered beeswax candles.

Welcome to my candle making blog! In this blog, I will be sharing my tips and tricks for making candles. I will also be sharing some of my favorite recipes.


