Introduction
Marbling candles is a craft that requires an artistic touch and provides a great opportunity to express oneself through a creative object. This process involves blending different layers of wax and/or paint into aesthetically pleasing patterns on the surface of candles. These layers can be varied in intensity and color, resulting in captivating displays of texture and light when used with luminary lighting. By utilizing different techniques such as dripping, blowing, or trailing – the inventor can create truly unique works of art. For DIY enthusiasts who appreciate a challenge, marbled candle making is an ideal project to pursue. With some basic supplies and a little bit of practice, anyone can master the technique and make beautiful marbled candles for use as decorations or gifts.
Materials Needed
Making your own marbled candles is a rewarding project that allows you to express your creativity while enjoying the therapeutic process of candle making. To get started, here are some of the materials you’ll need:
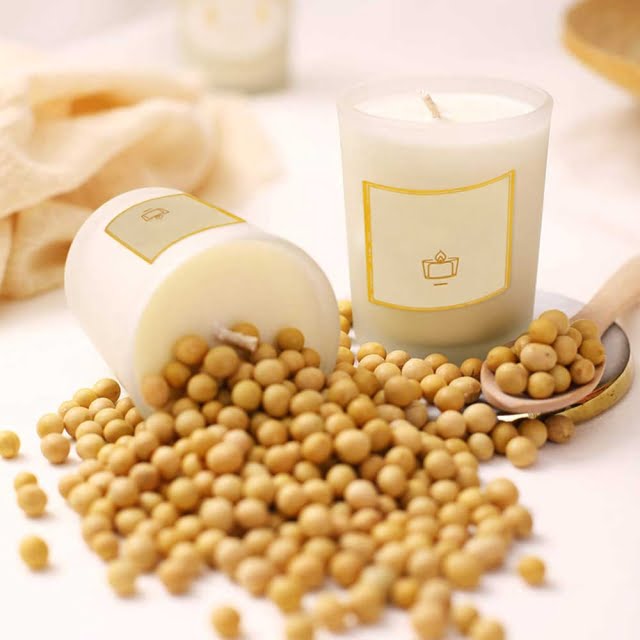
1. Wax: A soft wax such as soy wax flakes is recommended. Soy wax offers a superior finish and better fragrance throw. It is easy to work with and has a low melting point, making it ideal for cool marble designs.
2. Fragrance Oils: For optimum results choose high-quality fragrance oils that carry an IFRA certification label. This label guarantees that the fragrances are formulated from safe ingredients and can create strong, long-lasting aromas in your marbled candles without overpowering them. Suggested Supplies Link: https://www.candlescience.com/fragrance-oils
3. Wicks: A variety of sizes are available to fit different container types, including exposed wooden wicks that curl when lit to create a unique burning effect. Suggested Supplies Link: https://www.candlescience.com/wicks
4 Dyes: Candle dyes come in liquid or powder form and contain colorants made from specialized raw materials like vegetable oil blends and minerals with chemistries designed specifically for candlemaking projects to ensure bright colors and strong scent throw that won’t fade over time with repeated burns or from heat exposure during shipping .Suggested Supplies Links:
Liquid Dye – https://www.candlescience.com/dyes-liquid-colorant/
Powder Dye – https://www.candlescience.com/dyes-powder-colorant/
5 Containers: Most serious candle makers use metal tins, glass jars, or ceramic mugs as their containers of choice when designing marbled candles due to their uniform shape which helps keep square lines and clean boundaries while pouring the hot wax mixture over them while they spin around in circles on an electric lazy Susan spinner tray (see below).Suggested Supplies Links:
Durable Tins – https://www.candlescience.com/tins
Glass Jars – https://www.candlescience.com/glass-jars
Ceramic Mugs – https://www.amazonca//gp/product/B008LBDOLG?ref_=ast_sto_dp
6 Lazy Susan Spinner Tray for Marbling Candles: These stainless steel trays come with a convenient built in motor so you can easily spin your pouring containers hard enough to disperse the hot wax into marble patterns before cooling off into completion when done spinning (make sure you leave enough room for this expansion when sizing your containers). Suggested Supply Link :https://www2uileaveysmokeraccessories//products/lazy%252Dsusan%252Dspinning%252Dtray%252Dfor%252Dmarbling%252Dcandles
Colors
Marbled candle making is a wonderful way to create unique and one-of-a-kind decorations or centerpieces. It allows you to explore different patterns and color combinations while creating a beautiful piece of art.
The range of colors available for marbling makes it possible to customize your project with any aesthetic. You can combine bright, bold hues like sunshine yellow and navy blue to achieve an eye-catching design that will draw attention in any room. Or if you’d prefer something more subtle, pastel tones like mint green and pink blend seamlessly together for a calming look. You could even mix metallics like silver or gold for a glamorous touch. No matter which palette you choose, the resulting product will be unique to your specific project.
Techniques
Marbled candle making is a unique and attractive way to make handmade candles. This method gives each candle its own unique swirled pattern, adding personality to the finished project. The process of making marbled candles requires some supplies and basic knowledge of melting wax into a container. Here is an overview of what you will need and how to complete the process:
Supplies needed: Candle wax, wicks, mold or container, spoon or stick for stirring, double boiler or two pots and stove, thermometer (optional), craft paint in desired colors
Step 1: Heat your wax using the double boiler technique over medium-low heat until it reaches approximately 170-180 degrees F. You should use a thermometer if you have one.
Step 2: Once the wax has reached temperature, drop blobs of craft paint into the wax while stirring continuously with a spoon or stick so that the drops spread out to become thin trails throughout your wax.
Step 3: Carefully pour the marbled wax mixture into your containers or molds and ensure it’s completely cool before placing wicks in center.
Step 4: Allow your now cooled marbled candles to harden in their molds for several hours before carefully removing them from their containers.
Step 5: After the candles are removed from their molding containers, you can optionally dip them into melted wax for extra protection against smudging or scratching any of its intricate swirls away! Finish up by trimming wicks as desired and admire your creation!
Safety
Safety should be the number one priority when embarking in any type of candle making. Marbled candles involve working with open flames and hot wax, so it is important to make sure that you are always aware of your surroundings, have good ventilation, take basic safety precautions such as wearing protective gear like oven mitts when handling hot wax, and avoid any open flames near shelves or other furnishings. When disposing of melted wax, please ensure that you do so in a safe manner – never pour it down a drain if it’s still liquid as this can cause a blockage. Always read the instructions carefully with any materials you plan to use; this is particularly important where color dyes or fragrances are involved. Additionally, it is wise to keep all materials out of reach of small children and pets for safety reasons.
Troubleshooting
Color Bleeding: If color bleeding occurs, you may need to adjust the mixture of the wax and additives. Make sure you are following the recommended ratio for the ingredients being used. Try adding more wax or reducing the amount of dye or mica. Adding additional stabilizer may also help, as this helps bind together the wax and colorants.
Irregular Shapes: To create candles in regular shapes and sizes, always use cylindrical containers instead of glass or other materials such as jars. This will help prevent warping during cool down. Additionally, adding a wick pin to ensure the wick stays straight during cool down can be helpful here. You should also make sure that the wick is trimmed at an appropriate length (not too short) so it wil not bend away from center during cooling. Finally, try using soy blend waxes which have better flexibility than traditional paraffin waxes and tend to give a more consistent shape.
Conclusion
Making marbled candles at home is a satisfying and fun activity that allows you to create unique candles. Not only does it give you the opportunity to show off your creativity and express yourself, it can make for a very cost-effective way of decorating your home or giving beautiful gifts to loved ones. Making marbled candles also offers users a sensory experience by allowing them to select the scent and color of their own creation. The quality materials used in making marbled candles at home, as opposed to store-bought versions, allow them to last longer and produce an even better scent when lit. Creating marbled candles at home is a great outlet for all ages as almost anyone can find success, whether they’re experienced craftspeople or just beginning their journey into candle making.

Welcome to my candle making blog! In this blog, I will be sharing my tips and tricks for making candles. I will also be sharing some of my favorite recipes.


