Introduction
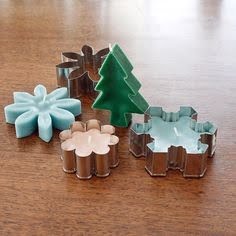
Paper candle mold making is a craft with endless possibilities. You can make unique candles to decorate your home, or to give as gifts for special occasions. With some basic materials and supplies, you can begin to create custom-molded paper candle molds.
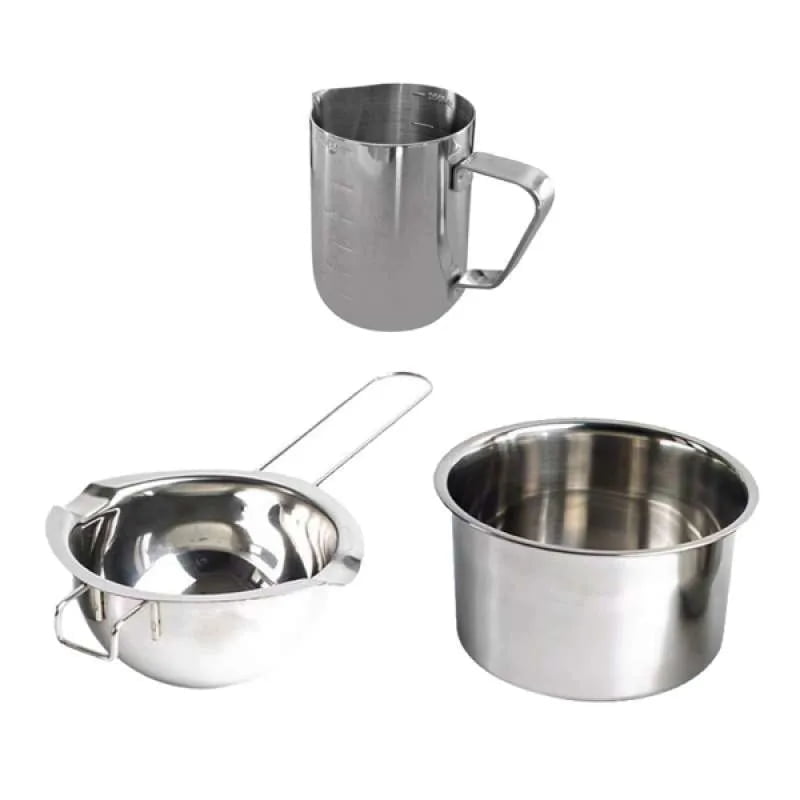
To start making paper candle molds, you will need multi-ply newsprint paper of various sizes, waxed tissue paper or parchment paper, scissors, pencils, permanent markers and tape. Begin by sketching a template of the desired design on the newsprint with the pencil. Cut out your shape using the scissors and use a permanent marker to mark any additional details on the template. Next, wrap a sheet of waxed tissue or parchment over the template tightly so that it covers all sides evenly. Tape down any overlapping sections to secure them in place. Finally, melt some wax in an electric warming tray or double boiler over low heat. Pour carefully into your mold and let sit for several minutes until cooled completely before removing from the mold.
Essential Tools
Making paper candle molds can require some degree of technical skill. However, having the right tools will make the job a lot easier.
The most important tool for making paper molds is a cutting tool like an X-Acto knife. This will help you cut clean and precise edges. You may also consider a special craft blade with a hook on the end, which is designed to smooth down the edges of your project.
For marking your project template, use graphite paper or carbon tracing paper. This will let you lay out your designs evenly and accurately. For releasing air bubbles while pouring wax, you’ll need a small brush with extra-soft bristles so it won’t leave scratches on the projects.
In addition to these essential tools, other helpful items can be included in your tool kit such as hot glue gun and sticks to create wax seals, tongs or tweezers for handling wicks when adding to the mold, parchment paper for lining the bottom of molds before pouring in hot wax and sponges for covering wax spills around your work area when finished pouring in each piece. These items are not mandatory but can make mold making much more convenient and efficient.
Material Requirements
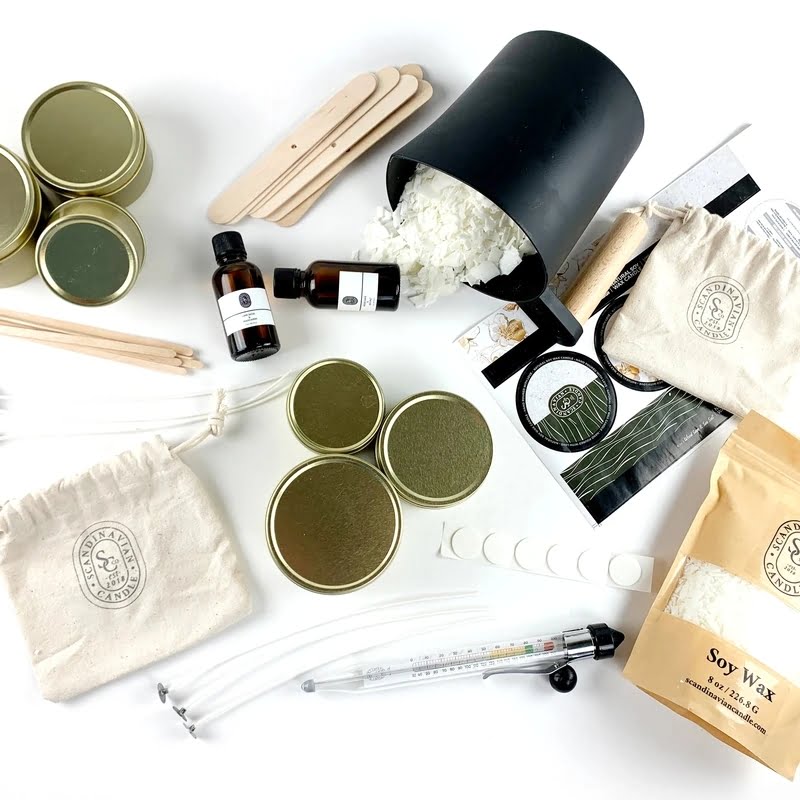
In order to make a paper candle mold you will need the following materials: waxed paper, tissue paper, scissors, an iron, a ruler or tape measure, card stock or foam core board, hot glue and a candle wick. First lay out the waxed paper on a flat surface. Using the ruler or tape measure to measure the width and length of your desired candle shape. Mark off those measurements on the waxed paper then cut along the lines to achieve that shape. Place two layers of tissue paper on top of that shape and use the iron to seal them together. Cut out a piece of card stock or foam core board in a slightly larger size than your candle shape then use hot glue to attach it around the edges of your waxed fabric so that it serves as an additional structural support for your mold. Finally attach a pre-measured candle wick to one end of your mold using hot glue. Now you are ready to pour melted wax into your completed DIY candle mold!
Step-by-Step Guide
1. Start by gathering the materials you will need to make a paper candle mold, including waxed paper, scissors, and a pencil.
2. Begin by cutting a piece of waxed paper that is about two inches larger than the circumference of the candle you’d like to make on all sides. For example, if your candle will be 3″ around, then cut out a piece of waxed paper that measures 7″ x 7″.
3. After cutting out the waxed paper, draw the shape of your desired candle onto it with a pencil for reference.
4. Then carefully fold the waxed paper in half, making sure that your drawing is inside and that both sides are even. At this stage, you may also wish to insert wicks into your mold as necessary.
5. Next crease each corner of the folded waxed paper down towards the center at an angle while gently pressing against your drawing so that it transfers onto both halves of the fold. This will form the four-cornered cone shape which makes up most candle molds and ensures that both sides remain even and symmetrical when open.
6. Once all four corners have been creased down towards the center line at equal distances from each other, open up both halves and trim off any excess edges at approximately 1/4” for straight lines or 1/2”+ for more complex shapes such as circles or scallops. This can help provide extra room for hot wax to fill up and create a rounded base while leaving space to attach wick tabs if desired later on during assembly of your candles once they dry in their molds..
7. Lastly place finished molds aside until you are ready to cast them with melted wax or pour soy candles directly into them after assembly (optional). Enjoy!
Techniques for Making Paper Molds
Paper candle molds are an excellent way to make candles that look both professional and unique. Paper molds offer a great level of flexibility for the craftsperson due to their varied shapes and sizes. To begin, choose a quality paper or cardstock in the desired design. For best results, use textured paper which will help your mold hold its shape when your wax is poured in. Next, cut out the desired shape from the paper, making sure all edges are cleanly cut with no jagged edges remaining. You can then use glue or tape to secure your mold together if necessary. Once done, lightly spray it with a coat of clear sealant and let dry before pouring in the wax.
When pouring the wax into your mold, be sure to take precautions to avoid singeing yourself as hot wax can cause serious burns. Make sure you have on appropriate safety equipment while handling hot wax – this includes long sleeves, protective eyewear, and gloves. When you’re ready to pour, gradually pour the melted wax into your mold while slowly turning it around so that all spaces are filled evenly without leaving any gaps behind where air pockets can form. Once satisfied, allow the candle to cool down around 4-5 hours before removing it from its mold – simply unwrap or carefully peel away your paper candle mold and enjoy!
Color Selection
When selecting colors for your paper candle mold making design, it is important to consider the effect lighting will have on the finished product. If a lamp or projector is used to light up the candle, true colors and hues can be identified. The background should also be taken into account as this can alter the eye’s perception of the overall color. Consider integrating contrasting warm and cool tones in your design to create an interesting optical effect. Some popular shades and tints that blend together nicely are earthy neutrals such as browns, oranges, and yellows; pastels such as pinks, blues, and purples; bold jewel tones like greens, deep reds, and blues; metallic accents like golds and silvers; dark gray shadows; glimmering white accents; glosses such as pearlescent finishes; and iridescent dyes with a hint of shimmer. Additionally, some people may opt for particular themes which may require one to research which hues match for that particular style to effectively communicate their idea. Ultimately when creating a design through paper candle mold making selection of shades should be based on an individual’s vision or preference accompanied by elements from previous knowledge or research.
Aesthetic Considerations
When it comes to paper candle mold making, there are many different aesthetic considerations to think about. The most important factor is the design and shape of your molds. You can use a variety of materials and techniques when doing paper candle mold making, so how you craft the design and shape of your mold has a big impact on the ultimate look and feel of the finished product. For example, if you want an intricate pattern or swirls in the wax of your finished candle, then you will need to pay close attention to detail in cutting the design out of your paper molds. On the other hand, if you’re more interested in having smooth lines with just a few subtle accents, then creating molds with less intricate designs might work better for you. Additionally, it is important to think about what kind of shapes will be most attractive or fitting within a room. Paper candle molds can have any type of shape with various sizes available ” everything from short stubby tealight candles to tall and slender pillars. By choosing shapes that are complementary to the space and match your overall intended aesthetic, you can really draw attention to and highlight your candles both when lit and unlit!
Final Steps
Once the candle mold has been built, the next step is to prepare for casting wax. It is important to thoroughly clean the interior of the mold before adding color or fragrances. Heat a metal cleaning brush on a stove to melt away any debris and residue from the inside of the mold.
Next, add some colorant to give the wax a desired hue. Adding fragrance will also help customize the candle and make it smell pleasant once lit. When choosing colors, it is recommended to select colors that work with the flavor of wax selected earlier; this will help ensure an optimal look when lit up with a flame. When adding fragrance, use no more than 10% of essential oils diluted in a carrier oil; this will prevent smokiness when lit. Finally, ensure there are no air gaps that could interfere with proper wax layering by packing down chunks as they are added.
Now it’s time to melt down some wax! Place several pieces in a melting pot and heat over low-medium heat until fully melted; stirring often with a stainless steel spoon helps reduce burning and bubbles from forming. After bringing all pieces together in a liquid state, pour into prepared molds and tap on table multiple times for even distribution of wax layers inside molds Once cooled off for about 15 minutes, it’s ready to be removed from the molds and create beautiful homemade candles!
Tips and Tricks
When using paper candle mold making techniques, proper preparation is essential to ensure the best results. Before beginning, it is important to ensure that all of your materials are gathered and ready. Paper should be prepped if necessary and any smooth surfaces, such as an ironing board, should be used for molding. Additionally, it’s a good idea to get familiar with the type of paper being used. Different kinds of paper will have different degrees of flexibility and durability which can affect the quality of the final product. After preparing your materials, you should lightly moisten the paper before forming it around the desired mold shape. This wetting helps to create a more secure bond between layers allowing for a smoother finish when rolling and smoothing out excess air bubbles. To help support a uniform thickness throughout the form, begin by laying down strips or layers of newspaper or tissue at least one inch thick and hand rub each layer with water. This will ensure that there’s adequate support when folding over larger shapes or intricate designs. Finally when finished with the form, let it dry completely before proceeding with any further steps such as wax pouring or pouring in scented oils and dyes on the inside of your paper molds.
Troubleshooting
Making paper mache candle molds can be a tricky process. If something isn’t coming out quite right, you should make sure to troubleshoot in order to find the source of the problem.
First, check if there is an issue with the paper mache paste. Too much glue can restrict air from drying it out causing the mixture to soften and leak. Too little glue will make the structure incredibly weak and likely collapse into itself as it dries. Therefore, ensure that you are adding enough glue to create a strong structure but not so much that it affects drying time or creates structural damage.
Next, examine how well the various layers of paper have been adhered together. It is essential for each layer of paper to be securely glued in place with an even application of adhesive if you want your candle mold to hold up in the long run. Reapply more adhesive if needed and then carefully press each sheet down to properly secure them in place.
Finally, inspect how evenly the paste has been spread throughout; any unevenness can cause cracks or other weak spots in your mold which could cause it to break before completion. Press down with a spoon or spatula if additional spreading is needed in order to create an even coating over all areas as this will generally result in optimal performance for your finished product.
Preservation Tips
Properly storing and maintaining your paper candle molds is key to their longevity. Here are some tips on how you can ensure they will last long:
1. Keep them away from dampness or humidity – If the molds get moist, they will not only lose their shape and become soft, but the process of drying them out can also cause them to shrink. To avoid this, store the paper molds in a dry place, such as in a sealed container or utilizing silica gel desiccant packs so that moisture does not accumulate.
2. Store them in dark places – Sunlight exposure can fade the color of the paper and weaken its glue structure over a prolonged amount of time. It is best to store it out of direct sunlight or in an enclosed container that does not let any light pass through.
3. Handle with care – Gently folding your pattern prevents wrinkles on the paper which is known to aggravate users when molding candles due to air pockets created by those cracks or creases when forming wax into the shape of your product. The same rule applies with cutting and pricking holes if necessary onto your molds; make sure you use careful slicing movements with a sharp blade like an X-acto knife, rather than force applied while doing so.
4. Allow molds to completely cool before storage ” When working with hot wax, take into account that patience is important when preparing for post-production as heat may affect the shape and texture rendered by your mold once cooled down (which usually takes around 10 minutes). Wait until it reaches room temperature before attempting removal for storage purposes; otherwise there will be risks of curving up because its changes in condition are still taking effect during cooling period
Conclusion
Making paper molds can be a great way to create custom candles that have a unique shape or design that may not be available in a traditional candle mold. Additionally, paper mold-making can be an economical alternative to purchasing more expensive molds that may not even offer the look you desire. Not only are paper molds affordable, but they are also easy to make and can usually be made with materials that are already in your home. Additionally, you do not require any special skills or equipment to make them, making them suitable for even beginner level candle makers. It’s also possible to reuse these molds multiple times which can save you some money when compared with purchasing new ones each time. Finally, paper molds take up very little space when stored and weigh very little in contrast with other types of candle molds meaning that even if you don’t live in a large house or apartment, it won’t take up too much space and will easily fit into almost any storage area.

Welcome to my candle making blog! In this blog, I will be sharing my tips and tricks for making candles. I will also be sharing some of my favorite recipes.

