Introduction
Pressed flower candles are a unique and beautiful way to add natural beauty and calming aromatherapy to any room or outdoor space. The wonderful thing about making these candles is that they can be customized and decorated with any number of plants and even colored wax. Making and enjoying pressed flower candles offers many benefits, including:
1. Natural Aesthetics – Freshly-pressed flowers in candles provide a stunning visual addition to any home decor setting. Each candle carries its own unique design, pattern, and color palette, giving them a truly natural aesthetic.
2. Aromatherapy – The fragrant aroma of the freshly-pressed flowers will bring a calming focus to any environment it is used in. Whether it’s a relaxing evening spent with friends or family, or as part of a yoga session; the smell of fresh flowers will give off an uplifting scent that everyone can enjoy.
3. Uniqueness – Finding store-bought pressed flower candles can be difficult, so making your own gives you complete control over what goes into them. Using various plants, leaves, petals and twigs with different colors wax creates an opportunity for true self-expression in candle crafting!
4. Durability & Longevity – Pressed flower candles last longer than their ordinary counterparts due both to the superior quality of the materials used in producing them as well as their careful construction by hand. A good pressed flower candle should last up to six times longer than an average burning candle once finished!
Gather Supplies
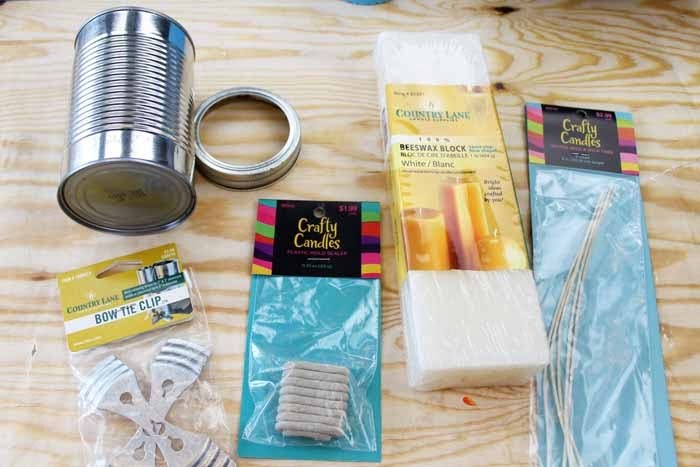
When making pressed flower candles, it’s important to ensure that you have all the necessary supplies. Depending on the style of candles you’re wanting to create, your list may vary. Some common supplies for this DIY project include: beeswax, dried and pressed flowers, candle wicks, molds of various shapes and sizes, melting pot or double boiler, thermometer (optional), paintbrush, protective glove and scissors.
Beeswax can be found at most craft stores or online retailers. It comes in a variety of colors and beeswax block size. If you’re looking for an eco-friendly option then try using natural beeswax instead of paraffin wax; it’s not only better for the environment but costs less too! Depending on the type of wax you decide to use and its melting point, you will need to modify your heating and cooling process accordingly.
The dried and pressed flowers used to decorate these candles must be kept away from moisture; otherwise they may become moldy over time. For best results, use organic flowers that are pesticide-free since they will last longer with minimal discoloration or fading when exposed to heat from the candle flame. Make sure that any blooms used are as flat as possible so that they don’t cause unevenness in the finished product.
To assemble each candle requires a combination of wick sizes (longer strands are needed if a large mold is being used) along with a few tools such as molds in different shapes & sizes, an electric/medium heat source like a double boiler/melting pot that can hold hot liquid wax + thermometer (optional if using beeswax), scissors, protective gloves and painting brush – both for applying melted wax onto molds or wicks securely so that each shape fills out entirely . Once everything is ready proceed by carefully pouring the melted beeswax into each mold until fully covered then carefully insert pressed flowers before allowing mixture cool completely before removing from form completely! Finally top off your creations with decorative ribbons or whatever else your imagination can come up with!
Steps to Create Your Candles
Step 1: Gather everything you need for your candle-making project. This includes the wax, wick core, essential oils, herbs and flowers, double boiler or water bath with thermometer for melting the wax, a ladle for adding the wax to the molds and an electric cord to power it all.
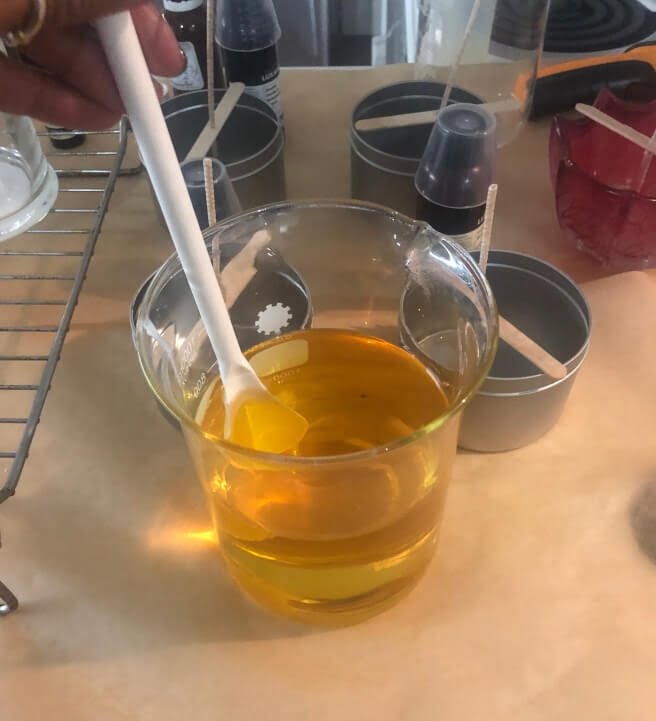
Step 2: Melt the wax in a double boiler or water bath over medium-high heat until it reaches 170 – 175⁰F (Temperature variance is ok). Use a thermometer to monitor the temperature. Add any desired essential oils while stirring slowly using a ladle.
Step 3: Prepare your mold of choice by lightly greasing with oil or butter. Make sure to use something that is food safe such as olive oil or coconut oil so as not to contaminate your finished candles.
Step 4: Add any herbs or dried flowers you’d like to include at this stage of the process. Place them along the bottom of your mold in whatever pattern you desire. You can also press these against the sides of the mold if you’d like your finished candle to feature flower designs on its surface as well.
Step 5: Pour your melted wax into your prepared molds using a ladle, filling up each one ¾ of the way full before stopping. Make sure that some space remains above each filled mold so that when we add our wick cores into them later on more room won’t be taken up by melting wax.
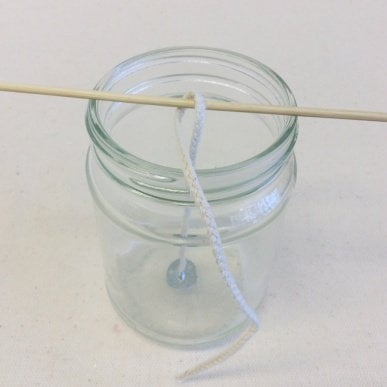
Step 6: Once all of your molds are full and ready, cut out lengths of wicking material that are slightly longer than each respective mold they will be inserted into and loop one in around its center using tweezers or needle nose pliers. Do make sure there’s some slack so when pressed down against its bottom it extends just past where each flower decoration begins at about ¼ inch deep for best effect. Allow for about 20 minutes after inserting them before venturing any further ahead with this project. Remember to trim away any overhang from either side on completion to ensure no off-centered burning once lit up during usage time rather than before it begins!
Tips for Crafty Candle Makers
Adding colour and texture to your pressed-flower candles can be done in numerous ways. For example, you could use dyes to mix different hues together and even coat the candles in various textures – ribbons, lace, fabrics, or even wax peel-off decals – which will create a truly unique look. If you’re artistic, you could also paint scenes on them or use flower petal colours to create abstract paintings.
Another option is to sprinkle crushed coloured crystals over the surface of a melted candle wax. These crystals add an extra sparkle as well as enclosing your pressed flowers for display. You can make it an interactive gift by asking friends and family to guess how many crystals you used when giving the candle away!
Lastly, adding scents and fragrances adds another dimension; lavender oil works well with a variety of flowers and gives off a delightfully soothing aroma, though you could try other combinations if desired. Whichever way you choose to go about it, making pressed-flower candles is both easy and rewarding!
Shine the Spotlight
Making pressed flower candles is an attractive and creative way to preserve flowers while making beautiful candles. It’s a great craft project for people of all ages, as well as a great opportunity to showcase the work of local artisans. With just a few basic supplies, you can create uniquely beautiful candles that will not only serve as beautiful decorations, but also provide the perfect mood lighting for any occasion. Pre-made pressed flower candles make shopping easy, with lots of options available in various sizes and colors. Whether you want something romantic or playful, there are several pre-made styles to pick from that’ll match your decor and style. Additionally, for those looking for something more intricate, there are artisans who specialize in creating hand-crafted designs that feature pressed flowers or other decorations. Links to these artisans are available online with some stores featuring their own selection of unique creations. No matter what style candle you buy or craft yourself, adding pressed flowers is sure to brighten up any space!
Creative Customization
There are a variety of options available to customize your pressed flower candle. First, you can choose the type of wax and color of candle you would like. Depending on the aesthetic you are going for, color choices range from classic white and ivory to festive reds and blues. Next, you can select the size of your candle — whether you want something small enough for a nightstand or large enough to impressively adorn a tabletop centerpiece. You may also consider which type of wick will be best suited to your preferences.
When it comes to the decoration itself, you can use real flowers or buy synthetic alternatives. Real blooms lend an earthy charm but require more patience due to their delicate nature. Synthetic options offer complex colors and shapes that resist oxidation over time but lack that personal touch that only nature provides. Additionally, the base of your candles could be decorated with glitter completely around or just in certain sections for sparkle without overwhelming sweetness; art beads in matching colors not only add another layer of decoration but also help hold everything together; and don’t forget ribbons with various colors and materials as an eye-catching finishing touch!
Wrap Up
Pressed flower candles can be a beautiful addition to your home energy and enhance any living environment. With the many types of wax, wicks, molds, and fragrances available, you can get creative and able to make unique custom designs of pressed flower candles. Whether its for yourself or a gift to someone special, these everlasting bloom candles help bring light and comfort into an ordinary day.
To start with making this lovely creation you will need wax of preferred choice (paraffin or soy), scents of essential oils or natural fragrance such as Lavender, chosen framed pressed flowers along with prefabricated both shallow containers or candle-making molds. The most important tool is a thermometer used to ensure that the wax reach the correct temperatures during the pouring process. Once the heat-safe container of melted wax is ready you will use your painted frame gently placed in top. Afterward, release drops of essential oils or fragrance directly in center then carefully pour hot wax until flower framed covered completely.
After all long wait for cooling off process you will have completed your pressed flower candle! You now may enjoy ultimate rewards from your beautifully handmade creations serve as one of kind artistic keepsakes as well as add serenity vibes to their homes when lit up!

Welcome to my candle making blog! In this blog, I will be sharing my tips and tricks for making candles. I will also be sharing some of my favorite recipes.

