Introduction
Making your own scented candles is a great way to revamp your home while also creating beautiful gifts for friends and family. With the help of a scented candle making kit, you can easily make stunning, custom-scented candles in your home. Kits come in many styles and sizes, ranging from basic beginner kits with all the tools you need to get started to advanced kits that include a variety of waxes, wicks, dyes, molds, essential oils and more. Whether you’re just looking for some fun or interested in making professional-grade scented candles, there’s sure to be a kit that meets your needs.
The Benefits of Scented Candle Making Kits
1. It’s a fun and relaxing hobby ” Scented candle making kits give people the opportunity to engage in something creative and calming. Working with scents, colors and molds can be incredibly satisfying and provide a sense of accomplishment.
2. You can customize your creations ” With your own candle making kit, you have complete control over what size, shape, scent, color, and texture you want your candles to be. You can make unique creations to fit your style or color scheme in any space in your home.
3. Candles make for thoughtful gifts ” If you’re looking for a personalized gift that’s sure to stand out from the rest, handcrafted scented candles are ideal. A custom-made candle is an intimate way to show someone how much they mean to you ” it will always remind them of their special day!
4. Save money by not buying pre-made candles ” Having a scented candle making kit on hand allows you the freedom to make your own candles whenever you need one without spending extra money on pre-made ones.
5. You get inviting aromas in your home ” The pleasant fragrances of freshly made candles can instantly turn any space into one of tranquility and relaxation. Whether it’s fruity scent or woodsy aroma ” all people need to do is take a few whiffs of these handmade scents!
Types of Scented Candle Making Kits
Scented candle making kits come in a range of shapes, sizes and functions, depending on your specific needs. There are budget-friendly options such as ready to pour waxes, coloured dyes and scented oil scent throwers that allow you to make your own candles at home. Professional grade kits, which often include wicks, silicone molds and wax flakes, let you create more intricate designs. For more experienced candle makers, there is an array of tools available so you can further customize and refine your craft. Crystal gems, wood chunks and glitter can be used to add luxury touches while natural essences like lavender or jasmine give candles added fragrance. Specialized melting pots unleashing intense aromatics with packed wax provide a more convenient way of creating fragrances. Finally, kits incorporating cotton core wicks help deliver smokeless burning.
What to Look for in a Candle Making Kit
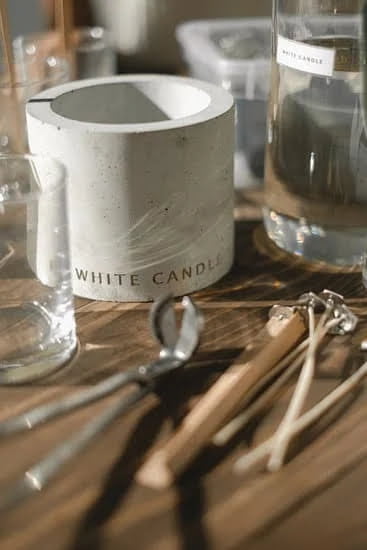
When looking for a scented candle-making kit, it’s important to consider the quality of ingredients that you’re using. Quality ingredients are essential for achieving a successful finished product and will give your candles a longer burning time, enhanced scent throw and improved texture. Look for cruelty-free, all natural soy wax as these will burn at a more steady rate with vivid colors and do not produce as much soot or smoke when burned. When choosing scents, look for pure essential oils that are free from harmful chemicals and that have strong aromas which are guaranteed to last long after the candle has been extinguished. Be sure to pick out wicks which are made of cotton or have a paper core as they are fire-safe and won’t emit toxic fumes during burning. Metal wicks can be dangerous if used incorrectly. You’ll also need dye blocks to create vibrant colors, pouring pitchers or spoons, wax thermometers, safety goggles, jars or molds of varying sizes to pour in your chosen fragrances, plus stands and labels to display your finished products with pride.
Selecting Candle Making Fragrance
When selecting scents for candle making, it is important to consider the ingredients of the fragrance oils. Natural fragrance oils are typically composed of up to 100% essential oils derived from plants. They are highly concentrated and are formulated to enhance your candle’s scent when heated. Synthetic fragrance oils may also be used; however, they can be made of hundreds or even thousands of chemicals and may produce an inferior product that lacks potency.
Be mindful of the strength of the chosen scent as well, opting for a stronger scent in traditional candles such as pillar and jar styles, depending on the size of each container. Too strong of a scent can overpower the room whereas something less pungent might be more suitable for tealight or votive options as these candles have shorter burning cycles. Generally speaking, you should use about 1-2 ounces per every pound of wax for a standard candle. Testing out different concentrations beforehand through small-scale experiments can help you determine which one produces the desired effect in your finished product.
You should also think about what scent note would pair well with other fragrances such as complimentary notes with earthy fragrances to create complex aromatic profiles that keep customers coming back for more. Lastly, try to match the aroma with a traditional seasonal feeling or occasion like Christmas spices or summer blooms if you’re looking to add novelty products that attract attention in stores during peak times throughout the year.
Step by Step Candle Making Guide
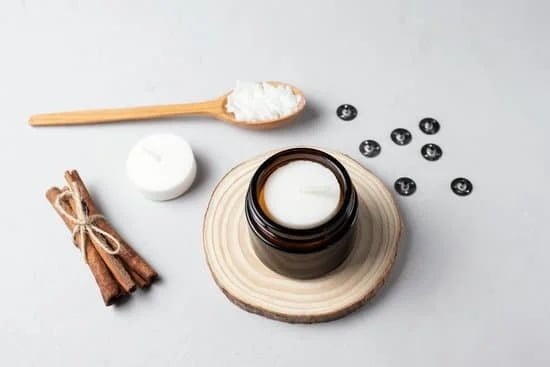
Step 1: Gather Supplies: For starters, you will need to get your hands on a scented candle making kit that includes all the supplies you will need. This could include wax, a wax warmer/melting pot to melt the wax, wick sticks and tabs to maintain the wick in place, coloring dyes, fragrances, a thermometer and containers or molds to make your candles in.
Step 2: Prepare Set Up Area: Make sure you have a safely prepared area with plenty of space to work with. Put some newspapers down on your countertop to avoid any mess. Place all of your supplies within easy reach and turn on the wax warmer/melting pot.
Step 3: Melt Wax & Add Colorants & Fragrances: Measure out the recommended amount of wax as indicated by your kit instructions and add it into the melting pot/wax warmer. Let the melting point reach around 160 degrees Fahrenheit before adding any color dyes or fragrances. Once added let the mixture cool for about 10 ” 15 minutes so that these ingredients are evenly blended throughout.
Step 4: Prep Wick & Containers: Carefully attach the pre-tabbed wick into position at one end of each container you’ll be using for your candle molds. Ensure it is securely in place before moving on to pouring liquid wax into the containers.
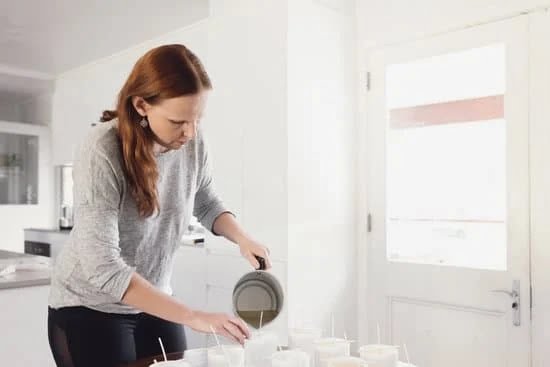
Step 5: Pour Liquid Wax Into Molds: Using a ladle or pouring jug, slowly pour melted liquid wax into each mold until it reaches nearly full capacity but ensure there is an ample amount room at top which allows overheating and over boiling to occur if done too hastily or without precautions taken beforehand. Allow this cooled liquid wax to settle overnight so that its firmly set in each particular container shape and size before taking out and trimming off extra tails if needed from respective sides.
Step 6: Trim Wick & Give Final Touches: Lastly, trim away any excess pieces of wick sticking out of individual molds respectively using scissors and give some final touches such as decorations or labels for unique personalization for party gifts etcetera! This completes our overview guide for setting up successful scented candle making kit creations from start-to-finish with finished products ready ahead await… Enjoy!
Candle Making Tips and Tricks
1. Choose the right wax: Different waxes such as soy, beeswax and Paraffin will all produce different types of candles. Choosing the right wax can make a huge difference in the quality of your scented candle.
2. Use quality wicks and wick tab holders: If you use low-quality wicks they may not burn properly or they may create smoke while burning. It is important to use high-quality wick tabs and holders that won’t hurt the environment and that will provide an even burning when lit.
3. Check temperatures when blending fragrances: Fragrance oils play a key role in making unique scented candles but it is important to check temperatures when blending them together as different temperatures for each component can impact the final result drastically.
4. Test your creation before gifting: Once you have blended your scent and everything is ready it’s time to test your creation; light up the candle, keeping track of any potential issues such as faults in your design or having an uneven flame, since this could be an issue for further batches down the line if not addressed early on.
5. Package it correctly: Finally, make sure to package your handmade scented candles correctly; use cardboard boxes or water-resistant bags/wraps to protect them from any moisture wastage due to humidity which could damage them in transport or even on display at craft fairs/stores if selling them commercially!
Resources for Candle Making
Once you’ve purchased your scented candle making kit, it is important to take the time to research and understand all of the necessary processes and materials it takes to make a beautiful, unique, high quality scented candle. Here are some online resources to help get you on track:
-HobbyLark offers detailed tutorials and articles that provide step by step instructions for creating candles, from melting the wax to cooling wax before adding the wick.
-Cornucopia Brands’ blog features various candle-making techniques and helpful tips for hobbyists. They specialize in natural and vegan friendly ingredients for those looking for an eco-friendly option.
-Candle Making 4U is filled with tutorials on how to make candles using a variety of molds and supplies. They also offer special offers on different kits which include step by step instructions as well as safety advice when creating candles.
-Craftsy has a wide selection of classes that can teach everything from choosing the right fragrances for your projects to understanding color theory when working with dyes or pigments.
-Simply Candles provides helpful webinars designed to guide newbies through their project, no matter what skill level you are starting at.
With all of these available resources, you have everything you need to create the perfect scented candle the first time around!
Conclusion
A scented candle making kit is a great way to create beautiful and unique candles for your home. Not only can you customize the scent and color of your candles to perfectly match your style, but you will also be able to make them at a fraction of the cost of buying ready-made ones. With a candle making kit, you get all the supplies you need in one handy package, including wax, wicks, smells, dyes and melting containers. Making your own candles in this way is easy and fun and it’s an activity that can be enjoyed by adults and children alike. These kits give you the opportunity to express your creativity while savoring the calming aromas that fill your living space. Why not give it a try yourself and see what amazing creations you can come up with!

Welcome to my candle making blog! In this blog, I will be sharing my tips and tricks for making candles. I will also be sharing some of my favorite recipes.

