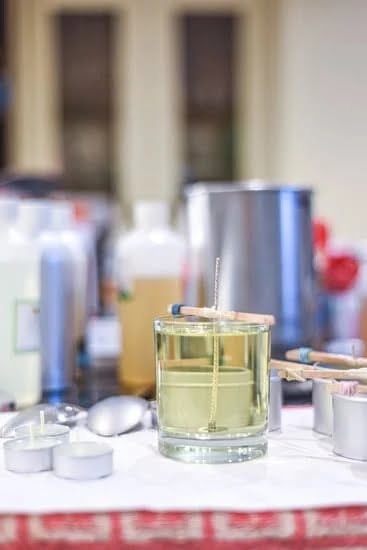
Candle-making has become a beloved hobby for many, offering individuals a creative outlet and the ability to craft personalized candles for their homes or as gifts. For those looking to embark on this journey, a starter kit for making candles is the perfect entry point. These kits are designed to provide beginners with all the necessary tools and materials to kickstart their candle-making adventure.
Whether you are drawn to the soothing ambiance of flickering candlelight or the joy of creating something with your own hands, candle-making offers a unique and fulfilling experience. A starter kit typically includes essential components like wax, wicks, fragrance oils, and molds, making it easy for newcomers to get started without the hassle of sourcing individual materials. This convenience allows beginners to focus on honing their craft and experimenting with different types of candles.
From container candles to pillar candles and votives, a candle-making starter kit opens up a world of creative possibilities. With detailed instructions and step-by-step guides included in these kits, beginners can learn how to melt wax, add fragrance oils, and pour the mixture into molds successfully. The process not only results in beautiful homemade candles but also provides a sense of accomplishment and relaxation that comes from engaging in a hands-on activity.
Choosing the Right Materials
When embarking on the journey of making your own candles, having the right materials is crucial to ensure a successful and enjoyable experience. A starter kit for making candles typically includes all the essential components needed to create beautiful and fragrant candles at home. Here are some of the key materials that you can expect to find in a basic candle-making kit:
- Wax: The foundation of any candle, wax comes in various types such as soy, beeswax, paraffin, and more. Each type of wax has its own unique qualities, so it’s important to choose one that suits your preferences and needs.
- Wicks: Responsible for carrying the flame and providing a steady burn, wicks come in different sizes and materials. It’s essential to select the right wick size based on the diameter of your candle container or mold.
- Fragrance Oils: Adding fragrance oils to your candles allows you to customize the scent and create a sensory experience. From calming lavender to invigorating citrus scents, there are endless options to choose from.
- Molds: Whether you prefer container candles, pillar candles, or votives, having molds in various shapes and sizes will help you achieve different candle styles. Silicone molds are ideal for beginners due to their flexibility and ease of use.
With these essential components in hand, you’ll be well-equipped to start creating your own custom candles from the comfort of your home. Experimenting with different combinations of wax, wicks, fragrance oils, and molds will allow you to develop your unique candle-making style and skills over time. The versatility of a starter kit for making candles makes it an excellent choice for beginners looking to explore their creativity and craft homemade gifts or decor items.
Types of Candle Making
When starting out on your candle-making journey with a starter kit, it’s essential to understand the different types of candles you can create. With the right materials and a bit of creativity, you can craft a variety of candles that suit your preferences and style. Here are three popular types of candles that can be easily made using a starter kit:
Container Candles
Container candles are perhaps the most beginner-friendly option for those using a starter kit. These candles are poured directly into containers such as jars or tins, which not only serve as a vessel for the wax but also add to the aesthetic appeal of the candle. With endless possibilities for customization in terms of container size, shape, and design, container candles allow you to express your creativity while enjoying the cozy ambiance they provide.
Pillar Candles
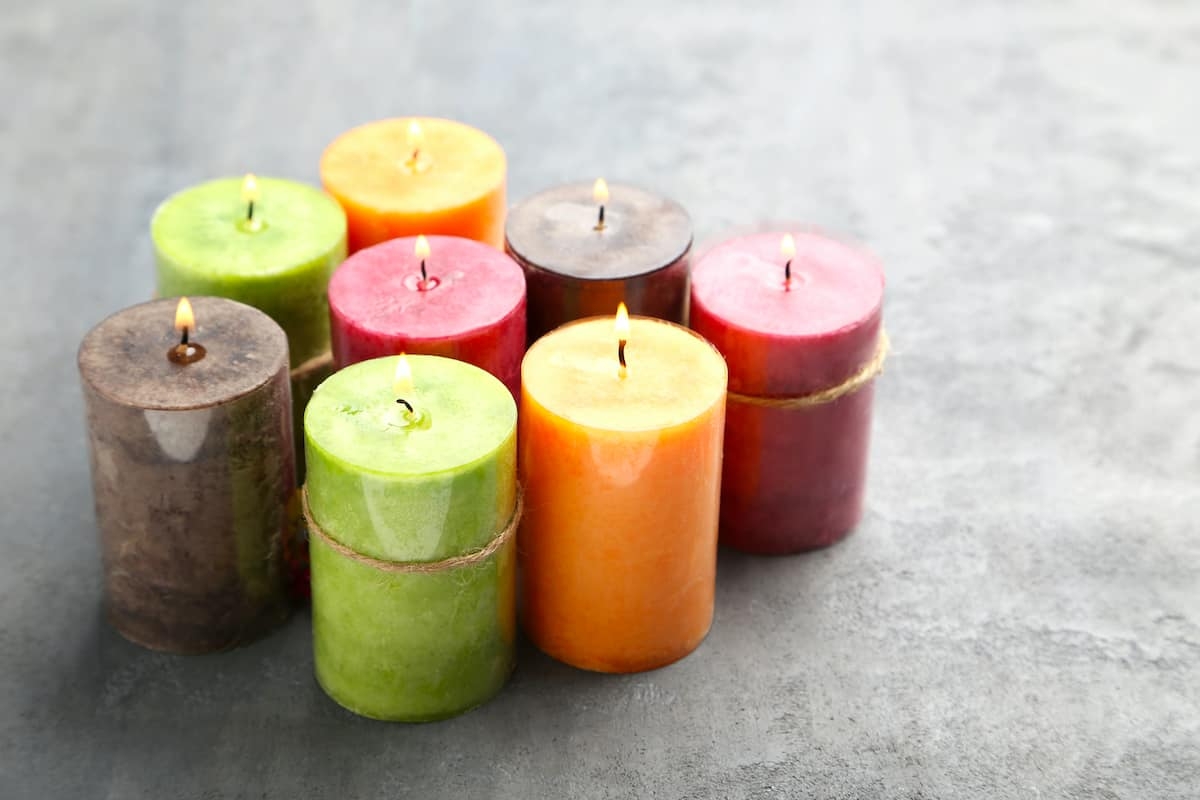
Pillar candles are another versatile option for candle-making enthusiasts using a starter kit. These candles are typically cylindrical in shape and do not require a container for support. Instead, pillar candles can stand on their own and make for stunning centerpieces or decorative accents in any space. With various sizes and colors to choose from, pillar candles offer endless opportunities for experimentation and customization to suit different occasions or personal preferences.
Votive Candles
Votives are small, cylindrical candles that are ideal for creating a warm and inviting atmosphere in any room. These compact candles are perfect for quick projects using your starter kit and can be placed in votive holders or decorative containers for added charm.
Whether used individually or clustered together, votive candles add a touch of elegance to any setting and make lovely gifts for friends and family members. Experiment with different scents, colors, and textures to discover your favorite combination when making votive candles at home with your starter kit.
By exploring these different types of candle-making options with your starter kit, you can unleash your creativity while enjoying the therapeutic process of crafting personalized candles at home-perfect for setting the mood or creating thoughtful gifts for loved ones.
Step-by-Step Guide
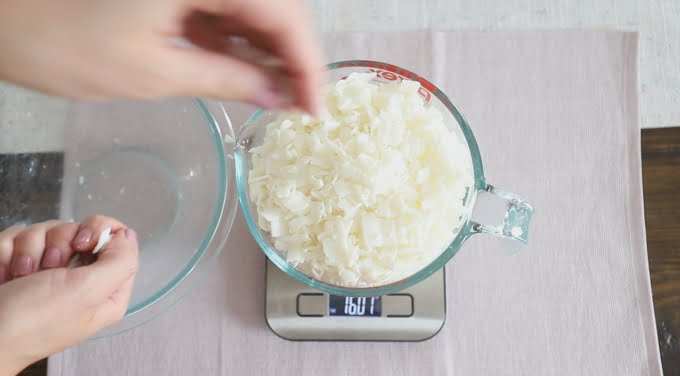
Making your own candles can be a fulfilling and creative hobby, and using a starter kit for making candles is a fantastic way to get started. These kits typically come with all the essential supplies you need to create beautiful candles right at home. The first step in the candle-making process involves melting the wax. Most starter kits include wax flakes that are easy to melt down using a double boiler or microwave.
Once the wax is melted, it’s time to add fragrance oils if desired. Starter kits often come with a variety of scents to choose from, allowing you to customize your candle’s aroma. Be sure to follow the instructions included in your kit for adding the fragrance oils in the correct proportions. After adding the fragrance, carefully pour the scented wax into molds provided in your starter kit.
As the candles cool and harden, it’s important to let them set for the recommended amount of time specified in your starter kit instructions. Once fully solidified, you can remove them from the molds and trim the wicks to an appropriate length.
Congratulations – you’ve successfully created your own handmade candles with the help of a starter kit. With practice and experimentation, you can continue to refine your candle-making skills and create unique pieces that make wonderful gifts or additions to your home décor.
| Candle-Making Step | Description |
|---|---|
| Melting Wax | Use a double boiler or microwave to melt wax flakes from the starter kit. |
| Adding Fragrance | Customize your candle by adding fragrance oils included in the starter kit. |
| Pouring Into Molds | Carefully pour scented wax into molds provided and let them set as per instructions. |
Safety Precautions
When embarking on the exciting journey of making candles using a starter kit, it is crucial to prioritize safety at every step of the process. Working with hot wax and open flames can pose potential risks if proper precautions are not taken. One of the most important safety measures to remember is to never leave melting wax unattended. It is essential to closely monitor the melting process to prevent any accidents or fires from occurring.
Additionally, using designated tools for handling hot wax, such as a double boiler or a dedicated wax melting pot, can help minimize the risk of burns or spills. Ensuring that your work area is clean and free of clutter can also reduce the likelihood of accidents. It is recommended to have a fire extinguisher nearby as a precautionary measure in case of any unexpected situations.
Furthermore, when working with open flames to light candles or melt wax, it is important to keep them away from flammable materials and surfaces. Always place candles on a stable surface away from curtains, paper, or any other object that could catch fire easily. Extinguish candles before leaving the room or going to bed to prevent potential hazards. By following these safety precautions diligently, you can enjoy the candle-making process without compromising your well-being.
| Safety Tip | Importance |
|---|---|
| Never leave melting wax unattended | Prevent accidents and fires |
| Use designated tools for handling hot wax | Minimize risk of burns or spills |
| Keep open flames away from flammable materials | Prevent potential fire hazards |
Troubleshooting Tips
Air Bubbles in Candles
Air bubbles can be a common issue that beginners may encounter when making candles with a starter kit. These pesky bubbles can form during the pouring process and result in an unattractive appearance in the finished candle. To prevent air bubbles from forming, it is essential to pour the wax into the mold slowly and at the right temperature. Additionally, tapping the sides of the mold gently can help release any trapped air pockets before the wax solidifies.
If air bubbles do appear in your candles despite your best efforts, there are ways to fix them. One method is to use a heat gun or blow dryer on low heat to carefully melt the surface of the candle, allowing the bubbles to rise to the top and disappear.
Another option is to poke holes with a skewer or toothpick into the affected areas while the wax is still soft, then filling these holes with additional melted wax to level out the surface.
Uneven Burning
Uneven burning is another common issue that can arise when making candles for beginners using a starter kit. This problem occurs when certain portions of the candle burn faster than others, leading to wasted wax and an unsightly appearance. To address uneven burning, it’s crucial to ensure that you properly trim the wick before each use. Trimming the wick to about 1/4 inch will help maintain an even flame and prevent tunneling in container candles.
In addition to regular wick trimming, you can also try rotating your candles periodically while burning them. This simple step can help distribute heat evenly throughout the candle and promote a more consistent burn. If you notice tunneling starting to occur, you can use aluminum foil wrapped around the top of your container candle to reflect heat inward and encourage a more even melt pool.
Additional Tips
Beyond air bubbles and uneven burning, beginners may encounter other issues when making candles with a starter kit. For example, frosting or discoloration of candles can occur due to temperature fluctuations or improper cooling processes. To minimize these problems, consider using a water bath when melting your wax and allowing your candles to cool gradually at room temperature.
It’s also important not to rush through the candle-making process and follow instructions carefully provided in your starter kit or online tutorials. By taking your time, being patient with trial-and-error, and learning from each batch of candles you make, you’ll become more skilled at troubleshooting common issues and creating beautiful homemade candles that bring joy and ambiance into any space.
Decorating and Personalizing
Creating your own candles with a starter kit can be a fun and rewarding experience, but why stop there? Take your candle-making hobby to the next level by exploring various ways to decorate and personalize your creations. Here are some ideas to inspire you:
- Colorful Creations: Experiment with different shades of dye to create vibrant and eye-catching candles. Whether you prefer pastel hues or bold colors, adding dye to your wax can transform plain candles into personalized works of art.
- Texture Play: Get creative with texture by incorporating elements such as dried flowers, herbs, or glitter into your candles. These added textures not only make your candles visually appealing but also add a unique touch that sets them apart from store-bought options.
- Unique Designs: Elevate your candle-making skills by trying out intricate designs like marbling, layering, or even embedding objects within the wax. With a little practice and creativity, you can craft one-of-a-kind candles that showcase your personality and style.
Personalizing your candles not only enhances their aesthetic appeal but also makes them thoughtful gifts for friends and loved ones. A customized candle serves as a unique expression of care and creativity, making it a cherished keepsake for any occasion. So don’t be afraid to experiment with different decorating techniques to create candles that truly reflect your individuality.
Remember that the possibilities are endless when it comes to customizing candles. From using specialty molds to incorporating personalized labels, there are countless ways to make each candle uniquely yours. So unleash your imagination, have fun with the process, and enjoy the satisfaction of crafting beautiful candles that reflect your personal style.
Maintenance and Storage
Once you have successfully made your own candles using a starter kit, it is essential to know how to properly care for them to ensure they burn efficiently and last longer. To maintain the quality of your finished candles, it is important to trim the wick before each use to prevent excessive smoking and soot build-up. Keeping the wick trimmed to about 1/4 inch will also help the candle burn evenly and reduce the risk of tunneling.
Furthermore, when storing your finished candles, it is best to keep them in a cool, dry place away from direct sunlight and heat sources. Excessive heat can cause the candles to soften or melt, while exposure to sunlight may lead to discoloration over time. Additionally, storing candles in airtight containers or ziplock bags can help preserve their fragrance and prevent dust accumulation on the surface.
As for leftover supplies in your starter kit for making candles, proper storage is also crucial to maintain their quality for future use. Ensure that any unused wax is tightly sealed in its original packaging or stored in airtight containers to prevent drying out or absorbing odors from its surroundings.
Similarly, store fragrance oils and dyes in a cool, dark place away from direct light to prevent evaporation or degradation of their scents. By following these simple tips for maintenance and storage, you can enjoy your homemade candles created with a starter kit for many months to come.
Conclusion
In conclusion, starting a candle-making hobby with a starter kit can be a rewarding and fulfilling experience. The convenience of having all the essential materials in one package makes it easy for beginners to dive into this creative craft without feeling overwhelmed. With access to wax, wicks, fragrance oils, and molds, individuals have the foundation to explore various candle-making techniques and styles.
Additionally, creating homemade candles not only allows for customization but also provides a sense of accomplishment and pride. From choosing the right materials to following a step-by-step guide, each stage of the process offers opportunities for personalization and creativity. Whether making container candles for cozy nights at home or pillar candles as decorative pieces, there is no limit to the possibilities that a starter kit for making candles can offer.
Overall, using a starter kit for making candles opens up a world of possibility for individuals looking to explore their creative side and craft something unique. By following safety precautions, troubleshooting any issues that may arise, and learning how to decorate and personalize their creations, beginners can develop their skills and create beautiful homemade candles that they can enjoy or gift to others.
So why not embark on this journey today and start creating your own handmade candles with the help of a quality starter kit?
Frequently Asked Questions
What Equipment Do I Need to Start Making Candles?
To start making candles, you will need some essential equipment like a double boiler or microwave for melting wax, a thermometer to monitor temperature, candle molds or containers, wicks, fragrance oils or essential oils for scent, dyes for color, and a stirring tool.
What Do I Need to Start Making Candles at Home?
When starting to make candles at home, it is crucial to have a designated workspace with good ventilation. You will also need to gather the necessary supplies like wax, wicks, fragrance oils or essential oils, dyes, containers or molds, a heat source for melting wax like a double boiler or microwave, and tools like thermometers and stirring utensils.
How Do You Start Off Making Candles?
To start making candles, begin by setting up your workspace with all the needed equipment and materials. Measure out the amount of wax you need based on the size of your container or mold. Melt the wax using a double boiler or microwave while monitoring the temperature.
Add fragrance oils and dyes as desired. Prepare the wick in the container or mold before pouring the melted wax carefully. Allow the candle to cool and harden before trimming the wick and enjoying your handmade creation.

Welcome to my candle making blog! In this blog, I will be sharing my tips and tricks for making candles. I will also be sharing some of my favorite recipes.

