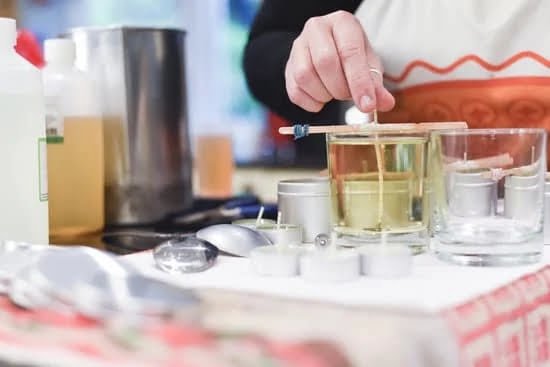
1. Gather your supplies. In addition to the wax and wick, you’ll need a double boiler or saucepan and some kind of pot or container to put the candle in once it’s finished.
2. Cut the wick to the desired length. It should be about two inches longer than the height of the container you’re using.
3. Tie a weight to the bottom of the wick. This will help keep it straight while the wax is melting.
4. Put the wax in the double boiler or saucepan and heat it over medium heat until it’s melted.
5. Remove the wax from the heat and let it cool for a few minutes until it’s just warm to the touch.
6. Pour the wax into the container.
7. Add the wick and use a stick or your fingers to hold it in place.
8. Let the candle cool for a few hours.
9. Trim the wick to about 1/4 inch.
Beeswax Molding & Candle Making By Richard Taylor
Beeswax is a natural product that has been used for centuries to make candles, cosmetics, and other products. Beeswax is a high-quality wax that is made from the honeycomb of bees. The honeycomb is melted down and the wax is filtered and purified.
Beeswax candles are made by pouring melted beeswax into a mold. The wax is then allowed to cool and harden. The finished candle can then be trimmed and decorated as desired.
Beeswax candles are known for their high quality and long burning time. They also produce a very pleasant smell and are non-toxic.
Silicone Candle Making Molds
are a great way to make candles. You can use them over and over again and they are easy to clean.
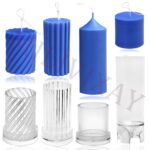
There are two types of silicone candle molds- flexible and rigid. Rigid molds are best for making pillars and other tall candles. They are also good for making candles with intricate designs. Flexible molds are best for making votives and other small candles.
When using a silicone candle mold, make sure to use a high-quality, food-grade silicone. This will ensure that your candles are safe to burn.
To make a candle using a silicone mold, start by melting wax. You can use either a stovetop or a microwave. Once the wax is melted, pour it into the mold. Then, let the wax cool and harden. Once the wax is hard, you can remove the candle from the mold.
If you are using a flexible mold, you can also use it to make candles with wicks. To do this, cut a piece of wick that is long enough to go from the bottom of the candle to the top. then, tie the wick to a pencil. Put the pencil across the top of the mold and make sure the wick is in the center of the mold. Then, pour the wax into the mold. Once the wax is hard, remove the candle from the mold.
To clean a silicone candle mold, simply wash it with soap and water.
What Type Of Label For Candle Making
When it comes to candle making, one of the first decisions you’ll need to make is what type of label to use. There are a variety of different types of labels available, each with their own advantages and disadvantages. Here’s a look at some of the most common types of labels for candles.
Adhesive Labels
Adhesive labels are probably the most common type of label used for candles. They’re easy to apply, and they come in a variety of different shapes and sizes. Additionally, they’re relatively affordable, making them a popular choice for small businesses.
The main downside to adhesive labels is that they can be easily damaged. If they’re not applied properly, they can easily peel or tear off. Additionally, they can be damaged by heat and moisture, which can be a problem if your candles are stored in a humid environment.
Wax-Based Labels
Wax-based labels are another popular choice for candle makers. They’re relatively durable, and they won’t easily peel or tear. Additionally, they’re resistant to heat and moisture, making them a good choice for candles that are stored in a humid environment.
The downside to wax-based labels is that they can be expensive, and they’re not as easy to apply as adhesive labels. Additionally, they can be difficult to remove once they’ve been applied.
Candle Making Supplies Renton, Wa
Candle making is a fun, creative, and rewarding hobby. It also happens to be a great way to relax and de-stress. Not to mention, it’s a great way to create custom gifts for friends and family.
In order to get started in candle making, you’ll need to gather a few supplies. Here in Renton, Wa, there are a few great places to find all the supplies you need.
The first thing you’ll need is a wax. There are a few different types of wax you can use, but the most popular type is paraffin wax. You can find paraffin wax at most craft stores.
The next thing you’ll need is a wax melter. This is essentially a heating device that will melt your wax. You can find wax melters at most craft stores, or online.
Another essential tool for candle making is a thermometer. This will help you ensure that your wax is the correct temperature before you begin pouring.
In addition to the essentials, you may also want to invest in some candle making tools. These tools can help make the process a bit easier and more efficient. Some of the most popular tools include pouring jugs, pouring spoons, and wicking needles.
Once you have all of your supplies, it’s time to get started! The first step is to choose your scent. There are a variety of scents to choose from, so you’re sure to find one that you like.
The next step is to melt your wax. You can do this in a wax melter, or in a pot on the stove. Once the wax has melted, add your scent.
Once the scent has been added, it’s time to add the dye. You can use liquid dye or crayons. Be sure to add the dye before the wax has cooled too much, as the dye will not mix well with the wax if it’s too cold.
The next step is to add the wick. Cut the wick to the desired length, and then carefully thread it through the wick hole in the bottom of the container.
Once the wick is in place, it’s time to pour the wax. Be sure to use a pouring jug or spoon to avoid spilling.
Once the wax has been poured, it’s time to let it cool. Depending on the size of your container, it can take anywhere from a few hours to a few days for the wax to cool completely.
Once the wax has cooled, it’s time to light your candle! Be sure to trim the wick before lighting it, and enjoy your new candle.

Welcome to my candle making blog! In this blog, I will be sharing my tips and tricks for making candles. I will also be sharing some of my favorite recipes.


