Introduction
Candle making is a great activity to engage in alone or with friends and family. It is a creative, enjoyable way to relax, unwind and have fun making something meaningful. And the best part of all? Watching your work of art light up when you’re done! To get started, there are some essential supplies you will need. These include wax, wicks, mold/containers, fragrance oils and/or color dye chips. The wax needs to be melted over a double boiler until it is completely liquid. Depending on the type of candle you are making, you may also need to add in fragrance oils or color dye chips at this point. Once the wax cools off a bit, carefully add in pre-cut wicks and secure them with clips or hold down with heavy objects such as washers or coins. After that comes pouring the wax into the molds/containers and allowing for it to cool for several hours before taking out your masterpiece! The benefits of candle making are endless – from providing calming aromas for relaxation, providing warmth for cozy nights by the fire or adding ambiance to any room in any season – candles are truly multifaceted wonders!
Essential Supplies and Tools You’ll Need
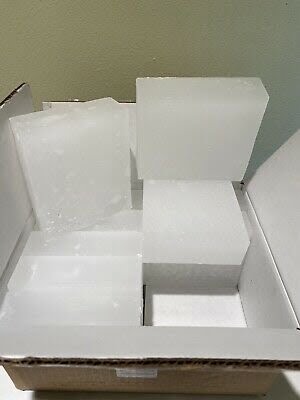
Candle making is an exciting, creative hobby that can be quite rewarding. To get started, you’ll need a few essential supplies and tools. You will want to purchase wax, either in the form of blocks or sheets, wicks, fragrances and other decorative items like dyes or glitter. You will also need a double boiler, thermometer, pouring pot or pitchers, measuring cups and spoons for weighing the wax ingredients. A glass or metal container for melting the wax is necessary as well as a surface for cooling candles before and after they are made. Specialized tools such as glass cutters are also helpful depending on the type of candle you plan to make. Lastly, safety equipment like eye protection and heat resistant gloves should always be worn if you’re dealing with hot materials like melted wax. With these supplies in hand, you’ll be ready to get started creating your own unique candles!
To further enhance your candle making experience and add your own special touch to each project you take on, it’s helpful to have an array of accessories at your disposal. These extra items range from all-natural soy waxes and beeswaxes; natural colors derived from herbs and spices; essential oils, molds of all sizes; lace appliques; color dyes; glitter sprays; dropper bottles – even seashells! Having quality tools not only affords added options when designing but can help create more professional results too! Finally don’t forget the basics like scissors (for trimming wicks) rulers (for measuring poured batches) paper towels and bowls or towels for cleaning up spills before they set into place!
Creative Candle Making Ideas for Beginners
One of the best candle making ideas for beginners is using a simple mason jar. Mason jars are an inexpensive and easy-to-find vessel that makes the perfect container for creating beautiful, homemade candles. You can easily accessorize a mason jar by adding unique charms, charms with meaningful sayings or sparkly gems to make each one special and unique. It’s also possible to add different kinds of scents to create amazing smelling candles. Choose ones like lavender, cinnamon sticks, orange peel or pine needles as natural fragrances, or opt for a particular candle scent such as cherry blossom, lilac or sandalwood. Aside from the scent, you have lots of options when it comes to color and texture. Make sure you purchase wax flakes that you can melt and pour into the mason jar to add texture and vibrant colors. You can complete your creative candle making project by adding wicks and allowing your masterpiece to cool before lighting it up!
Advanced Candle Making Techniques
Advanced candle making techniques encompass a range of methods for achieving more intricate and interesting results in candle making.Many of these techniques involve embedding additional materials inside the wax, such as decorations or herbs, which can give the finished candle an exciting twist.Layering different colored waxes is an advanced technique that can create a stunning visual effect by creating an ombre finish or using contrasting colors.Adding scents to your candles adds yet another dimension to them and is easily achieved by mixing essential oils into the molten wax.You can also incorporate this technique in conjunction with beeswax sheets and colours by pressing coloured shapes on one side of the sheets and then peeling away the excess before adding it to your wooden wick.Carving your own unique designs on the surface of your candles is something that you can have fun playing around with and offers endless possibilities in terms of giving your candles a completely unique look.Finally, you can try out pouring candles in differrent vessels other than moulds, such as mason jars or glass tumblers for an eye-catching finish!
Tips for Working with Different Waxes and Wicks
When it comes to candle making, there are many different waxes and wicks available on the market. Different waxes give off different scents and colors, while the size and type of wick can affect how quickly your candles will burn. There are a few key tips to keep in mind when working with both waxes and wicks:
• For wax melts, look for candles that use stearin or paraffin blends as these melt at higher temperatures, which keeps their shapes better when heated.
• Make sure you choose the correct wick type for your project; thick wicks will lead to faster burning and thin wicks will cause slower burning times.
• Be aware of flashpoints as certain waxes have lower maximum temperatures, causing them to ignite more easily than traditional paraffin waxes.
• Be consistent when measuring the amount of wax you’re going to use in each candle; consistency is key for good quality results.
• Lastly, don’t be afraid to experiment! Some of the best candle-making ideas come from trial and error so try out different combinations of scents, colors, or textures until you find one that works for you!
How to Achieve Unique Color Combinations
When creating unique candle making ideas, color combinations play an important role. With the right colors, you can create a variety of captivating scents and vibrant visuals that draw people in. Here are some tips to achieve those stunning color combinations:
1. Look to art for inspiration – Artists have always been at the very forefront in experimenting with colors and utilizing different shades to create something completely unique. Take some time to look through artwork, both old and modern, to get inspired for your own unique creations.
2. Utilize gradients – Gradients can help add more depth and dimension to your finished product. By mixing two complementary colors together – like blue and yellow or red and green – you can achieve a dreamy look that everyone will be sure to love.
3. Experiment with texture – The best way to really rejoice in your candle’s beauty is by adding texture such as mica powder or glitter. This will not only add an aesthetically pleasing appearance, but also make the product one of a kind!
4. Use Monochromatic Colors ” Limiting yourself to the same hue when creating colored candles is a great way to ensure consistency in your finished product. This gives it more of an elegant touch and allows you to layer tinted wax on top in order to add interesting details.
Creative Ways to Add Fragrance and Accents to Your Candle Designs
When it comes to candle making, there are a variety of ideas you can use in order to make your design unique and special. There are a few creative ways to add fragrance and accents to your candles.
One great way is to add small pieces of dried flowers or herbs by placing them within the wax before it cools completely. This adds beautiful color and aroma to your candle without the need for costly oils or synthetic fragrances that can be expensive. You could also use botanicals such as cinnamon sticks, crushed peppermint sticks, lemon peels, rose petals, sage leaves or lavender buds to give your candle a unique look and scent.
Another idea is to embed wicks in different shapes such as stars, hearts and circles within the wax during the cooling process which will then break away when they are solidified, leaving behind subtle elegant patterns inside the candle.
Finally, you could try adding essential oils into the melted wax prior to pouring it into molds or containers. Adding essential oils not only makes your candles smell wonderful but also has therapeutic qualities such as relaxation and soothing anxiety. Experiment with various essential oils until you find just the right combination that produces an inviting aroma throughout your home.
DIY Candle Projects for Special Occasions
DIY candle projects are a great way to add something special and unique to any celebration. Candle making can be a fun and creative way to express yourself, with materials ranging from wax, molds, beads, and scented oils. There are several tools required for natural wax crafting including a double-boiler, candy thermometer, wick tabs & sustainers, wicking, safety glasses and gloves. As you become more experienced in the craft of candle making you may want to invest in new materials that will help you create even more impressive designs.
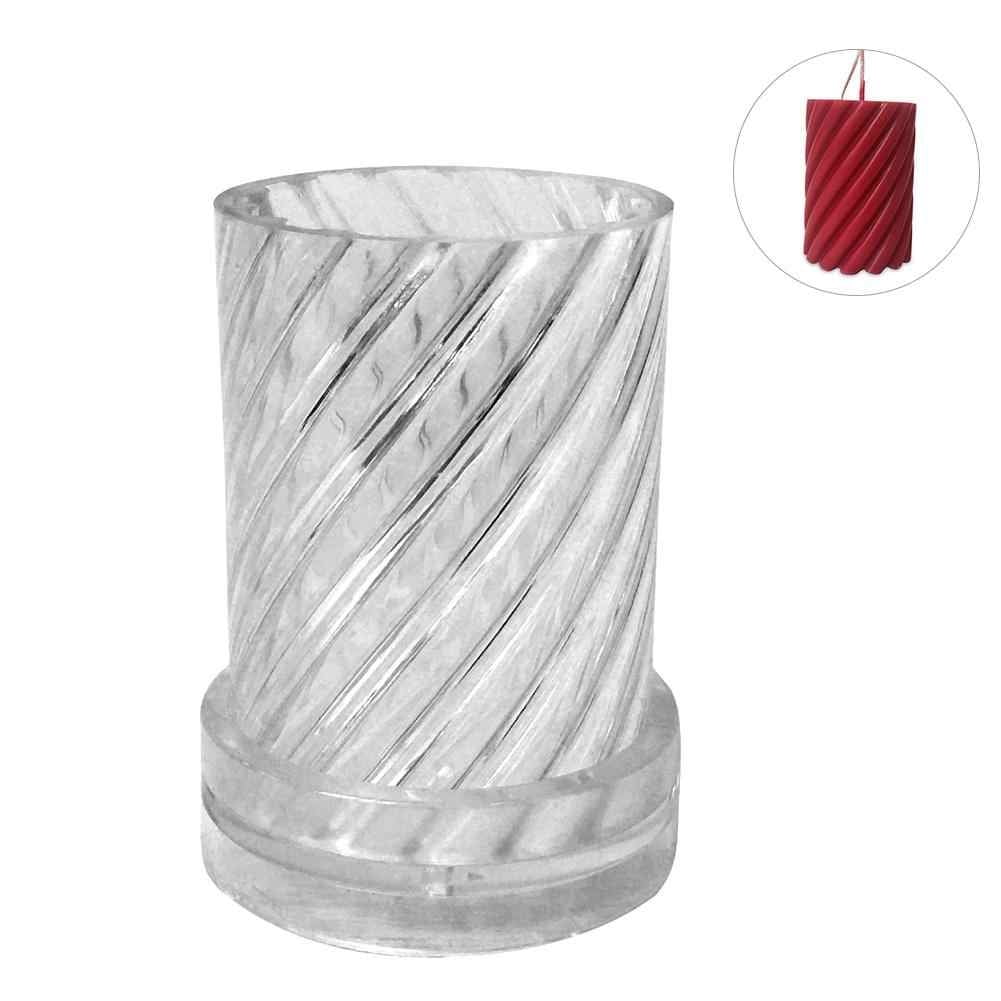
One of the most popular DIY candle making ideas is creating layered candles known as “candle tarts” which involve pouring different colored layers of wax on top of one another. These candles can be used as centerpieces or make great gifts for friends and family. For an extra special touch include dried flowers or petals when pouring your candles for an added decorative element. Additionally, experimenting with different shapes is always fun. You can purchase molds or make your own from flexible materials like silicone rubber by taking advantage of the many tutorials available online or attending craft classes with experts in the field. Using fragrant essential oils to scent your candles can also make them stand out from the crowd! Invest in some quality oils as they have stronger scents that last longer throughout the burning process. Finally, give your relationship status away when sharing these creations with your loved ones by assigning certain colors to represent certain relationships such as pink for romantic partners or blue for family members.
Step-by-Step Instructions for Making and Setting the Perfect Scents
Candle making can be a fun and creative hobby, but it does require some preparation to get the process started. Before you start the process of creating your own candles, make sure that you have all the tools and supplies you need such as wax, fragrance oils, wicks, containers, thermometers, spatulas and other molds. Additionally, set up your work area in a comfortable place that is well-ventilated and large enough for your projects.
Once you have gathered all resources needed for candle making and arranged your workspace, prepare the wick by threading it through each of the candle holders. Secure it where needed with glue dots or clips so it will stay in place while the wax melts. The correct length should be two times the height of your container plus one inch to allow for trimming when setting.
When it comes to selecting wax for making candles, there are many different types available including paraffin wax and soy wax. Paraffin wax is generally easier to work with as it has naturally soft texture; however if you prefer organic or scentless varieties soy might be best for you. In addition, pick out scents ” both natural essential oils or synthetic fragrances ” depending on your preference. Keep in mind that having too strong a scent can overpower any room’s atmosphere so consider mixing subtle scents together until it’s exactly how you want it to be.
Once you have chosen all of your materials carefully now start melting down the wax using either double boiler method or microwaves; however keep stirring during process as too much heat may scorch the wax resulting in blackened hue on finished product. Once its fully melted add scent then pour freshly prepared mixture inside candle holders ensuring adequate uniformity before moving on next step – setting! Allow them cool down completely which may take up to 48 hours then snip off excess from wick ends as desired prior lighting them up!
Finishing and Care Tips for Long-Lasting Candles
Finishing and Care Tips for Long-Lasting Candles will help you make candles that not only look beautiful, but also stand the test of time.
When it comes to wax mixtures, there are a few things to keep in mind. Before you pour your melted wax into a mold, mix in long-burners, like paraffin or soy wax. This will ensure the candle burns longer and at an even rate. When pouring, try your best to be as precise as possible when measuring out each part of the mixture. You don’t want one section to have more paraffin than another or vice versa; otherwise, your candle won’t burn as equally as possible. Additionally, consider setting aside some of your melted wax so that you can do what is known as “topping up” where extra wax is poured over the top of the candle while still warm in order to fill in any areas worn away by use.
It’s important to remember, however, that candles aren’t fireproof and must be correctly handled with care no matter what type of material they’re made from. Always store fluorescent candles in a dry place and never leave them unattended while they’re burning – which is true for any kind of candle! To make sure that they last a lifetime (or at least close to it), use wick trimmers every time you light your candles to remove any black bits or excess wick strands that may have accumulated since last lighting them. It also helps if you can dust off the wicks before relighting them so excess grime doesn’t drip down into their bodies and give off foul odors when lit! And finally, make sure you burn them regularly (don’t let them go completely unlit for longer than six weeks) to prevent too much build-up on the sides or within their interior surfaces which robs them from being able to fully heat up and deliver smell strength during its usage life cycle.
Conclusion
Creating your own handmade candles is a rewarding pastime and there’s no shortage of ideas of projects to try. From natural beeswax blends to fun scented options, experimenting with different ingredients, wicks and containers can be both enjoyable and creative. Whether you’re looking for decoration, a romantic moment or the perfect gift, candle-making provides endless possibilities to create something uniquely yours. With a few basics supplies, time and some inspiration, soon enough you could have beautiful personalized candles that will light up any room!

Welcome to my candle making blog! In this blog, I will be sharing my tips and tricks for making candles. I will also be sharing some of my favorite recipes.

