Introduction
Making candles is a fun and thoughtful way to add charm and beauty to any room in your home. The endless possibilities of fragrances, colors, and designs make it an enjoyable activity for anyone who wants a creative outlet. Not only are candles great for decorating, but the sweet aromas have been said to have therapeutic benefits as well! It’s no wonder why so many people are taking up the hobby of candle making these days.
In addition to being a great source of relaxation, learning how to make candles offers a wide range of skill-building benefits too. Candle makers must pay attention to detail and pouring techniques whenever they craft their creations. They also learn valuable knowledge on how different wick sizes respond to different types of wax. Through some experimentation and practice, candle makers can master the perfect blend of scented waxes, colorful dyes, and intricately folded lips that characterize beautiful candles every time. In other words, by participating in this art form you don’t just get a pretty decoration — you get lots of useful knowledge too!
What Kinds of Wax and Wicks to Use
To make a great candle, you need to choose the right kind of wax and wick. The type of wax accounts for a significantly large portion of the finished product. Paraffin is a popular choice since it’s easy to work with and produces an even burn. Other waxes such as soy or beeswax are great options too and can give your candles a more natural, aromatic feel. Additionally, you may want to consider using blended waxes which combine multiple different types of wax together for an improved melting point, scent throw, and overall performance.
Wicks are just as important when making candles as they directly impact how well it performs while burning. The most commonly used type of wick is made out of cotton or linen threads but there also exists bamboo or paper core alternatives which boast improved heat resistance and provide better results in larger containers or scent-infused candles. Ultimately, you should test out several different types to find out which one works best for the size and purpose of the candle that you are making. Just be sure to use those specifically designed for candle making only!
Fragrances to Use and the Right Quantities to Add
When making great candles, one of the most important steps is selecting the fragrances to use. It’s essential to get the right combination of wax, fragrance and color. To make sure you’re getting the best results, it’s important to follow manufacturer directions and only add the recommended amount of fragrance to your wax. Many makers recommend adding between 1-3% fragrance oil when making standard soy wax candles. However, if you’re working with different types of waxes (such as paraffin or beeswax) you may need different amounts in order to achieve desired results. In any case, it’s good practice to start out with a small amount – usually around 1% – and gradually increase from there until you get the scent strength you’re looking for. It can also be useful to experiment with different scent combinations in order to find unique signature scents for your products. Finally, don’t be afraid to use en vogue scents that are popular at the time – this can help keep your creations relevant and up-to-date!
Preparing Your Work Space
Having a clean and organized workspace is essential when making candles. Begin by separating your supplies into different storage containers or shelves based on what you need to make your candles. This will help you keep track of the various fragrances, waxes, wicks, dyes, and molds you’ll use for different kinds of candle projects. Make sure to store all these items in air-tight containers that have been separately labeled with their contents. This will save time when it comes to searching for individual supplies in the future. Additionally, as many candle-making ingredients are flammable – such as wax and some fragrances! – ensure that all these items are stored safely away from any sources of heat or flame. Make sure to consult safety guidelines whenever using any materials for candle-making and always wear gloves when handling hot wax.
Step-by-Step Instructions For Making Candles
Making great candles requires more than just a few simple steps: it’s an art, and one that can be perfected over time. Whether you want to make scented, dyed or plain beeswax candles, here are the basics of creating unique and beautiful candles.
1. Choose your wax type – There are three main types of wax for candle making: paraffin (derived from crude oil), soy (made from the oil of soybean plants) and beeswax (the oldest known man-made material, produced by honeybees). Each type of wax produces different results, so choose the wax that best fits your needs.
2. Measure and melt – Carefully measure out the correct amount of wax for your project according to the instructions provided with your particular wax product and melt it either in a double boiler or microwave until it reaches its melting point. For high-quality results, use a food thermometer during this step to monitor and ensure accurate temperatures.
3. Prepare your wick – Purchase pre-assembled wicks or assemble them yourself with wick tabs and wicking material cut to length according to package instructions. Place the end of each tab into the center of each glass or metal container before pouring in the melted wax in order to ensure proper positioning of both wick and tab when poured into candle containers
4. Optionally add colorants and fragrances – Mix dyes into wax at trace (approximately 140°F–149°F) after measuring out what is needed according to proper ratios as outlined by dye supplier; this ensures an even consistency throughout each batch made using either cubes/plays or liquid dyes/powders/inks. Fragrance oils should also be added at trace for best results; if scenting a larger batch, carefully divide the mixture equally among smaller containers before adding scents for more even distribution within each finished product.
5. Pour – Carefully pour molten wax into containers being sure not to pour too much into each as this can lead to tunneling issues once cooled; pour just enough that container walls will stay protected from excessive heat while also allowing for enough room for prepared wick(s). Try not move container(s) while pouring unless absolutely necessary as any sudden jerks may cause air pockets which can later become unattractive surface blemishes once cooled completely over several hours until solidified again but still slightly warm & pliable on surface areas only..
6. Cool & trim – Allow candles cool & solidify overnight before touching surfaces as they should be set-, unmovable due to further cooling times needed before handling without damage incurred during transportation or storage; once cooled fully, inspect candles post-deployment trimming process noting any bloomed portions along topside edges caused by air pockets during initial creation phase prior finalizing packaging labels & displaying products!
Tips for Troubleshooting
Avoid bubbles: Bubbles are the enemy of a perfect candle. Try tapping the sides of your mold to remove any trapped air, and lower the temperature of your wax a few degrees when pouring to reduce how much air is incorporated.
Avoid sinkholes: Pour molten wax at an even temperature over the wick base, filling from side to side as you go up rather than just straight down as this can cause sinkholes and other imperfections.
Cool consistently: Allowing your candles to cool for too long or not enough can result in cracking or incomplete wax meltage; so be sure make sure your candles cool evenly with indirect heat and good ventilation.
Remove shrink marks: As the candle shrinks during the cooling process wrinkles may form around where the mold meets the wick end, this is called ‘shrink marks’. To avoid this use a wick bar to center your wick while its hot, and always allow some extra headroom in your molds so that shrinkage won’t affect too much of your design.
Inspect every candle after cooling: Once cooled it’s important to inspect each candle individually, many imperfections like excessive bubbles or crooked lines can be overlooked before hand; so properly inspecting every single one after cooling is essential for achieving a perfect product overall.
Decorative Ideas for Candles
The secret to making great candles is to choose the right materials and ingredients. The best option for candles is 100% pure beeswax, which provides an even and consistent burn. Soy wax is a good vegan alternative as it has a long burning time and emits a pleasant aroma. It also holds scents really well, which makes it ideal for adding fragrances to your candles. Additionally, candle wicks should be made of 100% cotton so they won’t burn too quickly or slowly – if you buy pre-made wicks, check that they are certified cotton with lead-free cores.
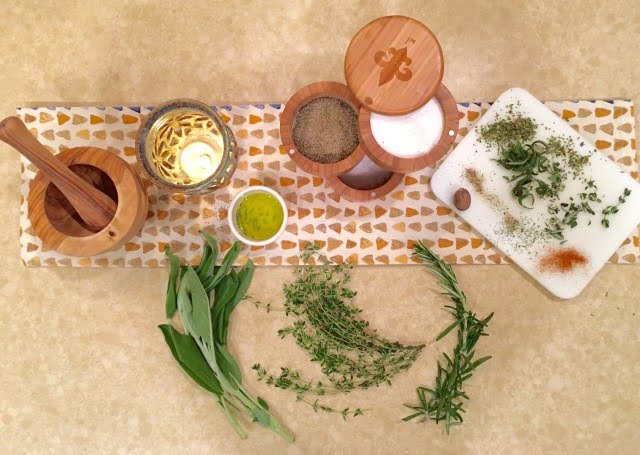
When it comes to decorating your candles, there are endless possibilities! Different scents can be used to add a personal touch; adding dried herbs like lavender or rosemary makes for stunning visuals too! Glitter looks fantastic on darker waxes like soy, and colorful paint can be used for creative designs. Finally, try different shapes and sizes of mold – from intricate designs to traditional tapers – there’s nothing like having unique pieces that were created just by you! With the right materials and some imagination, you can make beautiful candles that will last a lifetime!
How to Take Care of and Store Your Candles
For the best performance and longest lasting burn, proper candle care and storage is key. Continuous good care will prolong the life of your candles. Below we have outlined a few steps to ensure that you are getting the most out of your candles.
First, Before burning each candle: Always trim the wick before each use! This helps maintain a clean flame with minimal soot production. Cutting away used parts of the wick can also prevent high flames and reduce smoking. To do this, simply use a pair of scissors or a wick trimmer to cut away any remaining pieces before lighting.
Second, Burn the candle for at least 2 hours: To get an even and complete wax pool, it’s important to allow plenty of time for your candles to fully melt (the recommended burning time is around two hours). This allows enough time for an even and complete wax pool without leaving excess wax behind.
Third, Allow your candle to cool after blowing it out: We recommend waiting at least two hours after extinguishing before handling or relighting the candle. Similarly, don’t extinguish by dipping the wick in water. You could risk releasing toxic fumes into the air from any unburnt wax particles trapped in the water.
Finally, Store Your Candles Properly: Ideally keep them stored in a cool dark place as excessive heat and light can affect how quickly they burn down over time as well as affecting their colour/scent vibrancy . Whenever possible try not stack products on top of your candles or move them about too much as direct contact with other items can leave tiny soot marks which will spread across wider areas once lit again – thus reducing their scent throw and aesthetic qualities further down the line!
Conclusion
When it comes to making your own candles, there are many advantages. Firstly, when you make your own candles, you get to take control of what goes into them. You decide which color, scent and ingredients to use, ensuring that the final product meets your exact specifications. This can be helpful if you have a particular condition you are looking to treat or if you simply want a more personalized experience than something you’d purchase in-store. Secondly, creating your own candles allows you to save money. By buying bulk supplies and learning techniques such as double boiling or dipping wick into melted wax giving them a more rounded shape and high quality look – you can produce beautiful candles at a fraction of the cost of buying them already made. Thirdly, making your own candle is a great way to practice mindfulness. Forced breaks for melting waxes and cooling times gives an opportunity for creativity and relaxation with something both therapeutic and productive – perfect for stress relief! Finally, by making the candles yourself, you will get pure satisfaction from the finished product that no store bought candle could ever give!

Welcome to my candle making blog! In this blog, I will be sharing my tips and tricks for making candles. I will also be sharing some of my favorite recipes.


