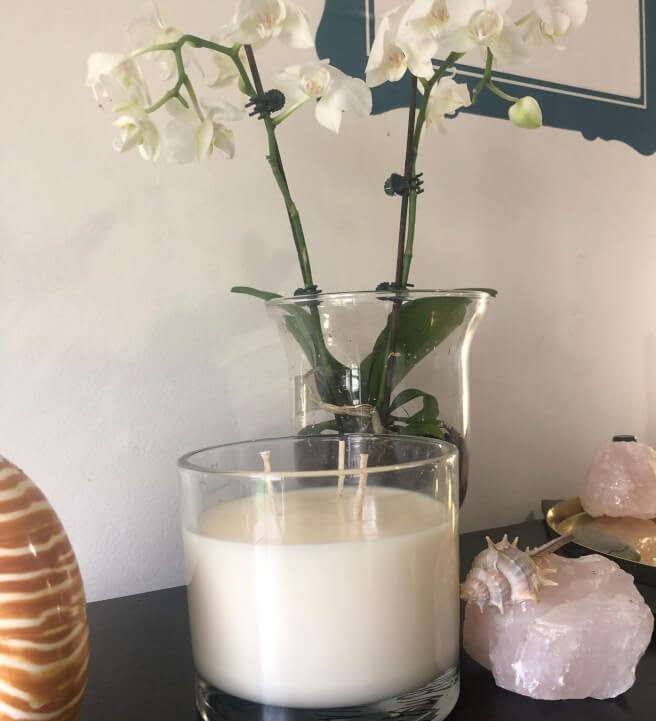
Welcome to the world of water candle making, where creativity and tranquility come together. In this introductory section, we will dive into the art of creating mesmerizing water candles in the comfort of your own home. Discover the unique qualities and benefits of water candles that make them a captivating addition to any space.
Water candles are more than just decorative pieces – they bring a sense of peace and serenity with their soft glow and gentle flickering reflections. The combination of water and wax creates an enchanting ambiance that is both soothing and visually stunning.
Whether you want to add a touch of elegance to your living room or create a calming atmosphere in your bedroom, water candle making is a versatile craft that allows you to express your creativity while setting an inviting mood.
As we embark on this journey into the world of water candle making, prepare to be amazed by the science behind it. Understanding how buoyancy and density work together to create the mesmerizing effect is essential for achieving beautiful results. This article will explore the physics and chemistry involved, giving you insights into why these candles captivate our senses.
Join us as we delve into the world of water candle making step by step, starting with essential supplies and materials needed for this craft. We will guide you through each part of the process, providing detailed instructions accompanied by visuals or diagrams to ensure success even if you’re new to candle making. From selecting quality ingredients to mastering techniques for perfect results, this article aims to support every aspiring water candle maker.
So gather your supplies, embrace your artistic side, and get ready to create enchanting water candles that will captivate both yourself and others. Let’s embark on this creative journey together as we explore different techniques, themes, fragrances, decorating ideas, safety precautions, and showcase amazing projects created by enthusiasts like yourself. Get ready to immerse yourself in the artistry and soothing aura of water candle making at home.
Understanding the Science Behind Water Candles
The process of creating water candles involves harnessing the scientific principles of buoyancy and density to create a mesmerizing effect. Understanding the science behind water candles can help you appreciate the magic that occurs when these candles are lit.
Buoyancy plays a crucial role in water candle making. Buoyancy is the upward force exerted by a fluid on an object immersed in it. It explains why objects float or sink in water. In the case of water candles, the wick of the candle floats on top of the water due to its lower density compared to the surrounding liquid wax. This allows the wick to remain lit while surrounded by melted wax.
Density also plays a significant role in creating water candles. Density refers to how much mass is contained within a given volume. In water candle making, it determines which layer, be it the wax or water, will remain on top and which one will sink to the bottom.
The density of the liquid wax used for making these candles needs to be carefully adjusted so that it is higher than that of water but lower than that of the chosen decorative elements. This ensures that both layers stay separated and create an intriguing visual effect when illuminated.
To further understand the science behind water candles, it is essential to explore some physics and chemistry involved in this process as well. The heat from the lit wick melts the solid wax, turning it into liquid wax with a lower density than solid wax or water.
As this liquid wax cools down, it solidifies once again, forming layers between the water and any decorative elements present below it. The chemical reactions occurring during combustion release energy in various forms such as light and heat, contributing to ambiance and beauty of these candles.
Understanding these scientific principles can not only deepen your appreciation for these unique candles but also help you troubleshoot any issues you may encounter during your own journey into making them at home.
| Scientific Principle | Description |
|---|---|
| Buoyancy | The upward force exerted by a fluid on an object immersed in it. It explains why objects float or sink in water. |
| Density | The mass contained within a given volume. In water candle making, it determines which layer remains on top or sinks to the bottom. |
| Heat and Combustion | The heat from the lit wick melts solid wax into liquid wax with a lower density than solid wax or water. Combustion releases energy in forms such as light and heat. |
Essential Supplies and Materials for Water Candle Making
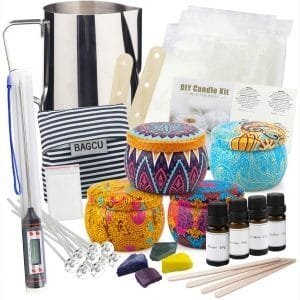
When it comes to water candle making, having the right supplies and materials is crucial for achieving beautiful and successful results. Here is a comprehensive list of essential items you’ll need to get started:
- Glass containers: Choose containers with a wide mouth and sturdy base to hold the water and wax securely. Mason jars or glass bowls work well.
- Candle wicks: Look for pre-waxed wicks or wick assemblies specifically designed for water candles. These types of wicks are coated with a special substance that helps them stay upright in water.
- Wax: Opt for paraffin wax or soy wax, which are both suitable for water candle making. Consider using high-quality wax to ensure proper burning and longevity of your candle.
- Dyes: If you want to add color to your water candles, purchase liquid candle dyes or dye blocks that are specially formulated for use in candles.
- Fragrance oils: Enhance the ambiance of your water candles with fragrance oils. Choose scents that complement the mood you wish to create, such as lavender for relaxation or citrus for energy.
- Decorative elements: Get creative with embellishments like dried flowers, seashells, colored sand, or glitter. These can be added between layers of wax or placed at the bottom of the container.
- Heat-resistant adhesive: Use adhesive dots or glue tabs to secure the wick at the bottom of the container before pouring in the hot wax.
- Double boiler or microwave-safe container: Melt the wax using either a double boiler setup on the stove or a microwave-safe container if using soy wax that can be melted in a microwave.
- Mold release spray (optional): This can be useful if you plan on creating shaped candles using molds.
- Thermometer: A thermometer will help you monitor the temperature of the melted wax and ensure it’s within the recommended range for optimal pouring.
Remember to gather all the necessary tools as well, including a heat source (like a stove or microwave), a pouring pitcher or pot, stirring utensils, and safety equipment such as gloves and goggles.
Now that you have your supplies ready, it’s time to move on to the next section: “Step-by-Step Guide to Creating Water Candles”.
Step-by-Step Guide to Creating Water Candles
Creating your own water candles at home can be a fun and rewarding project. With some basic supplies and a little creativity, you can craft beautiful candles that add a touch of elegance to any space. In this step-by-step guide, we will walk you through the process of making water candles from start to finish.
Step 1: Gather Your Supplies
Before getting started, make sure you have all the necessary supplies on hand. This includes a heat-resistant container or glass jar, candle wicks, candle wax flakes or pellets (preferably soy or beeswax for a cleaner burn), fragrance oils (optional), dye or color blocks (if desired), long wooden skewers or pencils, and a heat source like a double boiler pot or microwave-safe pitcher.
Step 2: Prepare the Container
Take your chosen container and ensure it is clean and dry. If you wish to enhance the visual appeal of your candle, consider adding decorative elements such as dried flowers, glitter, or small ornaments to the bottom of the container before proceeding.
Step 3: Secure the Wick
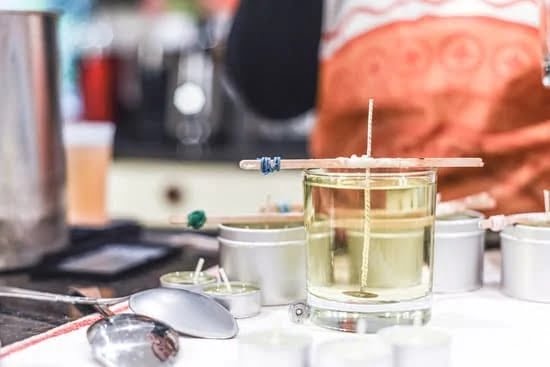
Attach the wick to the bottom center of your container using a small dot of hot glue. To keep it centered while pouring in the wax later on, wrap the top end of the wick around a long wooden skewer or pencil and rest it on top of the container.
Step 4: Melt the Wax
Melt your chosen candle wax using either a double boiler pot on low heat or a microwave-safe pitcher in short bursts. Be sure to follow safety guidelines when melting wax and always keep an eye on it during this process. Once melted, stir in any desired fragrance oils or dye if you want colored candles.
Step 5: Pouring in the Wax
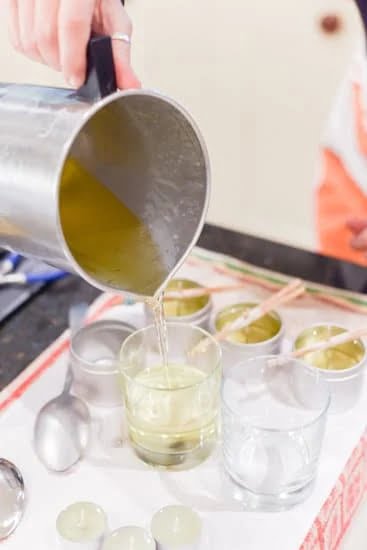
Carefully pour the melted wax into your prepared container, being mindful not to dislodge the wick. Fill it up to about three-quarters full or at your preferred height, leaving some space at the top for the water layer.
Step 6: Adding the Water
Allow the wax to cool and solidify completely before adding the water layer. Slowly pour room-temperature or distilled water into your container, filling it up to about one inch below the rim. The water should be level with or slightly above the wax.
Step 7: Trim and Light the Wick
Once everything has fully set and solidified, trim the excess wick to a length of about half-an-inch. Your water candle is now ready to be lit. Apply a flame to the wick gently, allowing it to catch fire and create a warm and inviting glow.
Creating your own water candles can be a therapeutic and artistic process that allows you to personalize your space with unique and beautiful creations. Enjoy experimenting with different scents, colors, and decorative elements to make each candle truly your own. Remember to always prioritize safety when handling hot wax and open flames. With this step-by-step guide, you’re all set to embark on your water candle making journey.
Exploring Different Techniques and Designs for Water Candles
Techniques for Creating Visual Appeal
One of the captivating aspects of water candles is their visual appeal. There are various techniques and designs that can be employed to create stunning effects and capture attention. Layering is a popular technique where different colored wax layers are poured one on top of the other, creating a beautiful gradient effect when the candle is lit. By carefully choosing complementary or contrasting colors, you can achieve mesmerizing combinations that add depth and vibrancy to your water candle.
Color mixing is another technique that allows for endless creativity. By using different shades of dyes or pigments, you can experiment with blending colors together to create unique hues that reflect your personal style. For example, blending blue and green dyes can result in a tranquil teal color reminiscent of crystal-clear waters.
Embedding objects within water candles also adds a special touch. You can place small decorative elements such as seashells, dried flowers, or even gemstones between layers of wax. As the candle burns, these objects will gradually emerge from within the transparent wax, enchanting viewers with unexpected surprises. When choosing objects to embed, consider materials that are heat-resistant and won’t release harmful substances when exposed to heat.
Inspiration for Creative Designs
When it comes to creating water candles, imagination knows no bounds. While traditional cylindrical shapes are common, don’t shy away from experimenting with different molds and containers to produce unique designs. Consider using glass jars or cups with interesting shapes or patterns on their surface to add an extra dimension to your candles.
In addition to experimenting with shapes, exploring patterns can elevate the beauty of your water candles. Try creating swirls by gently stirring the colored wax before pouring it into the container. This will produce mesmerizing patterns once it solidifies. Another popular pattern is marbling which involves swirling multiple colors together for a whimsical effect.
If you’re feeling particularly adventurous, you can even try creating themed water candles. For example, a beach-themed water candle can be made by embedding tiny seashells in the wax and using blue and sand-colored layers to mimic ocean waves and sandy shores. Use your creativity to envision designs that evoke a certain mood or inspiration, bringing your candles to life.
Final Thoughts
Exploring different techniques and designs for water candles allows you to unlock your artistic potential and create truly unique pieces of art. From layering colors to embedding objects, the possibilities are endless. Don’t be afraid to experiment with different methods and push the boundaries of traditional candle making.
Let your creativity flourish as each new candle becomes a canvas for your imagination. With the right combination of techniques and designs, you can craft water candles that not only provide a soothing glow but also serve as eye-catching centerpieces or thoughtful gifts. Let your creativity flow along with the molten wax, and watch as your creations come alive with the flickering flame.
Tips and Tricks to Achieve Perfect Water Candles
Creating the perfect water candle requires attention to detail and a few helpful tips and tricks. While water candle making can be a rewarding and enjoyable experience, it is not without its challenges. In this section, we will explore some expert advice to help you achieve flawless water candles every time.
Achieving Optimal Water Clarity
To create visually stunning water candles, it’s crucial to have crystal clear water within the candle. Here are a few tips to achieve optimal water clarity:
– Start with distilled or filtered water: Using clean and purified water helps prevent impurities from clouding the candle.
– Boil the water: Boiling the water removes any air bubbles or impurities, resulting in clearer liquid.
– Allow the boiled water to cool: This allows any remaining sediment or impurities to settle at the bottom of the container, reducing the likelihood of them getting caught in your candle.
Preventing Wax Leakage
One of the common challenges in water candle making is preventing wax leakage into the surrounding water. To avoid this issue:
– Use high-quality wicks: Choosing wicks specifically designed for underwater use can reduce the chances of wax leakage.
– Seal your containers tightly: Ensure that your containers have a secure seal to prevent any melted wax from seeping out.
– Use appropriate wax mixture ratios: It’s essential to find the right balance between melting point and density when creating your wax mixture. Experiment with different ratios to find what works best for your specific design.
Troubleshooting Common Problems
Sometimes, despite our best efforts, issues may still arise during candle making. Here are a few troubleshooting tips for common problems:
– Uneven burning: If your candle isn’t burning evenly, try trimming the wick or adjusting its position within the wax.
– Flickering flame: A flickering flame could indicate an issue with air circulation. Ensure that the container has proper ventilation.
– Wax discoloration: To avoid wax discoloration, use high-quality dyes and pigments designed for candle making. Store your wax and colorants in a cool, dark place to prevent exposure to light and heat.
By implementing these tips and tricks, you can enhance your water candle making skills and create beautiful candles with confidence. Remember, practice makes perfect, so don’t be discouraged if it takes a few attempts to achieve the desired results. Experiment with different techniques and designs to develop your unique style and embrace the artistry of water candle making.
Enhancing the Ambiance
As you embark on your water candle making journey, it’s essential to consider how you can enhance the ambiance of your space with the right fragrance and decor. Choosing the appropriate scent and decorative elements can elevate the tranquil and soothing atmosphere that water candles create. In this section, we will explore the role of fragrance in creating a welcoming environment, suggest different options for scents, and provide ideas for embellishing your water candles with decorative elements.
When it comes to choosing fragrances for your water candles, it’s important to select scents that align with the mood you want to create. Fragrances have a powerful effect on our emotions and can induce feelings of relaxation, rejuvenation, or even invigoration. For a calming ambiance, opt for scents such as lavender, chamomile, or vanilla.
If you’re looking to energize your space, citrusy scents like lemon or orange can be refreshing choices. Experiment with different combinations to find a fragrance blend that resonates with you.
Decorative elements can further enhance the visual appeal of your water candles while complementing their soothing aura. Consider adding items like fresh flowers or greenery around your candles to create a natural and organic feel. You can also experiment with floating petals or colorful stones to add pops of color and texture.
Craft stores often carry specialized candle decorations like wax beads or glitter that can give your water candles an extra touch of sparkle. The sky is the limit when it comes to creative options – feel free to let your imagination roam.
Remember to keep safety in mind when selecting decor for your water candles. Ensure that any embellishments are non-combustible if they come into contact with hot wax or flames. Also, be mindful of size and placement – choose decorations that won’t obstruct the flame or interfere with proper candle burning.
Choosing the right fragrance and decor is an opportunity to inject your personal style into your water candle creations. So, take a moment to envision the ambiance you desire, experiment with different scents and decorations, and enjoy the process of creating a beautiful and inviting space with your homemade water candles.
Safety Precautions and Proper Candle Care
When engaging in the art of water candle making at home, it is crucial to prioritize safety to ensure a pleasant and risk-free experience. This section will discuss essential safety precautions that should be followed throughout the process and provide guidance on proper candle care.
Firstly, it is important to ensure proper ventilation while making water candles. Working in a well-ventilated area will help minimize exposure to any fumes that may arise from melting wax or fragrance oils. Opening windows or using fans can help maintain a steady supply of fresh air.
Additionally, when handling hot wax or any other materials involved in the candle making process, it is crucial to wear protective gloves and clothing to prevent burns. Wax can reach high temperatures, so using heat-resistant gloves will protect your hands from potential injuries.
Moreover, always keep flammable materials away from your work area and never leave melting wax unattended. It is also recommended to have a fire extinguisher readily available as an extra precautionary measure.
Proper candle care is equally important once you have finished creating your water candles. To enhance their longevity and safety, it is advised to trim the wick to about a quarter-inch before each use. This will prevent excessive flickering and uneven burning.
Furthermore, when lighting your water candles, be sure to place them on stable surfaces away from flammable objects and out of reach of children or pets. Never leave burning candles unattended and extinguish them fully before leaving the room or going to bed.
By following these safety precautions and practicing proper candle care techniques, you can enjoy the art of water candle making without compromising your well-being or personal safety. Remember, prioritizing safety not only provides peace of mind but also allows you to fully embrace the artistic aura that water candle making brings into your home.
Showcasing Amazing Water Candle Making Projects
Water candle making is not only a satisfying hobby, but it also allows for endless creativity and unique designs. In this section, we will showcase some truly amazing water candle making projects that will inspire you to create your own mesmerizing creations.
One popular technique in water candle making is layering different colored wax to create stunning visual effects. By pouring different colors of melted wax into the water one at a time, you can achieve a beautiful layered effect that resembles swirling clouds or vibrant ocean waves. Experiment with various color combinations and layering techniques to create your own unique masterpiece.
Another technique that adds intrigue and elegance to water candles is embedding objects within the wax. From flower petals to seashells or even small trinkets, embedding objects can create a visually striking focal point within the candle. Simply place the desired object onto the surface of the water before pouring in the wax.
Ensure that the object is completely submerged and gently press it down if needed. When the candle has solidified, you’ll have a captivating piece of art with a hidden surprise waiting to be discovered.
For those looking for more intricate designs, try using intricate molds or carving out patterns in the wax before placing it in the water. The carved patterns will add depth and texture to your candle, creating a stunning visual effect when lit. It may take some practice to perfect this technique, but the results are well worth the effort.
Remember, these are just a few examples of what can be accomplished with water candle making projects. Let your imagination run wild and experiment with different techniques and designs to create your own unique and breathtaking pieces.
With so many creative possibilities, showcasing your amazing water candle creations can be an inspiring way to connect with others who share your passion. Don’t hesitate to share your projects on social media platforms or online crafting communities. By showcasing your work and sharing tips and techniques, you can inspire others while building connections within the water candle making community.
In the next section, we will discuss essential tips and tricks to achieve perfect water candles. These insights will help troubleshoot common challenges and overcome any obstacles you may encounter in your candle making journey. Stay tuned for expert advice that will take your water candle making skills to new heights.
Conclusion
In conclusion, water candle making is not just a craft, but an art form that allows individuals to express their creativity and create a soothing atmosphere in their homes. By understanding the science behind water candles and having the essential supplies and materials, anyone can easily embark on this magical journey of creating beautiful water candles.
Through a step-by-step guide and exploration of different techniques and designs, even beginners can achieve stunning results. By layering different colors, mixing fragrances, and embedding objects in the wax, individuals can create unique and visually appealing water candles that reflect their personal style.
Safety precautions should always be followed when making and using water candles to ensure a safe experience. Proper ventilation and careful handling of hot wax are crucial for avoiding accidents. Additionally, proper care and maintenance of water candles will prolong their lifespan and keep them looking beautiful.
In conclusion, embracing the artistic and soothing aura of water candle making at home can bring joy, relaxation, and a sense of accomplishment. So why not give it a try? Explore this rewarding hobby today and experience the magic yourself. Remember to share your own experiences, ask questions, or leave comments to further enrich the community of water candle enthusiasts.

Welcome to my candle making blog! In this blog, I will be sharing my tips and tricks for making candles. I will also be sharing some of my favorite recipes.

