Introduction
Candle-making is a fun and rewarding hobby for many. Aside from the hours of creative satisfaction, it can also offer therapeutic benefits such as reducing stress, releasing creative energy, and deepening one’s connection with scent. Those just getting started in this exciting tack may be wondering what supplies are needed to start making their own unique creations.
When gathering supplies to make candles, the three main components that are necessary are wax, wick, and fragrance or color dye. Paraffin wax is commonly used as it is economical and has a lower melting point than other types of wax; however, beeswax and soy wax are often preferred because they burn cleaner. Once the type of wax has been chosen the width of the wick must be determined based on the size of the container being used and type of candle desired (tea light, votive etc.). It’s important to ensure that the wicks are not too thin so they can properly carry enough fuel to keep your candle going. Finally adding an essential oil or color-dye will provide your candle with its own signature scent or hue.
Besides these key ingredients a few extra tools will be needed for dipping and melting purposes such as metal tongs for handling hot wax, double boiler for melting down your candles ingredients together into one homogenous mixture, thermometer to measure temperature throughout process and molds/containers in any shape you desire such as teacups or creatively designed jars to set your finished product in.
Those looking to make alluring candles don’t need to visit their local craft store anymore: All you need is some simple materials easily found around home! With a little guidance anyone can create beautiful homemade candles tailored right to their own unique tastes.
Gather the Supplies
– A heat source: For melting the wax and pouring it into a vessel to create your candles. You can use a double boiler, a stove-top pot of boiling water, or an electric melting pot for this task.
– Wax: The material that will become the candle; choose from paraffin wax, beeswax, soy wax, or vegetable/coconut oil wax.
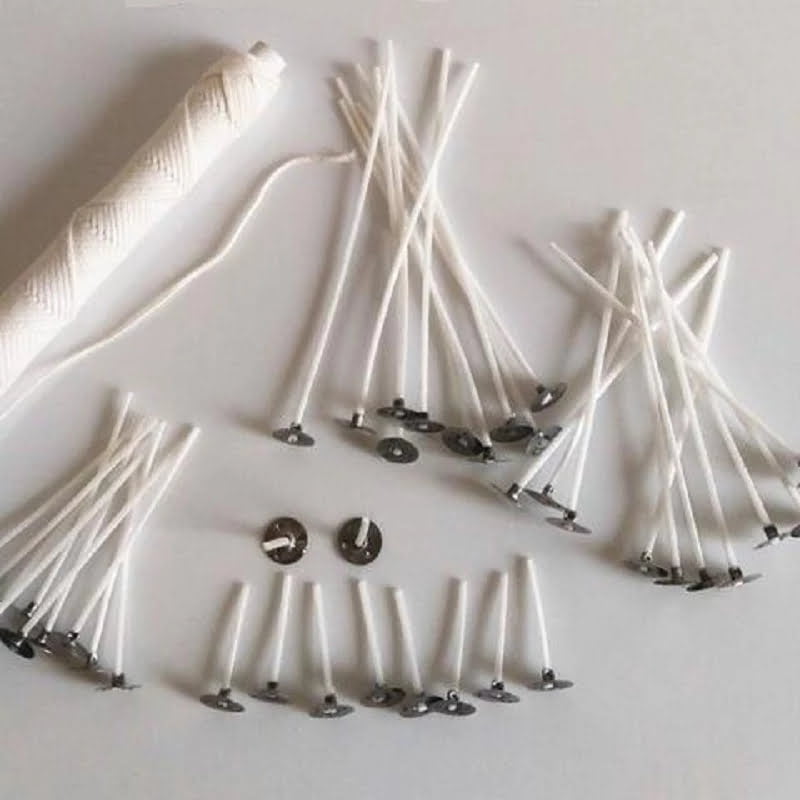
– Wick: Available in different sizes and types such as cotton core wick or wooden wick.
– Candle Molds: Want to make your own from materials like metal tins or plastic molds? Or use pre-made forms like mason jars for an easy way to get started making candles.
– Scented oils (optional): Essential oils of your choice that add fragrance and smell to the candle as it’s burning.
– Scissors/Trimmers (optional): Used to trim your wicks once they have cooled after being placed in the final product.
– Colorants (optional): Natural dyes can add color if desired when making molded candles.”
Select Your Wax
The two main options for candle-makers are paraffin wax and soy wax. Paraffin wax is an affordable and easy to use option, with a high heat capacity and great scent throw. The downside of paraffin wax is that it can produce hazardous pollutants when burning, making it potentially harmful to the environment. Soy wax is a more sustainable option and emits fewer pollutants when burning, though it can be slightly more expensive. It is also less likely to flake or crack than paraffin while burning, giving candles made from soy a longer lifespan. Unlike paraffin, soy wax candles emit a faint but pleasant aroma while they burn, although they won’t have as much of a scent throw as those produced with paraffin.
Include Fragrance or Color
If you would like to make a candle with added scent or color, it is important to have the right ingredients. You’ll need a wax melt, fragrant oils, dye chips, and an electric or tabletop melter. Start by pouring your wax into the melter. When the wax reaches 140F/60C, add fragrance oil if desired. The scent amount varies according to preference, but generally 5% of fragrance per pound of wax should be sufficient. After adding in the oil stir it in, before adding in your dye chips if desired. Color can be added similarly, at the same temperature as noted above – usually use 0.9 ounces of dye per pound of wax is a good starting point ” but remember to always patch test colors as they may vary from batch to batch. Finally stir them together until uniform which will ensure even color and scent dispersal before carefully pouring the melted wax into your mold.
You can find all three items for creating candles with added scents and colors in either traditional craft stores (such as Michaels or Hobby Lobby) or online places such as Amazon. It’s important to note that you should only use candle grade paraffin or vegetable-based waxes for melting and use fragrant oils specifically listed for usage in candles ” not fragrance oils meant for body care types of products ” when making candles with added scents.
Melt the Wax
Before melting the wax, there are several important safety precautions you should take. Make sure to work in a well-ventilated area, as burning wax emits fumes that can be hazardous if inhaled for too long. To protect yourself and any surfaces molten wax might come into contact with, always ensure that your space is covered with a heatproof mat or tray. Additionally, it’s important to wear protective clothing, such as an apron and heat-resistant gloves. Do not leave melting wax unattended while hot; instead make sure to keep in a clear view while it is being melted on the stovetop or using a double boiler system. Once fully melted and liquid, carefully transfer the wax into your heatproof pouring container of choice (typically a heat-safe jug) and ensure the spout is securely fastened to aid in an even pour.
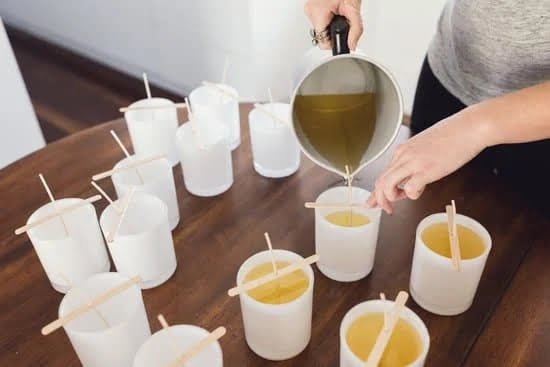
Pour the Wax
1. Start by melting the wax. Most oftentimes, you may use paraffin-based wax for your candle making. You can either melt it on the stove top or purchase a wax melter to make larger batches of wax.
2. Once completely melted, add your desired scent and coloring to the wax (if desired). For example, you may want to add lavender essential oil or a specific color to produce a candle aesthetic of your choice.
3. After the scent and coloring is added, remove from heat and wait until the temperature reaches 100-120 degrees Fahrenheit before starting your pouring process. This step is important for preventing any potential burning of fragrances in the wax mixture.
4. Next, wick your molds with cotton wicks at appropriate lengths (The length will depend on your preferred size of candles), so that they stand up above each mold before pouring the hot wax inside them
5. After everything is prepared, begin pouring carefully and evenly within each mold while maintaining an appropriate temperature between 80-90 degrees Fahrenheit to prevent air bubbles and other design flaws from appearing in later finished products during solidification process
6 . Finally, allow the candles to sit in their molds for an extended time period until fully cooled and set for use!
Allow the Wax to Set
While waiting for the wax to solidify, you can use this time to personalize your candle. Choose a vessel or jar and add dyes, fragrances, or embellishments such as dried flowers or herbs. If the wax has been dyed, consider adding glitter, petals or other decor elements that will be visible when the candle is lit. This is also a great time to inspect and perfect the wick length. For best results, make sure the wick is centered and that it extends out of the wax no further than 1/8th of an inch.
It’s important not to move or disturb the wax while it sets; if necessary, place something heavy over top of it to prevent air currents from disrupting it. Allowing the wax sufficient time to cool properly will ensure that your finished product looks as intended!
Trim the Wick
To trim the wick of a candle correctly, you will need some wax clippers or a wick dipper. Begin by cutting the wick to roughly one-quarter inch in length. Make sure to remove any errant pieces of thread or wire from the trimmed end. Be sure not to leave any extra long fibers with sharp and jagged edges, as these can cause unsafe smoking conditions and sooty buildup on the surface of your finished product. Once it is secure, slide the wick into the pre-created wax channel located in the center of your waxed container. Using a chopstick or similar tool, hold down the wick for additional security against any drafts that could move it about, and ensure that it is standing up straight in the middle of your candle. Finally, using a damp cloth or paper towel dipped in water, swipe away any excess wax near the base of your wick post-trimming to create a visually attractive and safe burning candle!
Clean Up and Enjoy
Once you have completed making your candle, it is important to clean up any mess that you may have made. Start by disposing of any wax or wick remnants in the nearest trash can. For containers with leftover wax, put the container in a safe place to cool before handling. Once cooled, empty the container and properly dispose of the used-up wax. If you are using a metal container, carefully plate it into boiling water for roughly 5 minutes. This will help to remelt any stuck on residue, making cleanup much easier. After your candle container has been cleaned and left to dry, you may continue using it for future projects or toss it into your recycling bin.
Enjoyment and relaxation should be your focus when creating candles”in addition to considerations for safety. While hot wax and melting points can vary, always err on the side of caution and remember simple safety tips: Never leave a burning candle unattended and make sure all flames are completely extinguished before leaving the area! Lastly, take great pride in completing your project and enjoy your handmade creation!

Welcome to my candle making blog! In this blog, I will be sharing my tips and tricks for making candles. I will also be sharing some of my favorite recipes.


