Introduction
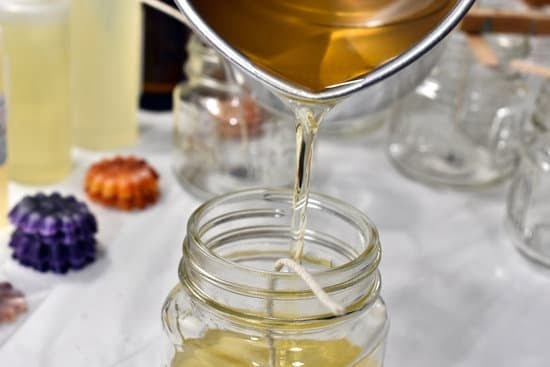
Whipped wax candle making is a fun and creative way to put your artistic touch on the classic practice of candle making. Wax whipped candles are created by combining different forms of wax together, usually from soy or beeswax, and then stirring them buoyantly together until they resemble fluffy clouds, hence the name. A great benefit of this method is that you can customize different scents and colors into one single candle piece. The end result gives off an indescribable level of stylish and complex aromas, perfect for any home or as a special gift.
When embarking on a whipped wax candle venture there is a lot to consider such as what type of wax to use, what kind of wick is right for your design, which scents will fit with the color scheme and how will you achieve the desired texture? Some additional helpful tips that can aid in success include practicality when it comes to temperatures and times when creating these works of art so be sure to do your research before beginning. Also, don’t forget that with lighter colors come calmer smells while darker colors tend towards more overpowering aromas so choose wisely! Have fun experimenting with ingredients & enjoy every step along the way!
Materials & Tools Needed
Materials Needed:
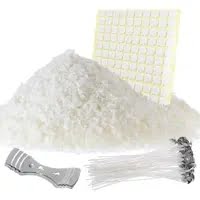
• Paraffin Wax – Budget-friendly options include IGI 5010 and Ecosoya CB-Advanced, both of which can be found on Amazon.
• Beeswax – A great budget-friendly option for beeswax is Beeswax Pivacolor, also on Amazon.
• Cotton Core Wick – If cost is a factor, you can use CDN2 Ecopup wicking from NatureWick.com.
• Fragrance Oils or Essential Oils – You will find a wide selection of budget-friendly fragrances at CandleScentsations.com.
Tools Needed:
• Wax Melting Pot (double boiler) – For a budget-friendly option check out the Bayou Classic 7400 Stainless Steel Double Boiler. It’s often used by restaurants and home chefs to melt butter!
• Whisk or Electric Mixer with Whisk Attachment – A simple whisk from your local grocery store works just fine; however, if you want to save some time you may want to invest in an electric mixer with a whisk attachment like the Hamilton Beach Hand Mixer for an affordable option.
• Thermometer – Any type of kitchen thermometer will do; however, it’s recommended that you get one that’s able to measure temperatures up to 205 degrees F (96 C). One example is the Taylor 7808 Digital Probe Thermometer which has convenient features and an easy-to-read LCD display and costs around $20 USD.
• Metal Spatula or Wooden Stick – You can use any aluminum cooking spatula or wooden stirring stick. The most important thing is that it must be able to withstand high temperatures without melting away!
Preparing the Supplies
Whipped wax candle making is a wonderful way to create beautiful, custom candles in the comfort of your own home. Before you can begin to make your candles, it is important to take the necessary steps to properly set up your workspace and ensure safety precautions are followed.
Before starting any candle making projects, make sure that the area you are working in is well-ventilated and away from any heat sources or open flames. It’s also important to wear protective eyewear during the process.
Set out your tools and supplies on a secure surface that won’t move while you are working. You will need an electric wax melter, thermometer, double boiler (or heating element), stirring spoon/wooden chopsticks, weighted stirring utensil (for whipped topping), molds/containers, wicks, dye blocks or liquid dyes, fragrance oils and beeswax. Assemble the supplies according to their specific uses and test the electrics before melting any wax.
Once everything is set up according to safety guidelines and you have all of your materials within reach it is time to start making your very own custom candles! Good luck!
Tips for the Perfect Candles
Whipped Wax Candle Making is a popular pastime and provides a fun way to decorate your home with brilliant light. To make a truly excellent candle, here are some important tips for troubleshooting any bumps you may encounter along the way:
First and foremost, do use only high-quality materials for your candles. Cheap waxes will produce poor results that can be hard to work with and lackluster in appearance.
Second, once you’ve chosen your wax, be sure it is clean – any trace of water or moisture will ruin your mixture and create an ugly lumpy candle.
Third, measure carefully as too much or too little of any ingredient can off-balance the color or scent of your candle. Also, pay attention to melting points as this will affect the texture of the wax when it sets up.
Fourth, know how long each layer should cool before making the next one – otherwise you may end up with messy drippy candles!
Finally, whip each layer thoroughly – incomplete mixing can lead to unevenness and an unpleasant texture.
These are just a few recommendations that can help you achieve perfect whipped wax candles every time – although perfecting this craft comes down to practice, experimentation, and patience! Happy candle making!
Techniques for Creative Designs
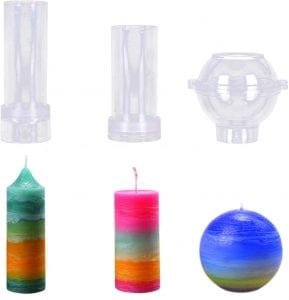
Whipped wax candles are beautiful and unique creations. With a few simple techniques, you can create your own custom candles that are tailored to any occasion. Color-mixing is a popular way to customize your candle’s esthetic; by combining different colors or additives of wax or dye, you can make a variety of shades and hues for each candle. Stenciling is also an easy method for achieving decorative patterns on the surface of the candle’s wax exterior. Additionally, mold designs can be used to create intricate patterns of shapes ranging from intricate lace designs to more abstract art pieces inspired by nature. Different scented oils, herbs, and extracts can be added for aromatherapy applications. Whether you’re creating something special for a romantic anniversary or making decorative candles to fill your home with color and fragrance, candles created with whipped wax are one of the ultimate expressions of love.
Finishing Touches
Once you have finished the candle making process, there are a few important things to remember when finishing your product with that professional look and feel.
Firstly, it is essential to check for air bubbles before the candles set. This will ensure an even burn resulting in a much more aesthetically pleasing product. To do this, drop your pour pot of hot wax into cold water for about 10 seconds before you pour the wax into the mold. The sudden change in temperature should pop any bubbles present.
When it comes to scenting your candles try experimenting with fragrances specifically designed for use in candle-making as these ingredients are more suited to high temperatures without polluting the burning environment. The amount of fragrance desired depends entirely on personal preference and how it mixes with the wax used, but usually around 8% is enough, although we recommend experimenting with different quantities.
To finish off each Whipped Wax Candle, trim off excess wick, ensuring that only around ½ inch of wick remain at all times – this will prevent too much smoke or soot during burning or flickering flame sides – sprinkle an elegant dusting of dried flowers over your expertly poured creation and wrap them with tissue paper along with a decorative ribbon or twine. For something extra special consider tying on a gift tag or pack of matches!
Taking it Further
Once you have the basics of Whipped Wax Candle Making down, there are lots of different ideas for taking your craft to the next level. Alternative candle making techniques can be explored such as drippy candles, poured candles, scented candles, and tea lights. You can experiment with flavorings and scented oils to customize your candle creations in a more personalized way. Additionally, you can learn about the process for layering colors to make beautiful multi-hued candles. Lastly, advanced candle makers experiment with adding herbs, glitter, and other objects into melted wax to create one-of-a kind works of art. With just a bit of practice and experimentation, you’ll be able to design decorative pieces that engage all five senses.
Summary
Whipping wax candle making requires careful preparation and consideration of how the type, color, and scent of the wax can influence the overall look and aroma of a finished candle. To create quality candles with long-lasting burn times, start by selecting high-grade wax that can be heated without smoking or burning excessively. Melt your wax gradually until it reaches its liquid form and practice mixing it with scents and colors for a customized fragrance designed to suit any setting. Consider different shaped molds for each individual candle style, as this will help amplify their aesthetic appeal. Finally, use wicks rated for the type of wax being used, ensuring that adequate support is in place to prevent excess dripping, drooping or otherwise non-ideal finishes. With these tips and proper care when melting your wax supplies, you’ll have all the bases covered needed to provide customers with stylish and fragrant candles!

Welcome to my candle making blog! In this blog, I will be sharing my tips and tricks for making candles. I will also be sharing some of my favorite recipes.


